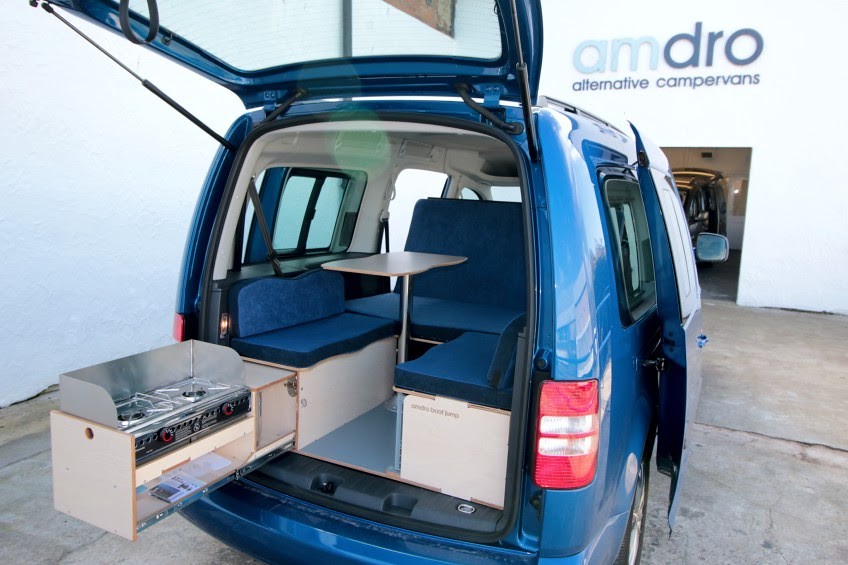
I always fancied a VW camper but couldn't afford a T5 and didn't fancy having to constantly maintain a T25, so I bought a Caddy Maxi Life. My intention was then to source a cheap second hand Amdro boot jump to make it into a camper one like this...
https://photos.app.goo.gl/IwMvwOioYC4bB9HV2
I managed to find an Amdro unit at half the price of a new one, bought it then discovered that they are vehicle specific and the one I had bought was about 20mm too wide to fit. I thought about cutting it to size, but decided due to its value just to sell it on eBay and make my own camper unit to my own design. I liked the Amdro boot jump. It is a clever design and is very well made, and there are several (blatant) copies out there but after seeing it, its layout just didn’t exactly suit our needs. The table and seating layout looked too cramped and I wanted something that could be lifted (easily) in and out, and still provide boot space to fit dogs and gear in. So after a few attempts i came up with a design which is...
• A storage box, then...
• Folds out the back of the caddy to create a cooking/kitchen work-surface,
• Folds in to make some rear seating (when stationary)
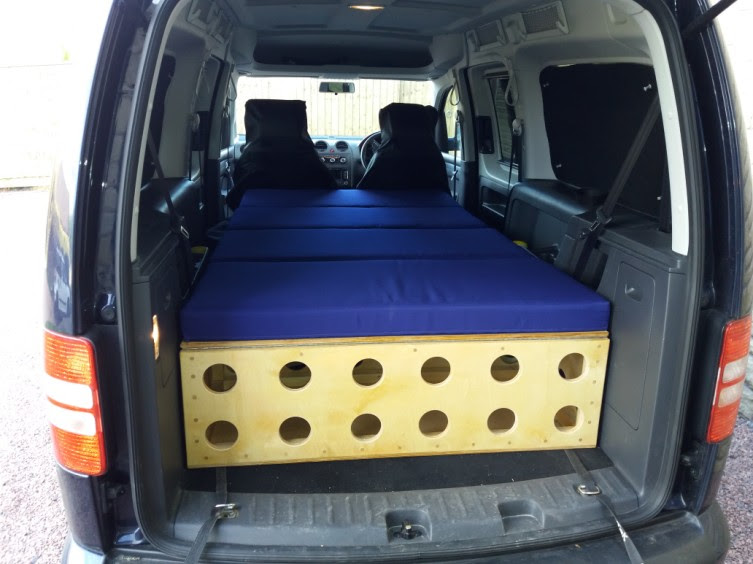
• Extends out to create a bed platform.
After a bit of research I settled on 12mm birch ply. It is good quality, has a nice finish and is free of voids which most of the ply which B&Q and the like seem to sell. It isn't cheap and cost about £45 per sheet and I needed two sheets.
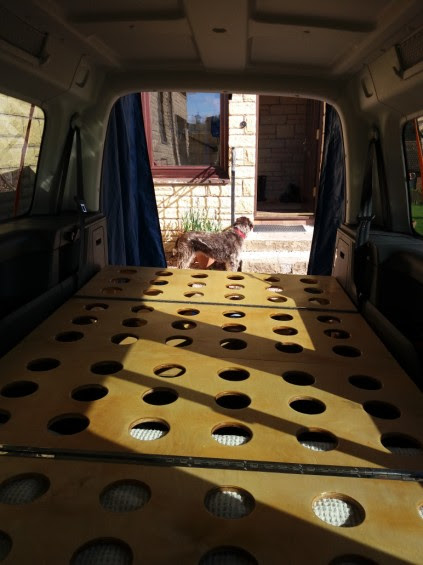
In order to try and save weight i cut 80mm diameter holes in just about every panel. This saved about 6kg overall. Though for all the drilling and routing i am not sure i could be bothered doing it again.
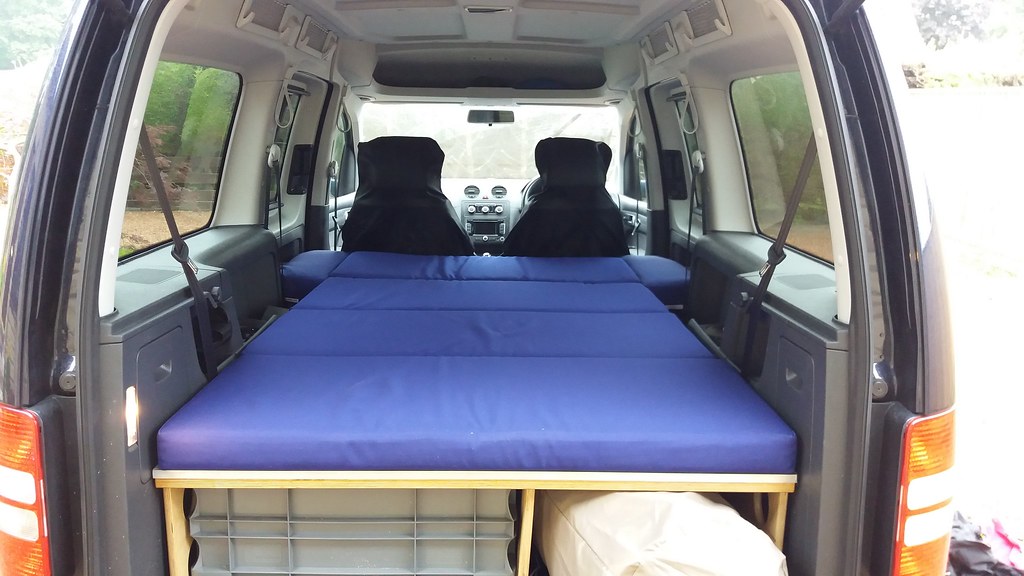
We got cushions made by a firm in Belgium (Cushion Creator). They were 1/3 cheaper than local upholsters that we tried. The cushions are made from tough fabric and 7.5cm firm foam and took about 3 weeks to make. I can definitely recommend them.
https://photos.app.goo.gl/lEgSJgt0AyYtIVam1
https://photos.app.goo.gl/VpymbJvFNEcyO5KZ2
https://photos.app.goo.gl/FBbeBgefjDmllJGD2
We used the camper unit at a local campsite and it worked well. Then a couple weeks later we used it for a weeks camping, travelling the length of the Hebrides. Again it worked well but my only complaint was the amount of moving of luggage/stuff around that was required for making up the bed each night.... so along came camper design Mk2....
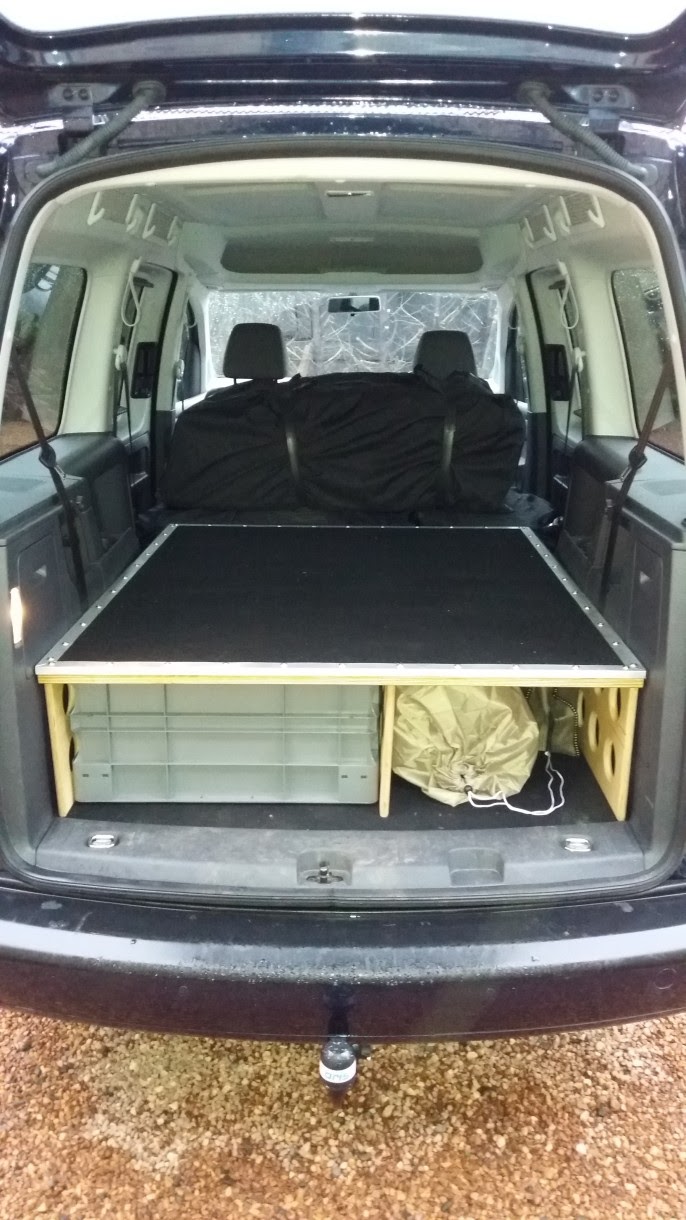
Using 15mm ply this time, i made a false floor with full length supports hinged underneath. It can be used as a regular floor most of the time, then in ‘camper mode’ it is raised to
• Be flush with height of folded down seat backs
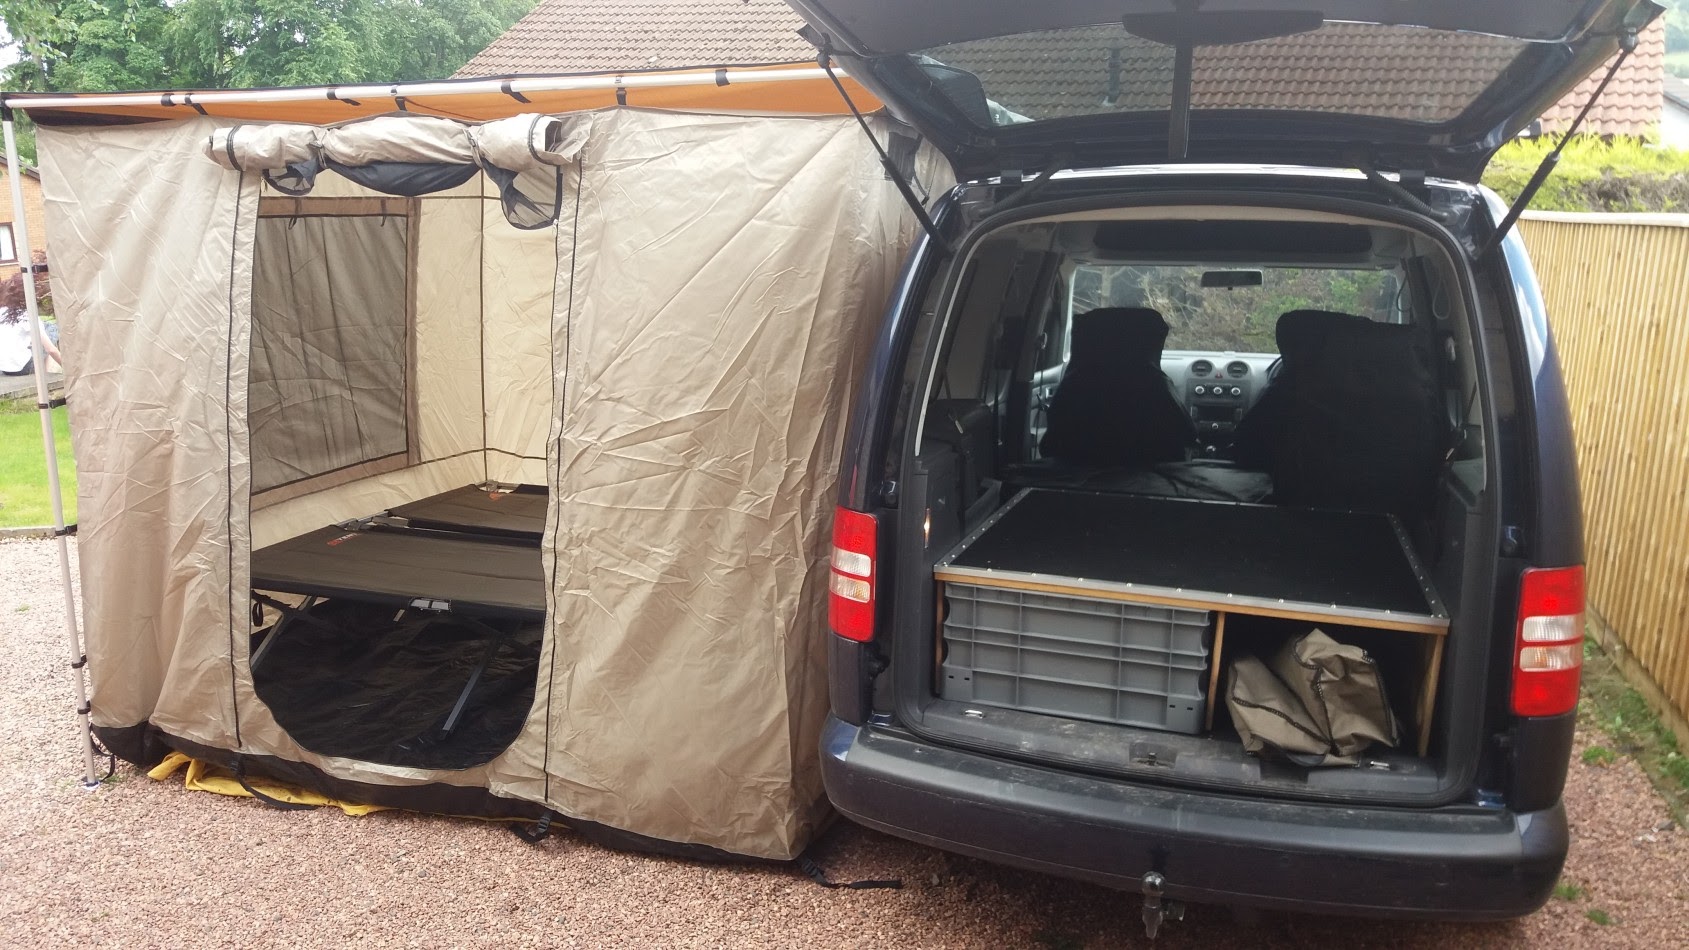
• Allow storage of gear underneath, out of sight, and clutter free! Underneath I have enough room for all our cooking gear (stove, pans, plates, cutlery gas etc..) 4x sleeping bags, thermal window blinds, two camp beds and the awning room.
https://photos.app.goo.gl/4r57xZqJ9YMMrqfP2
https://photos.app.goo.gl/ivnPyGbbmNOFk2i52
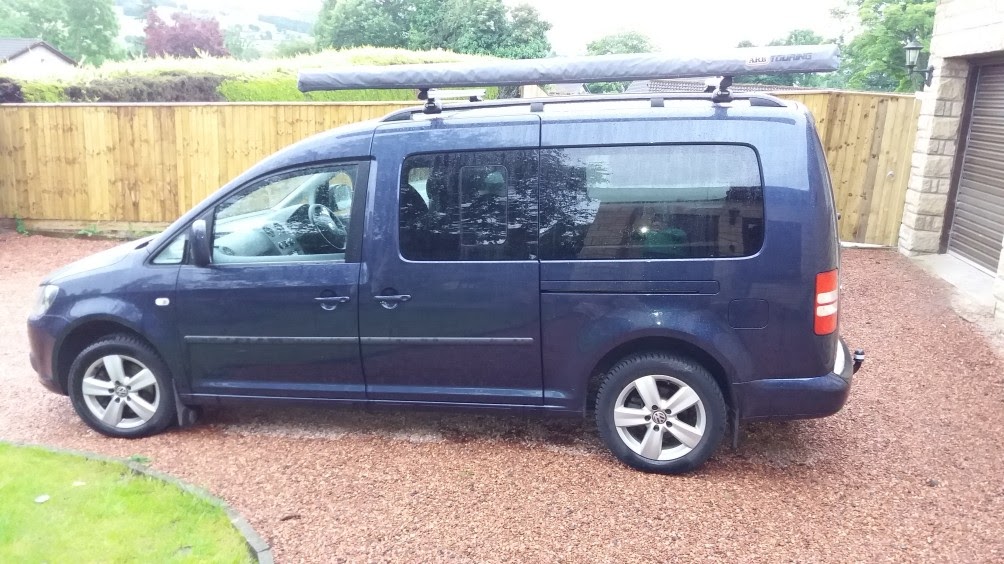
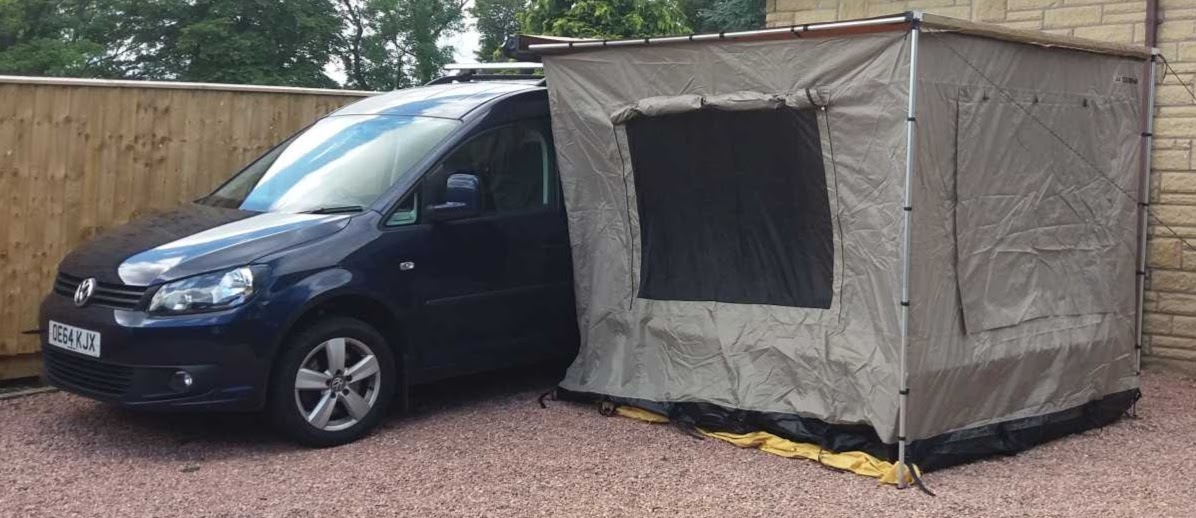
So far this design has worked well. After a bit of research I also bought an ARB side awning and awning room which adds on a 2.4 x 2.4 m room to the side.... giving plenty of room for two camp beds. I am very happy with this ARB set up as it only take 5-10mins to set up and the same to take down an put away. (Campervan Culture sell these). You can get 2m ones also which may be better suited to the SWB caddy.
https://photos.app.goo.gl/4r57xZqJ9YMMrqfP2
https://photos.app.goo.gl/i7cfV36TRJCmcATJ3
https://photos.app.goo.gl/CQGAU6du6mbcOzUH3
Anyway thought this might be of interest to those considering making campers.
Next step is changing the wheel and tyre set up to all terrains and probably add a metal sump guard.
Caddy Camper Versions 1 & 2
-
branwell
- Caddy2k Groupie
- Posts: 31
- Joined: Mon Jan 16, 2017 12:57 pm
- Engine size/power: 1.2 TSI (103bhp)
-
Ant290
- Caddy2k Groupie
- Posts: 11
- Joined: Tue May 02, 2017 9:02 pm
- Engine size/power: 1.4 16V Petrol (74bhp)
Re: Caddy Camper Versions 1 & 2
That looks great for extra space! and you could fit another 2 people there.
do you think the shorter ARB awning would go straight into the roof rack mounting points on a swb caddy.. or would you need a roof rail on there for it to be attached?
do you think the shorter ARB awning would go straight into the roof rack mounting points on a swb caddy.. or would you need a roof rail on there for it to be attached?
-
branwell
- Caddy2k Groupie
- Posts: 31
- Joined: Mon Jan 16, 2017 12:57 pm
- Engine size/power: 1.2 TSI (103bhp)
Re: Caddy Camper Versions 1 & 2
The awning is attached by two L shaped brackets. The fixing location on the awning is easily adjusted as the bolt heads sit within slots on the back of the awning. For a direct mount, you would just need to adjust the amount it protrudes from the van. Ours is attached to the roofbars via the thule t-slots.
Brackets would be easy enough to make by yourself or you can buy them for £20 for the cheaper ones or £45 for the more expensive stainless steel ones. Each bracket has three holes for attaching to the roof, so you have some adjustment. For direct mount I am not sure if you would need additional support but Campervan Culture may be able to advise.
Brackets would be easy enough to make by yourself or you can buy them for £20 for the cheaper ones or £45 for the more expensive stainless steel ones. Each bracket has three holes for attaching to the roof, so you have some adjustment. For direct mount I am not sure if you would need additional support but Campervan Culture may be able to advise.
-
branwell
- Caddy2k Groupie
- Posts: 31
- Joined: Mon Jan 16, 2017 12:57 pm
- Engine size/power: 1.2 TSI (103bhp)
Re: Caddy Camper Versions 1 & 2
Have just moved the photos to Flickr so hopefully this is a bit better than Google Photos….
I always fancied a VW camper but couldn't afford a T5 and didn't fancy having to constantly maintain a T25, so I bought a Caddy Maxi Life. My intention was then to source a cheap second hand Amdro boot jump to make it into a camper one like this...
 1
1
I managed to find an Amdro unit at half the price of a new one, bought it then discovered that they are vehicle specific and the one I had bought was about 20mm too wide to fit. I thought about cutting it to size, but decided due to its value just to sell it on eBay and make my own camper unit to my own design. I liked the Amdro boot jump. It is a clever design and is very well made, and there are several (blatant) copies out there but after seeing it, its layout just didn’t exactly suit our needs. The table and seating layout looked too cramped and I wanted something that could be lifted (easily) in and out, and still provide boot space to fit dogs and gear in. So after a few attempts i came up with a design which is...
• A storage box, then...
• Folds out the back of the caddy to create a cooking/kitchen work-surface,
• Folds in to make some rear seating (when stationary)
• Extends out to create a bed platform.
After a bit of research I settled on 12mm birch ply. It is good quality, has a nice finish and is free of voids which most of the ply which B&Q and the like seem to sell. It isn't cheap and cost about £45 per sheet and I needed two sheets.
In order to try and save weight i cut 80mm diameter holes in just about every panel. This saved about 6kg overall. Though for all the drilling and routing i am not sure i could be bothered doing it again.
We got cushions made by a firm in Belgium (Cushion Creator). They were 1/3 cheaper than local upholsters that we tried. The cushions are made from tough fabric and 7.5cm firm foam and took about 3 weeks to make. I can definitely recommend them.
 2
2
 4
4
 6
6
We used the camper unit at a local campsite and it worked well. Then a couple weeks later we used it for a weeks camping, travelling the length of the Hebrides. Again it worked well but my only complaint was the amount of moving of luggage/stuff around that was required for making up the bed each night.... so along came camper design Mk2....
Using 15mm ply this time, i made a false floor with full length supports hinged underneath. It can be used as a regular floor most of the time, then in ‘camper mode’ it is raised to
• Be flush with height of folded down seat backs
• Allow storage of gear underneath, out of sight, and clutter free! Underneath I have enough room for all our cooking gear (stove, pans, plates, cutlery gas etc..) 4x sleeping bags, thermal window blinds, two camp beds and the awning room.
So far this design has worked well. After a bit of research I also bought an ARB side awning and awning room which adds on a 2.4 x 2.4 m room to the side.... giving plenty of room for two camp beds. I am very happy with this ARB set up as it only take 5-10mins to set up and the same to take down an put away. (Campervan Culture sell these). You can get 2m ones also which may be better suited to the SWB caddy.
 7
7
 8
8
 10
10
 11
11
 12
12
Anyway thought this might be of interest to those considering making campers.
Next step is changing the wheel and tyre set up to all terrains and probably add a metal sump guard.
I always fancied a VW camper but couldn't afford a T5 and didn't fancy having to constantly maintain a T25, so I bought a Caddy Maxi Life. My intention was then to source a cheap second hand Amdro boot jump to make it into a camper one like this...
1I managed to find an Amdro unit at half the price of a new one, bought it then discovered that they are vehicle specific and the one I had bought was about 20mm too wide to fit. I thought about cutting it to size, but decided due to its value just to sell it on eBay and make my own camper unit to my own design. I liked the Amdro boot jump. It is a clever design and is very well made, and there are several (blatant) copies out there but after seeing it, its layout just didn’t exactly suit our needs. The table and seating layout looked too cramped and I wanted something that could be lifted (easily) in and out, and still provide boot space to fit dogs and gear in. So after a few attempts i came up with a design which is...
• A storage box, then...
• Folds out the back of the caddy to create a cooking/kitchen work-surface,
• Folds in to make some rear seating (when stationary)
• Extends out to create a bed platform.
After a bit of research I settled on 12mm birch ply. It is good quality, has a nice finish and is free of voids which most of the ply which B&Q and the like seem to sell. It isn't cheap and cost about £45 per sheet and I needed two sheets.
In order to try and save weight i cut 80mm diameter holes in just about every panel. This saved about 6kg overall. Though for all the drilling and routing i am not sure i could be bothered doing it again.
We got cushions made by a firm in Belgium (Cushion Creator). They were 1/3 cheaper than local upholsters that we tried. The cushions are made from tough fabric and 7.5cm firm foam and took about 3 weeks to make. I can definitely recommend them.
2 46We used the camper unit at a local campsite and it worked well. Then a couple weeks later we used it for a weeks camping, travelling the length of the Hebrides. Again it worked well but my only complaint was the amount of moving of luggage/stuff around that was required for making up the bed each night.... so along came camper design Mk2....
Using 15mm ply this time, i made a false floor with full length supports hinged underneath. It can be used as a regular floor most of the time, then in ‘camper mode’ it is raised to
• Be flush with height of folded down seat backs
• Allow storage of gear underneath, out of sight, and clutter free! Underneath I have enough room for all our cooking gear (stove, pans, plates, cutlery gas etc..) 4x sleeping bags, thermal window blinds, two camp beds and the awning room.
So far this design has worked well. After a bit of research I also bought an ARB side awning and awning room which adds on a 2.4 x 2.4 m room to the side.... giving plenty of room for two camp beds. I am very happy with this ARB set up as it only take 5-10mins to set up and the same to take down an put away. (Campervan Culture sell these). You can get 2m ones also which may be better suited to the SWB caddy.
78101112Anyway thought this might be of interest to those considering making campers.
Next step is changing the wheel and tyre set up to all terrains and probably add a metal sump guard.
-
Shane1987
- 100BHP+
- Posts: 166
- Joined: Wed May 10, 2017 12:38 pm
- Engine size/power: 1.4 16V Petrol (79bhp)
Re: Caddy Camper Versions 1 & 2
Hey guys with the arb side awning does it have to be mounted to a roof rack or is there a more descreet way?
Sent from my iPhone using Tapatalk
Sent from my iPhone using Tapatalk
-
branwell
- Caddy2k Groupie
- Posts: 31
- Joined: Mon Jan 16, 2017 12:57 pm
- Engine size/power: 1.2 TSI (103bhp)
Re: Caddy Camper Versions 1 & 2
As per the earlier post you may be able to mount it directly to the roof. It would just be a case of modifying the brackets to suit or make your own. All it needs is an L bracket with holes drilled in.
-
Shane1987
- 100BHP+
- Posts: 166
- Joined: Wed May 10, 2017 12:38 pm
- Engine size/power: 1.4 16V Petrol (79bhp)
Re: Caddy Camper Versions 1 & 2
Sweet I'm a long way off getting an awning yet just managed to source an asz for my broke. Bls 
Sent from my iPhone using Tapatalk
Sent from my iPhone using Tapatalk
-
dopeytree
- 100BHP+
- Posts: 115
- Joined: Wed Mar 08, 2017 12:37 pm
- Engine size/power: 1.6 CR TDI (102bhp)
Re: Caddy Camper Versions 1 & 2
This is ace! Nice work! I'm planing a similar thing. Currently I have been just pitching up in the back with the bulkhead still in & a leisure battery wired up in the rear passenger footwell but now I'm getting a rear conversion done so I can safely take other passengers.
I like the idea of the shelf. means you can have stuff stored underneath when you sleep & use it as a normal parcel shelf when using the van normally.
Where would you guys put the leisure battery? I'm guessing maybe right behind one of the seats?
This guy on ebay has a pretty cool design where the bed is attached to the back of the bench seat & folds up. So you just fold it out when you want it. Currently only for t5 but I'm sure it can be modded to fit the caddy seats?
http://www.ebay.co.uk/itm/VW-T5-T6-Komb ... SwmCVY-7QS
2011 1.6 TDI - ex british gas caddy maxi http://caddy2k.com/forum/viewtopic.php?f=3&t=30795
Mk4 rear lights, Auto headlights, Passat w8 interior leds, 18" supermetal bullets, Polo MFSW, Touran doorcards exit lights, carpet sports seats & storage bases. VanX glovebox, Audi air vents, Sirus rear seat conversion, Privacy rear windows, RCD 330 CarPlay, Speakerupgrade underseat sub, Leisure battery, 3000w inverter.
Mk4 rear lights, Auto headlights, Passat w8 interior leds, 18" supermetal bullets, Polo MFSW, Touran doorcards exit lights, carpet sports seats & storage bases. VanX glovebox, Audi air vents, Sirus rear seat conversion, Privacy rear windows, RCD 330 CarPlay, Speakerupgrade underseat sub, Leisure battery, 3000w inverter.
-
branwell
- Caddy2k Groupie
- Posts: 31
- Joined: Mon Jan 16, 2017 12:57 pm
- Engine size/power: 1.2 TSI (103bhp)
Re: Caddy Camper Versions 1 & 2
It looks good. Very similar to the Amdro bed for the T5. I did consider it for our caddy as i could also extend the wood on the back of the seats to incorporate a dog guard.
In the end, after trying the box version, the platform design works better for us. It is a lot less of a faff when getting the bed made up as it is nearly done already.
A nice set of drawers like those sold by Direct4x4 would be my ultimate solution but they are quite high. They are higher than the back seats when the seats are folded down, so some sort of solution would be needed to resolve the difference in heights. When money allows that will be Version 3.