Let the build begin - Plushed/Bagged VR6

Show off your caddy
User avatar
C Chis
Hyper Poster
Posts: 1657
Joined: Fri Mar 06, 2020 1:13 pm

Re: Let the build begin

Post by C Chis »


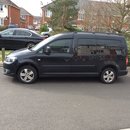
Might change my mind sometime and go for blue


Sent from my iPad using Tapatalk
2010 pre-facelift Mk3 3.2 VR6 : Touran Interior : 3D Premium Clocks : R32 Bumper : Climatic A/C

My VR6 Build Thread and Details can be Found Here
User avatar
C Chis
Hyper Poster
Posts: 1657
Joined: Fri Mar 06, 2020 1:13 pm

Re: Let the build begin

Post by C Chis »

Last cap colour change completed, woohoo!

Braved the torrential rain to screw the power steering cap back on Image

Image


Upcoming mods still to do...

9. Dukes of Hazard air horns (so ‘70’s)
23. Replacement colour coded rear bumper - R32 one, test fitted, almost ready for painting
28. TV/DVD/multimedia unit for the back
35. Interior unlocking button for the side door
38. Engine/gearbox upgrade, power, more power... very, very long term
41. Low washer fluid level detection
42. TPMS
44. Xenon lights from a Touran + headlight washers
45. Climatronic upgrade (parts here, waiting to install)
47.


Sent from my iPad using Tapatalk
2010 pre-facelift Mk3 3.2 VR6 : Touran Interior : 3D Premium Clocks : R32 Bumper : Climatic A/C

My VR6 Build Thread and Details can be Found Here
apriliajimmy
Caddy Fan
Posts: 60
Joined: Mon Nov 16, 2020 12:21 pm

Re: Let the build begin

Post by apriliajimmy »

i like the magnet idea with the bike claw. Is your ply just screwed on with self tappers ? just wondering would the bike make the ply wobble.
User avatar
C Chis
Hyper Poster
Posts: 1657
Joined: Fri Mar 06, 2020 1:13 pm

Re: Let the build begin

Post by C Chis »

Hi, I have secured the plywood on with 4mm/6mm machine screws into rivnuts, makes the ply very secure and easy to remove and replace in the same position. The bike holder is also bolted through the plywood and a 150mm square of reinforcing 12mm ply behind. Also used large “penny” type washers to spread the load at the back.

I dropped the mag mount in favour of a short bungee with hooks to hook into a small “D” ring as I liked the cleaner look when the bike is in my van.


Sent from my iPad using Tapatalk
2010 pre-facelift Mk3 3.2 VR6 : Touran Interior : 3D Premium Clocks : R32 Bumper : Climatic A/C

My VR6 Build Thread and Details can be Found Here
apriliajimmy
Caddy Fan
Posts: 60
Joined: Mon Nov 16, 2020 12:21 pm

Re: Let the build begin

Post by apriliajimmy »

C Chis wrote: Tue Nov 17, 2020 3:11 pm Hi, I have secured the plywood on with 4mm/6mm machine screws into rivnuts, makes the ply very secure and easy to remove and replace in the same position. The bike holder is also bolted through the plywood and a 150mm square of reinforcing 12mm ply behind. Also used large “penny” type washers to spread the load at the back.

I dropped the mag mount in favour of a short bungee with hooks to hook into a small “D” ring as I liked the cleaner look when the bike is in my van.


Sent from my iPad using Tapatalk
cheers the rivnuts is a good idea. i will have a proper look later at your build. you have done a lot of work.
User avatar
C Chis
Hyper Poster
Posts: 1657
Joined: Fri Mar 06, 2020 1:13 pm

Re: Let the build begin

Post by C Chis »

Yeah, it’s become an obsession I think!


Sent from my iPad using Tapatalk
2010 pre-facelift Mk3 3.2 VR6 : Touran Interior : 3D Premium Clocks : R32 Bumper : Climatic A/C

My VR6 Build Thread and Details can be Found Here
User avatar
C Chis
Hyper Poster
Posts: 1657
Joined: Fri Mar 06, 2020 1:13 pm

Let the build begin

Post by C Chis »

Sometimes it’s the small, often unseen things that make you smile!

OEM Fuse cover rubber liner, fuse extractor and R53’s and bases (for headlight washers retrofit) and spares, £6.00 all in Image

Image

Image


Sent from my iPad using Tapatalk
2010 pre-facelift Mk3 3.2 VR6 : Touran Interior : 3D Premium Clocks : R32 Bumper : Climatic A/C

My VR6 Build Thread and Details can be Found Here
FishermansFriend
Hyper Poster
Posts: 889
Joined: Wed Jun 17, 2020 12:10 pm
Location: Ireland Dublin

Re: Let the build begin

Post by FishermansFriend »

Love the OEM rubber liner, I dont think I have ever seen a nicer fuse box cover. Van looks great, so much accomplished.
User avatar
C Chis
Hyper Poster
Posts: 1657
Joined: Fri Mar 06, 2020 1:13 pm

Re: Let the build begin

Post by C Chis »

Thanks buddy, much appreciated!

I feel I’m getting somewhere now!


Sent from my iPad using Tapatalk
2010 pre-facelift Mk3 3.2 VR6 : Touran Interior : 3D Premium Clocks : R32 Bumper : Climatic A/C

My VR6 Build Thread and Details can be Found Here
User avatar
C Chis
Hyper Poster
Posts: 1657
Joined: Fri Mar 06, 2020 1:13 pm

Re: Let the build begin

Post by C Chis »

Managed a sneaky wee session just before the driving sleet started. Hibernating in the garage for a few days now, brrrr...

Image


Sent from my iPad using Tapatalk
2010 pre-facelift Mk3 3.2 VR6 : Touran Interior : 3D Premium Clocks : R32 Bumper : Climatic A/C

My VR6 Build Thread and Details can be Found Here
User avatar
C Chis
Hyper Poster
Posts: 1657
Joined: Fri Mar 06, 2020 1:13 pm

Re: Let the build begin

Post by C Chis »

Well, it’s been a quiet few weeks on the Caddy front, I’ve been enjoying doing nothing apart from popping my bike in the back and heading for the trails with my bike!

However, this morning it wouldn’t start, battery was flat, grrr... had to cancel a MTB session with a mate!

3.5 hrs on fast charge and yip, still dead! New battery please!

Checked my battery rating, size, etc and discovered that it was highly likely that the battery was still the original one, crikey, 10 years old!
Image

After a bit of checking and not finding anything wrong I’ve came to the conclusion that the added load from DRL’s/auto lights, shortish journeys, the PTC heater (I use it every time I get in the van) and heater fan has tipped the battery over the edge to its sudden death!

New battery in, wrapped in its wee blanket and all’s well again ImageImageImage

Image

Upcoming mods still to do...

9. Dukes of Hazard air horns (so ‘70’s)
23. Replacement colour coded rear bumper - Off for colour coding on Friday
28. TV/DVD/multimedia unit for the back
35. Interior unlocking button for the side door - diodes here, to be fitted
38. Engine/gearbox upgrade, power, more power... very, very long term
41. Low washer fluid level detection - to do at same time as bi-xenon headlights
42. TPMS
44. Xenon lights from a Touran + headlight washers
45. Climatronic upgrade (parts here, waiting to install)
47. Heated seats - Touran leather ones fitted, wiring to do at same time as Climatronic upgrade.
48.


Sent from my iPad using Tapatalk
2010 pre-facelift Mk3 3.2 VR6 : Touran Interior : 3D Premium Clocks : R32 Bumper : Climatic A/C

My VR6 Build Thread and Details can be Found Here
User avatar
Papa Bear
Hyper Poster
Posts: 1885
Joined: Sun Mar 01, 2020 10:44 pm
Engine size/power: 1.6 CR TDI (102bhp)
Location: Hampshire, UK

Re: Let the build begin

Post by Papa Bear »

I’ve not done anything to mine for ages due to having covid and packing to empty the house. It’s sold tomorrow, purchase of new house not completing for a couple of weeks so everything in storage. Good thing though, I found my Dixie air horns :D :D :D :D
Caddy Maxi Life 1.6TDI 7 speed DSG 102bhp
Black

Marmite lover!!!
VCDS
User avatar
C Chis
Hyper Poster
Posts: 1657
Joined: Fri Mar 06, 2020 1:13 pm

Re: Let the build begin

Post by C Chis »

Wow! Glad you’ve come through the other side and awesome news on finding your air horns... just need to get them fitted now!


Sent from my iPad using Tapatalk
2010 pre-facelift Mk3 3.2 VR6 : Touran Interior : 3D Premium Clocks : R32 Bumper : Climatic A/C

My VR6 Build Thread and Details can be Found Here
IainH91
100BHP+
Posts: 189
Joined: Sun Dec 20, 2020 4:08 pm
Engine size/power: 1.6 CR TDI (102bhp)

Re: Let the build begin

Post by IainH91 »

Skoda courtesy light to dip and fit, LED’s tested and they are red!
Image


Are these interior running lights? So they are on all the time?
IainH91
100BHP+
Posts: 189
Joined: Sun Dec 20, 2020 4:08 pm
Engine size/power: 1.6 CR TDI (102bhp)

Re: Let the build begin

Post by IainH91 »

And fitted the Golf+ interior lights and glasses holder to the overhead shelf followed by some silver 4 way stretch carpet

Spare shelf marked up and cutting started, stopped part way through to stem the blood coming from my thumb after catching it on the Dremel blade, ouch...

Image

Test fit before bonding the frame on and blank made and bonded in

Image

4 way stretch carpet on

Image

Wire (and spare wires) pulled through the dreaded A pillar for the red courtesy LED’s. They even dim with the dash dimmer switch, thanks to the “Passat W8 interior light mod how too”on here Image

Image

Wired up, tested and fitted back into the van, just need to wait until dark O’clock to see the red LED’s

Used a couple of plastic panel clips to hide the holes at the front where the screws go into the roof to hold the shelf up.

Image

This might be the ticket. So dark inside the van normally.
Post Reply