So, after many hours of labour and even more hours waiting on parts...
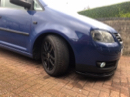
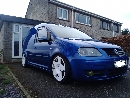
My van is now a little lower...


This should have been an afternoons work to swap the original struts, springs, wishbones, ball joints and track rod ends, however, it turned out to be a little more involved...
Van up on axle stands, and first issue, the long bolts holding the rear wishbone bearing on were seized, plated carbon steel bolts into alloy, no grease=snapped bolts as they were going out,

All a little crusty...

Ended up cutting off the drop links, the brake hose/abs wire holding bracket, the top mount bolts and after cracking the abs sensor housing and it also being totally seized in the hub I ended up opting to buy replacement parts for the bottom end...
Hub’s, 55mm ones
Drive shaft bearings
ABS sensors
Track rod ends
Drop links
Dust covers
Wishbones c/w bushes
Replacement wishbone mount after snapping the drill bit in the hole when drilling it out to re-tap it
Bolt kits for the wishbones and suspension
I ended up buying an impact wrench, the best thing ever for tackling rusty/crusty bolts, this would have removed the seized bolts without snapping them and would have saved more than it cost! It also came in handy when removing the salvage part for the wishbone mount, took 5 minutes and was effortless!
Beg, borrow or steal (mibbie not this one) an impact wrench if you’re going to do it yourself
So front suspension pretty much totally rebuilt with all the appropriate parts copper slipped so that it’s easier for the next person to do stuff or when I upgrade my coil overs!
Oh, and the strut top mounts just spun, the captive nuts were also rusted off

, however 30 minutes and several Dremel cutting discs later they were also gone...

The hub bearings had to come out to count the ABS sensor magnets, more grinding as the head of the bolts were rusted out

Then had to count the magnets

to make sure I ordered the right bearing, made a bit easier as the grinding dust had highlighted the magnets!

Almost all back together, new bolts greased and torqued

And some of the pile of scrap ready for recycling!

Now to do the rear end

Sent from my iPad using Tapatalk
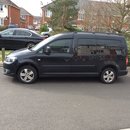
 love seeing modded blue vans.