@charlie-
Are you taking bookings on Caddy clean ups? Asking for a friend.... Cracker work, super turn around on the bits so far
Ex-BG Caddy Maxi Camper Build
-
themtbphysio
- Caddy Fan
- Posts: 60
- Joined: Wed Mar 24, 2021 5:56 pm
- Engine size/power: 2.0 CR TDI (108bhp)
-
charlie-
- Caddy2k Groupie
- Posts: 27
- Joined: Thu Feb 25, 2021 3:44 pm
- Engine size/power: 1.6 CR TDI (102bhp)
Re: Ex-BG Caddy Maxi Camper Build
Made some more progress over the weekend. My roof cross bars, 115W solar panel and MMPT charge controller arrived along with the leisure battery and VSR.
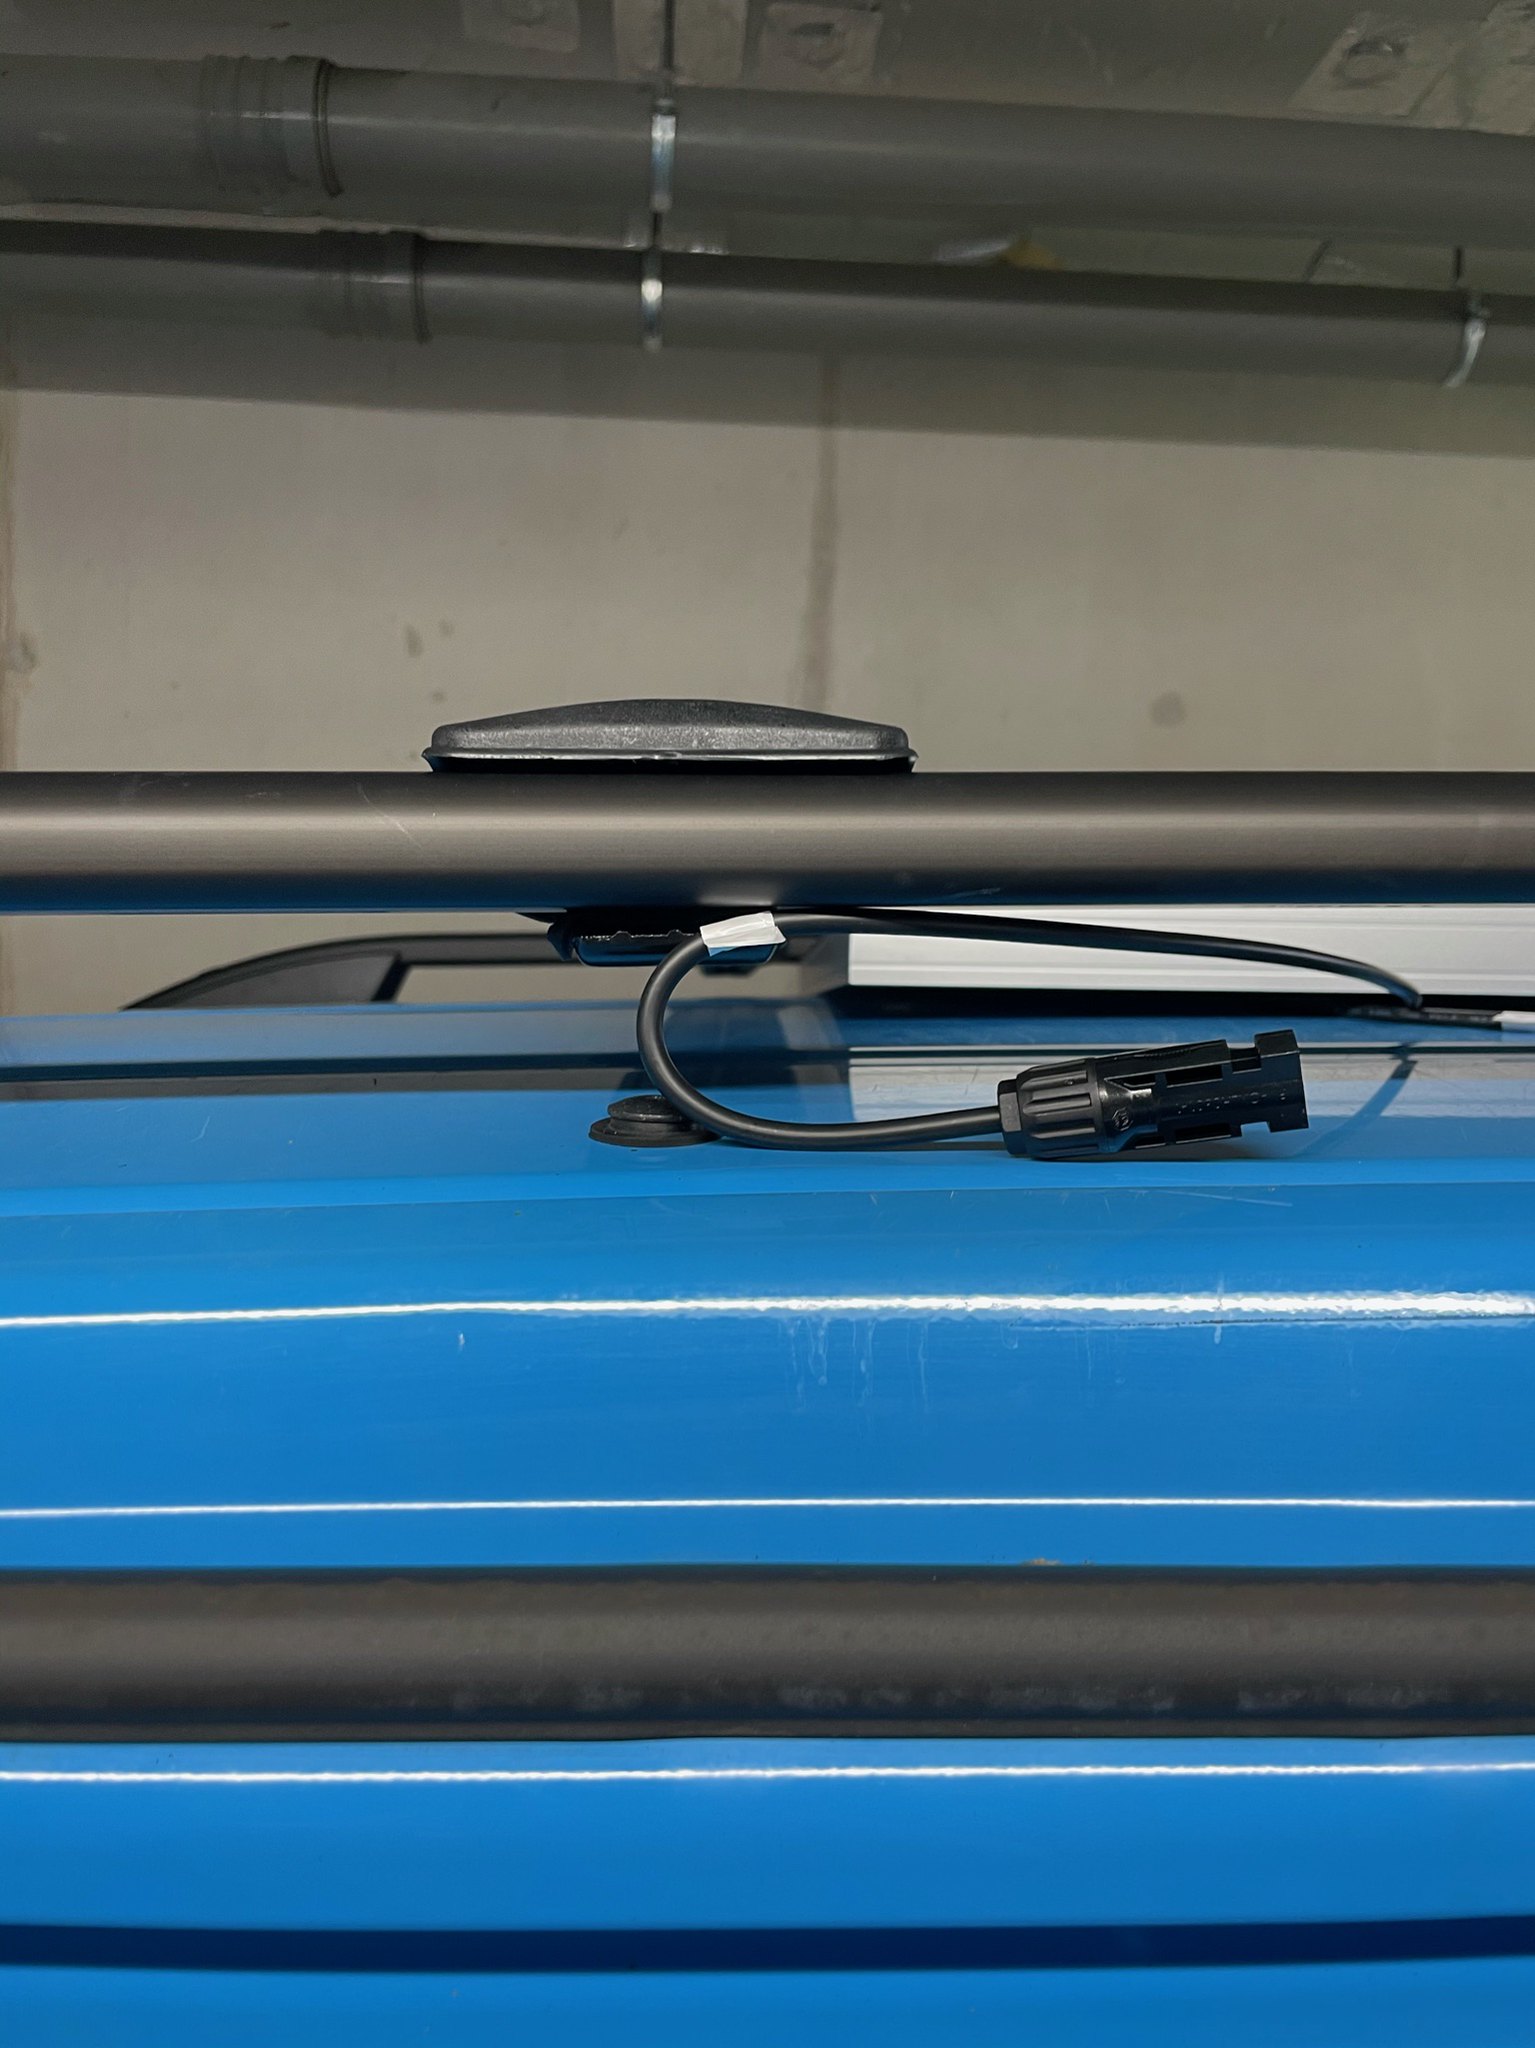
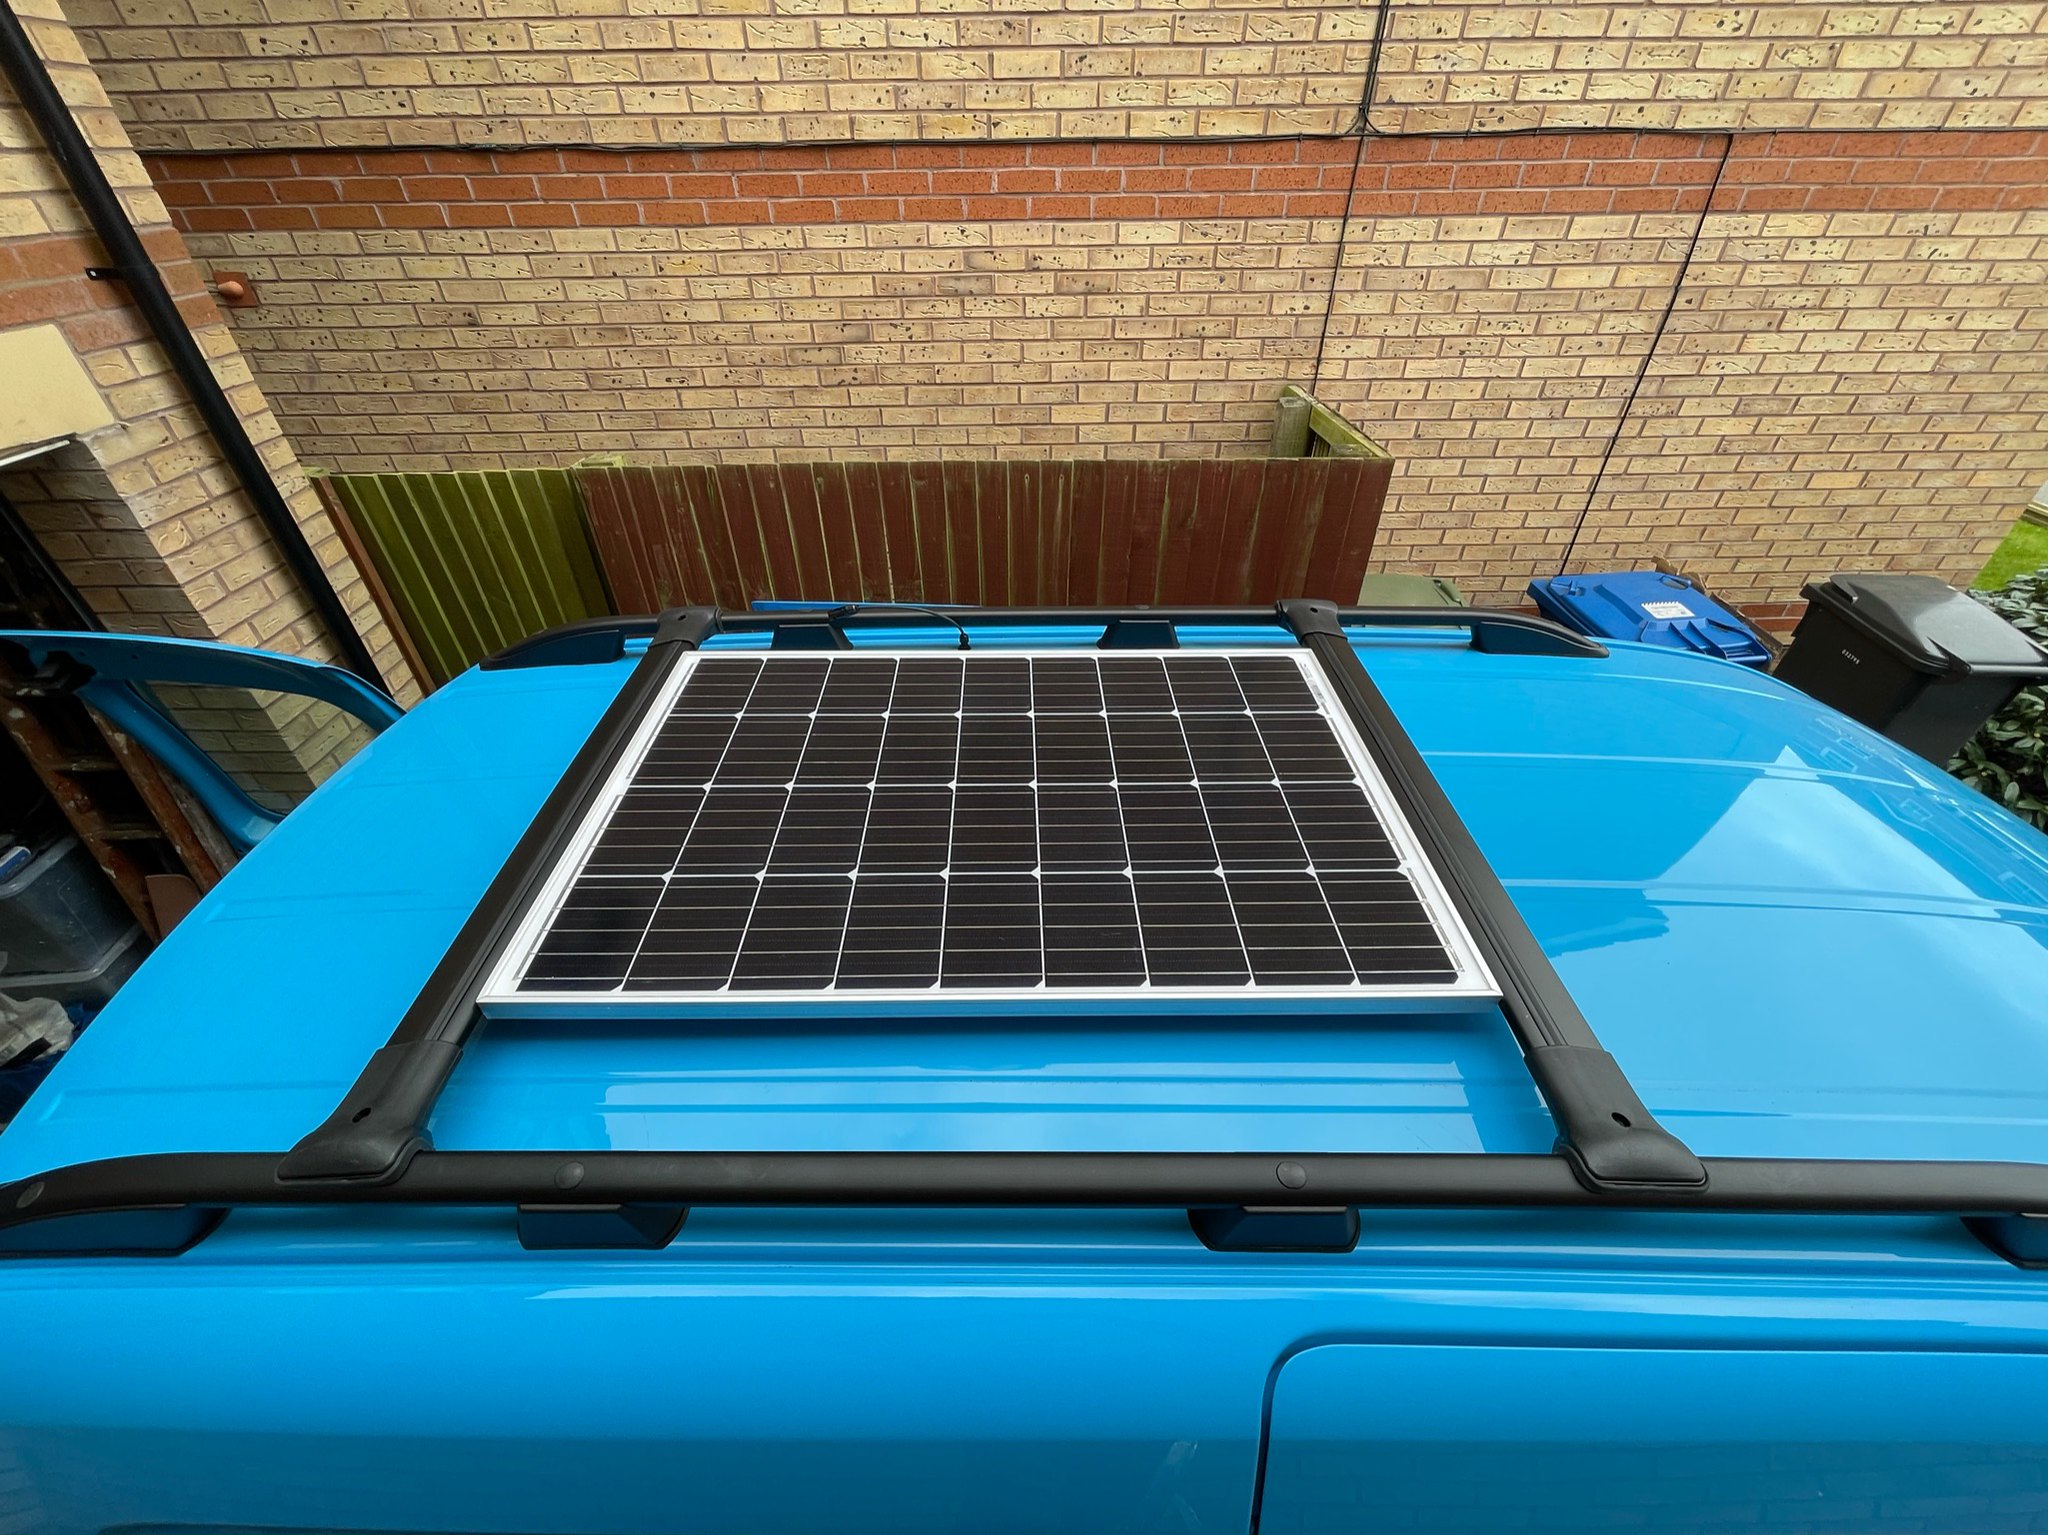
First up trial fitting the panel on the roof with the cross bars.

My plan is hopefully to route the two panel cables through the existing BG aerial holes in the roof rather than drilling more holes (the third hole is blanked off and luckily covered by the rear most roof rail foot), just waiting on some M12 cable glands to arrive before I can see if it will work.
Drilling 9mm clearance holes in the cross bars (4 on each).
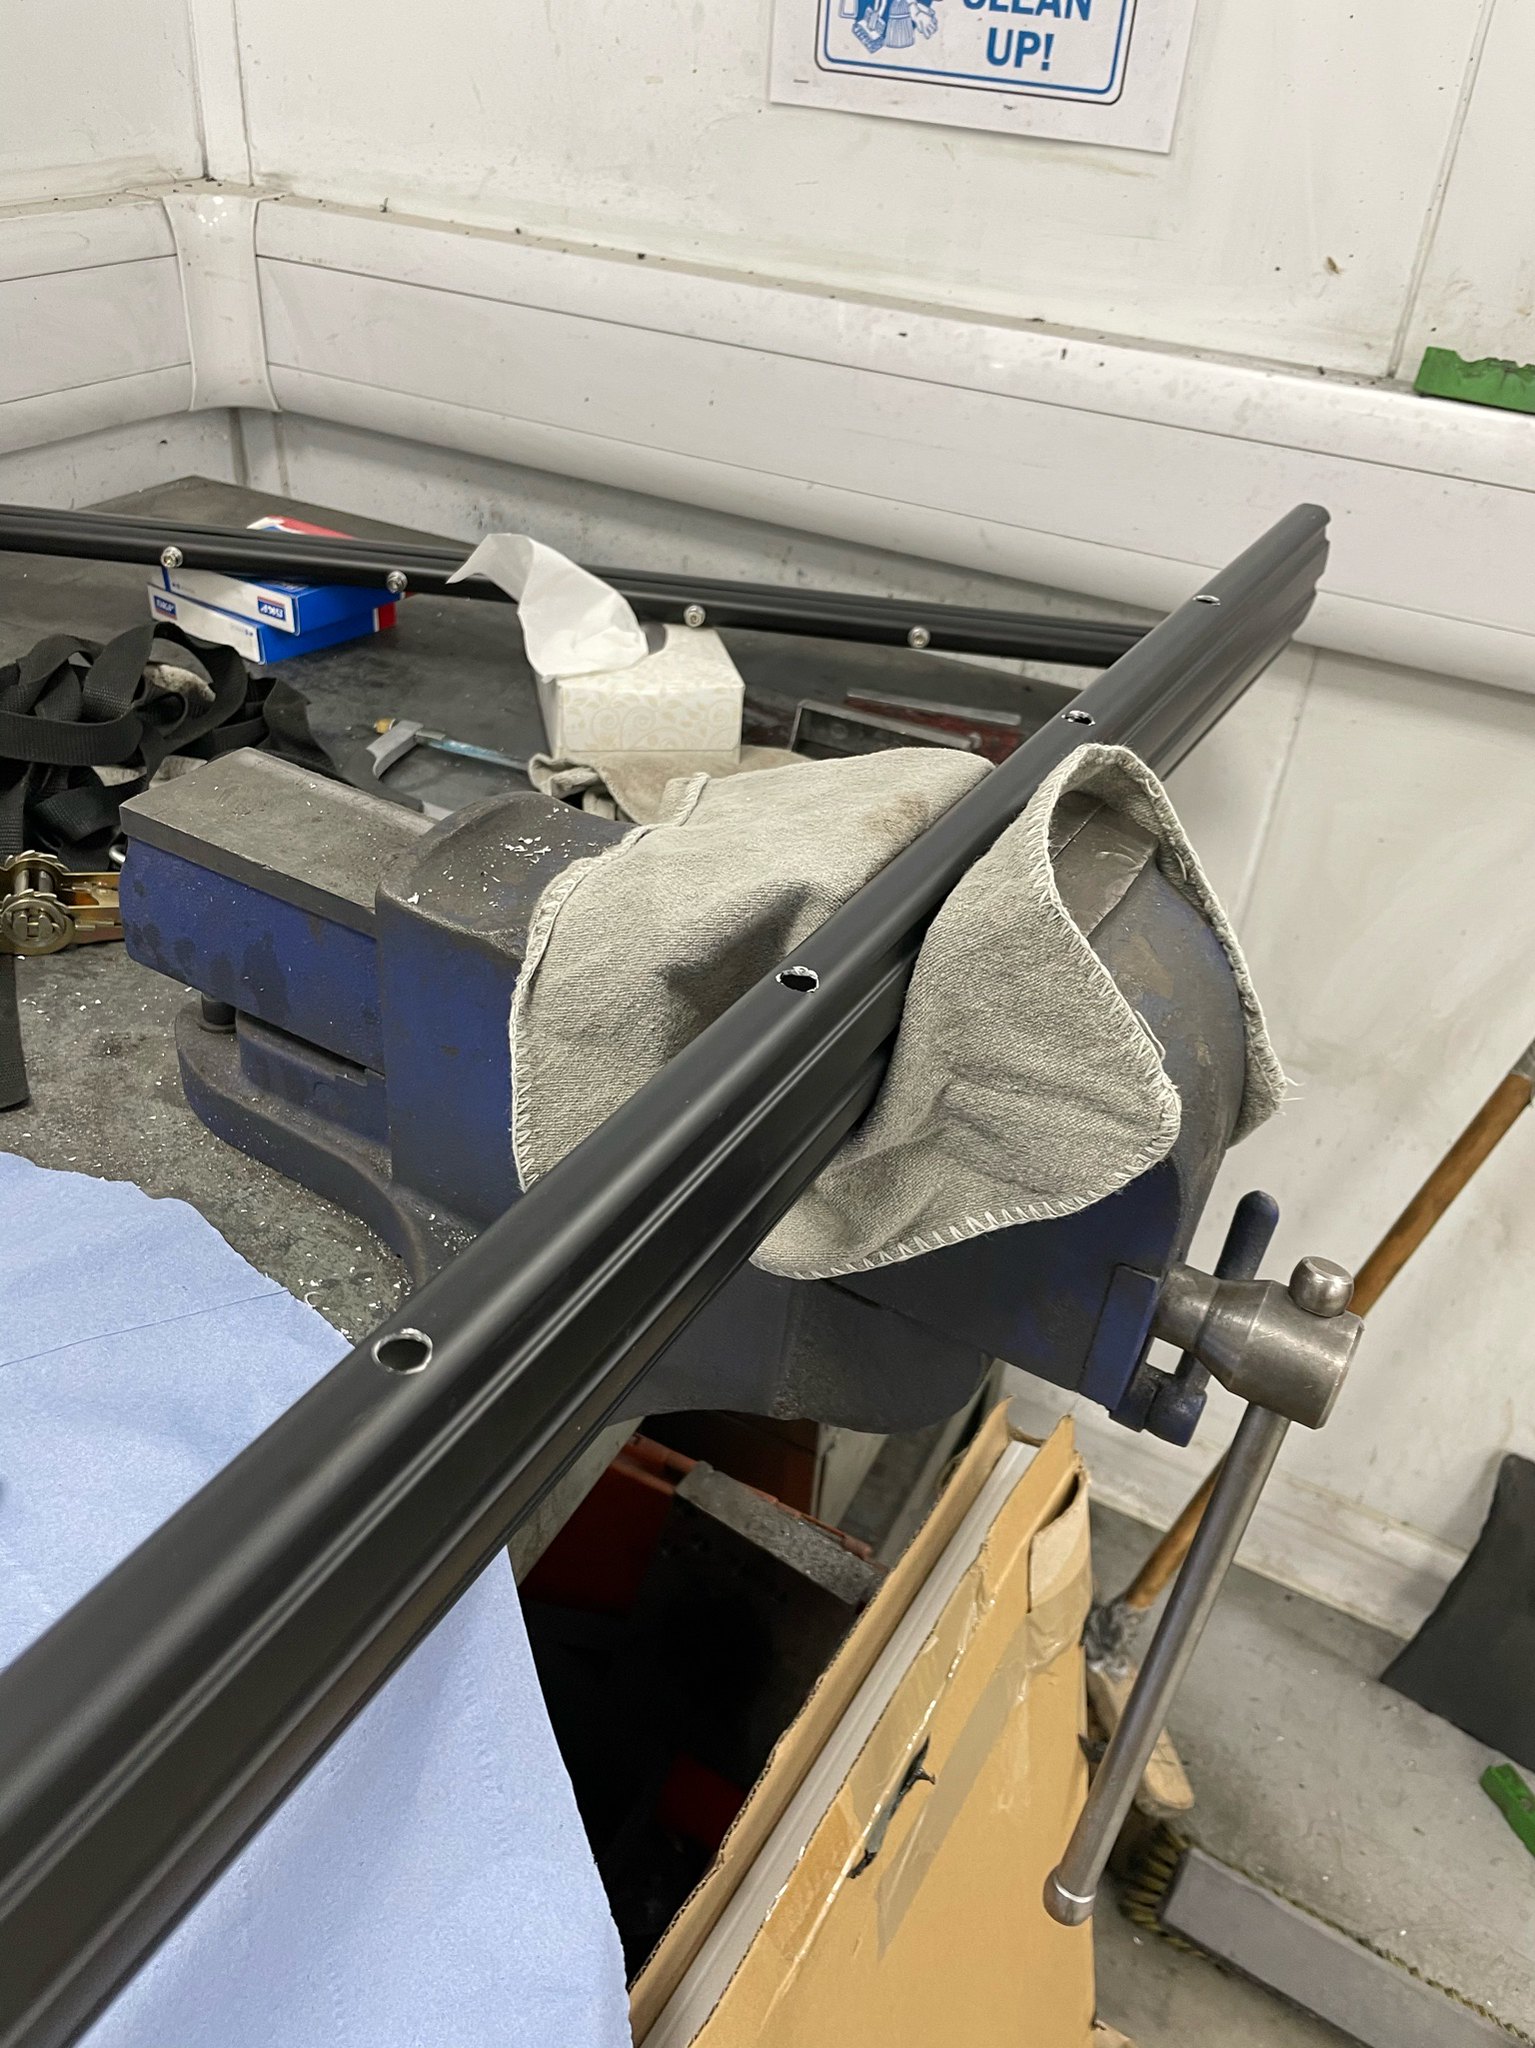
M6 rivet nuts inserted.
Felt like I needed hands like a vice to compress these steel rivet nuts

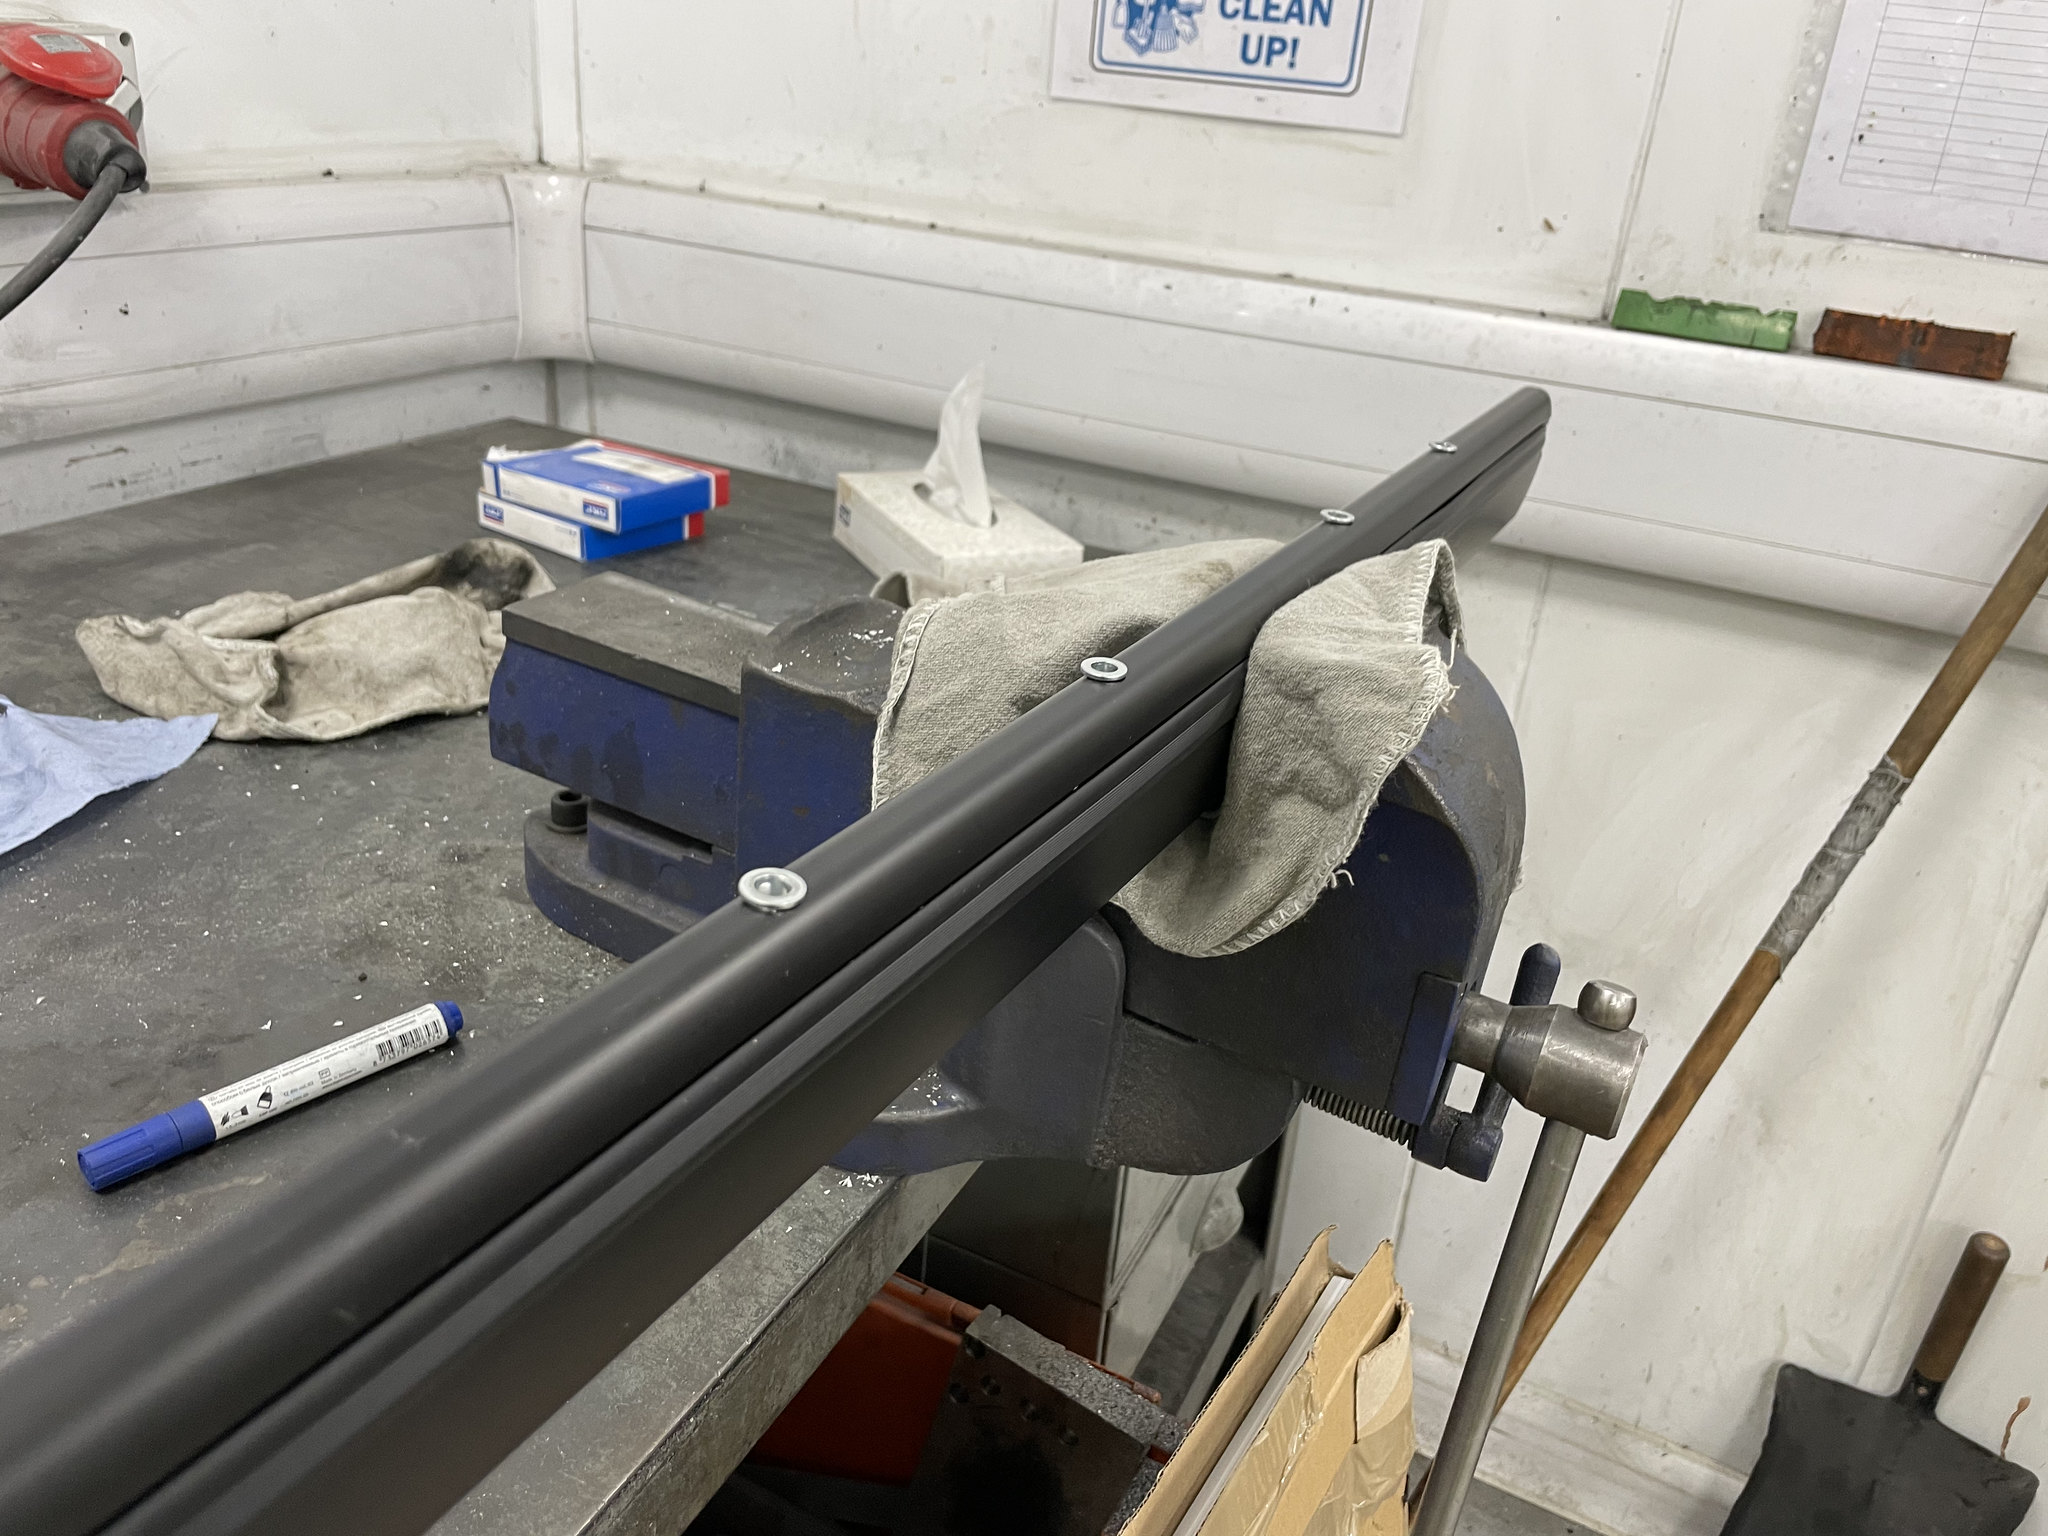
Matching holes drilled on the panel frame and then bolted on.

The finished item!

Hoping this will be a fairly discreet way to mount the panel and less messy than using glue to bond to the roof and/or drilling holes. It should also give great airflow around the panel. I did consider stick on panels at first as they’re so slim but they’re much more expensive and seemingly prone to failure.
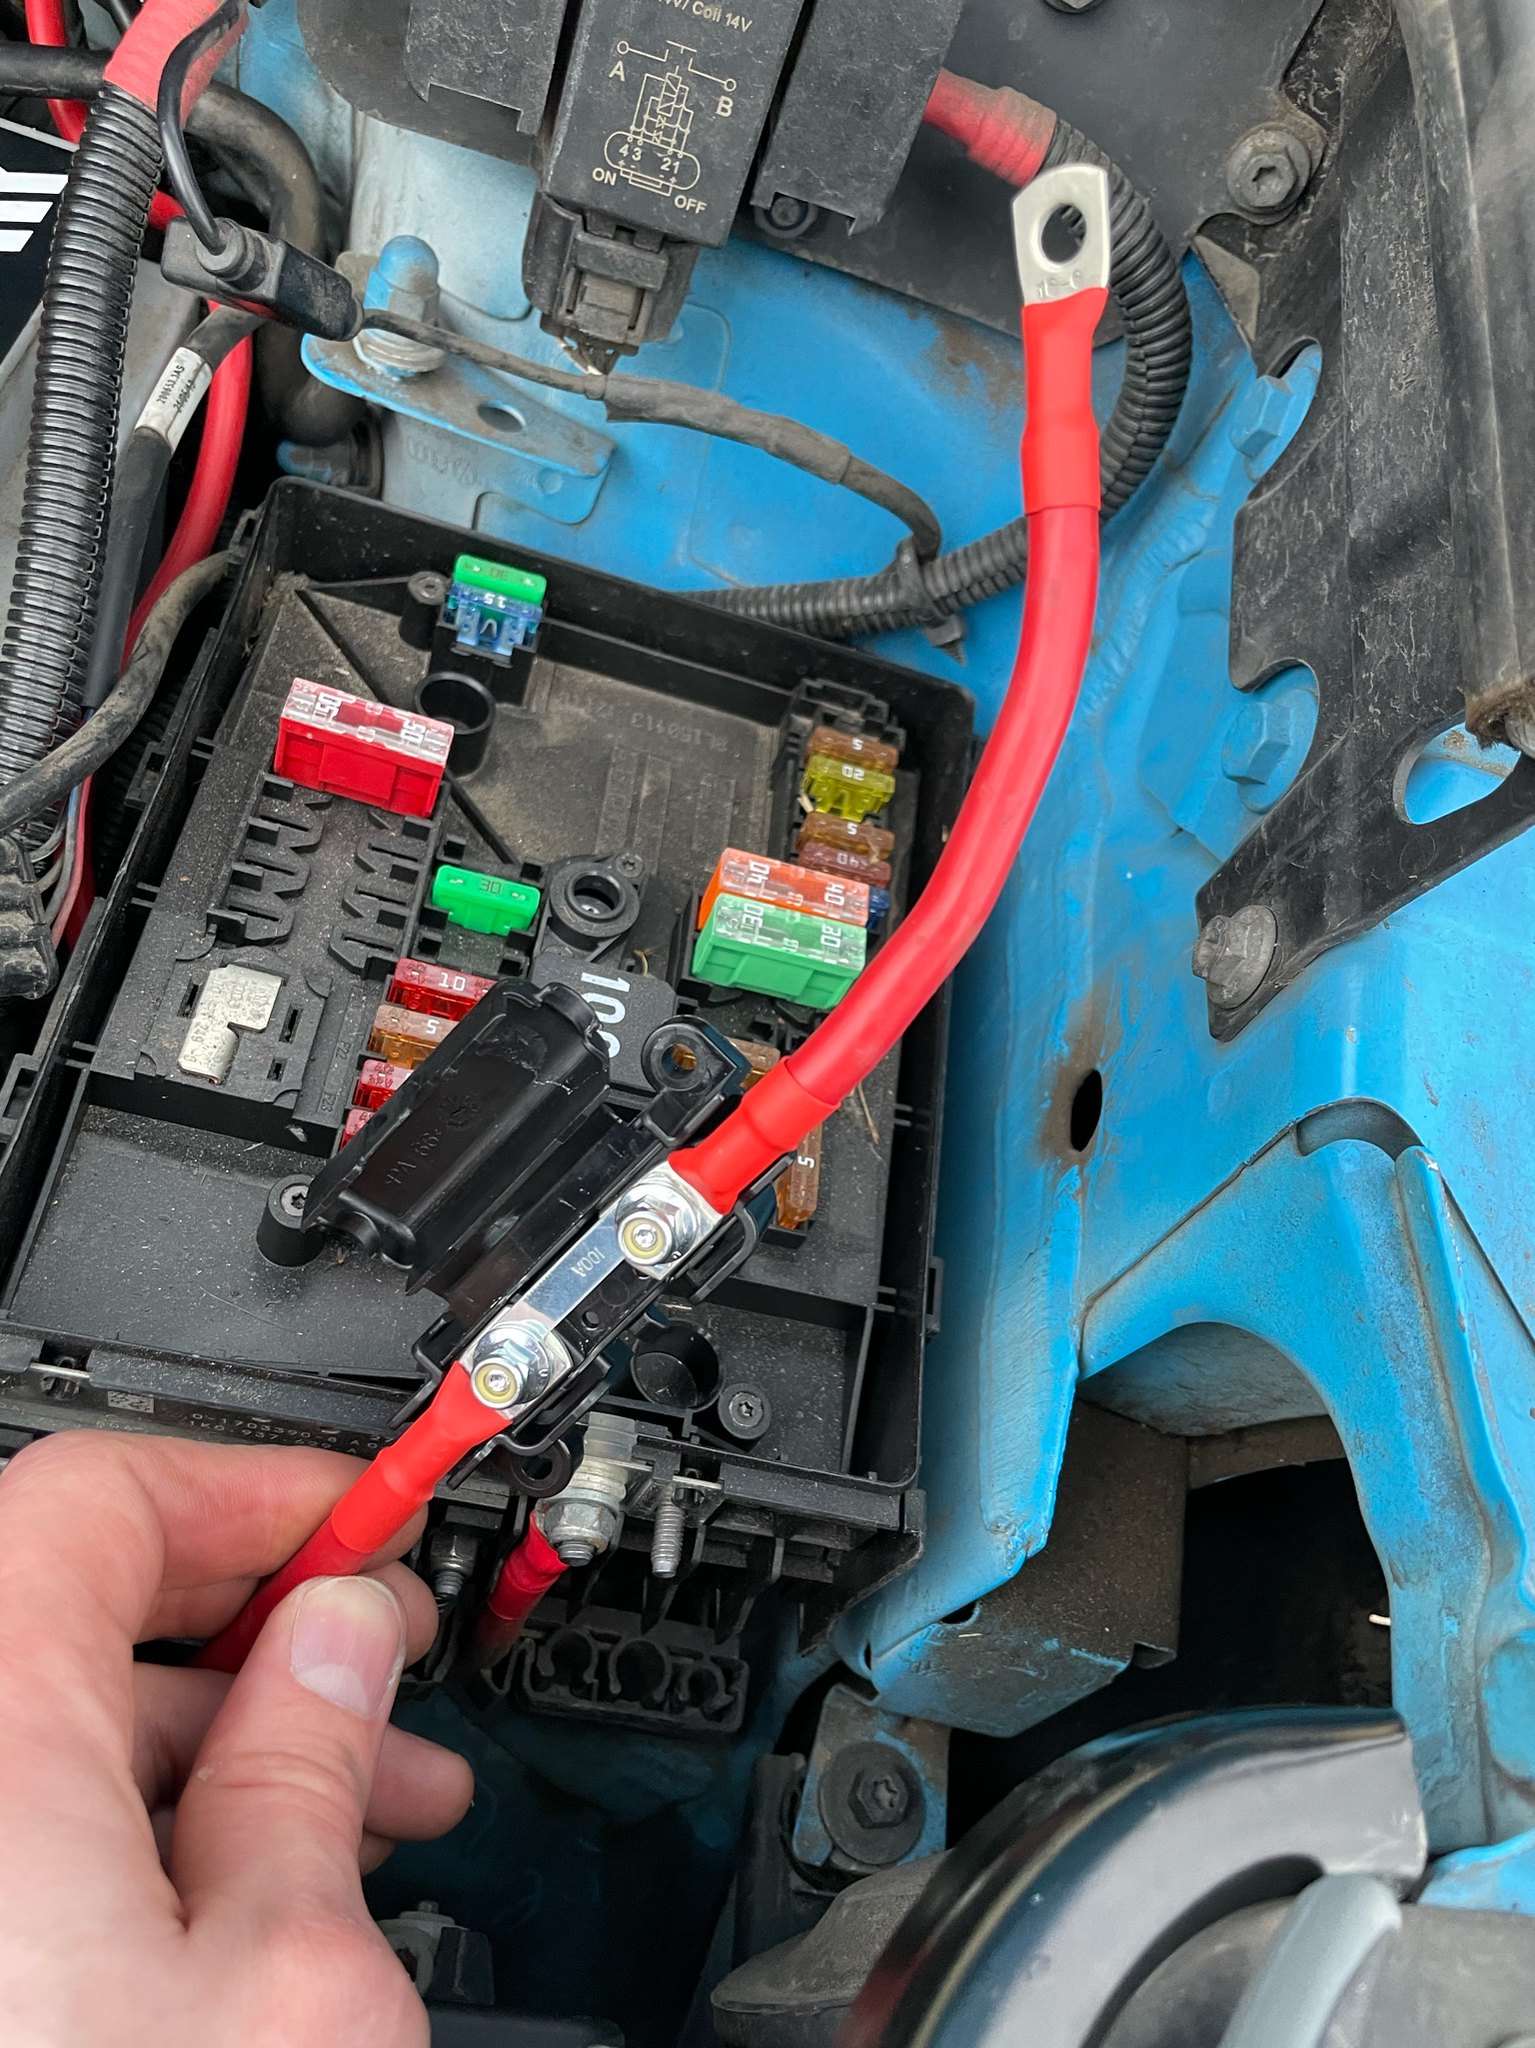
Next up the leisure battery and VSR install. First thing was to route the 12v supply cable from the engine bay to the rear passenger footwell. This was a proper pain to do working on my own, especially as the BG fuse box feed wiring takes up most of the space in the channel passing through the firewall. Removing this would have made it easier but I think the extra fused ignition terminals might come in handy in future so decided to keep it for now (with all the fuses and wiring removed).

Ended up routing the cable through both ends, taping together and then pulling through back into the engine bay. In hindsight removing the scuttle panel or just having an extra pair of hands from a friend handy would probably have made this easier!


Cable pulled through.

Fused and wired up to the spare connection in the fuse box.

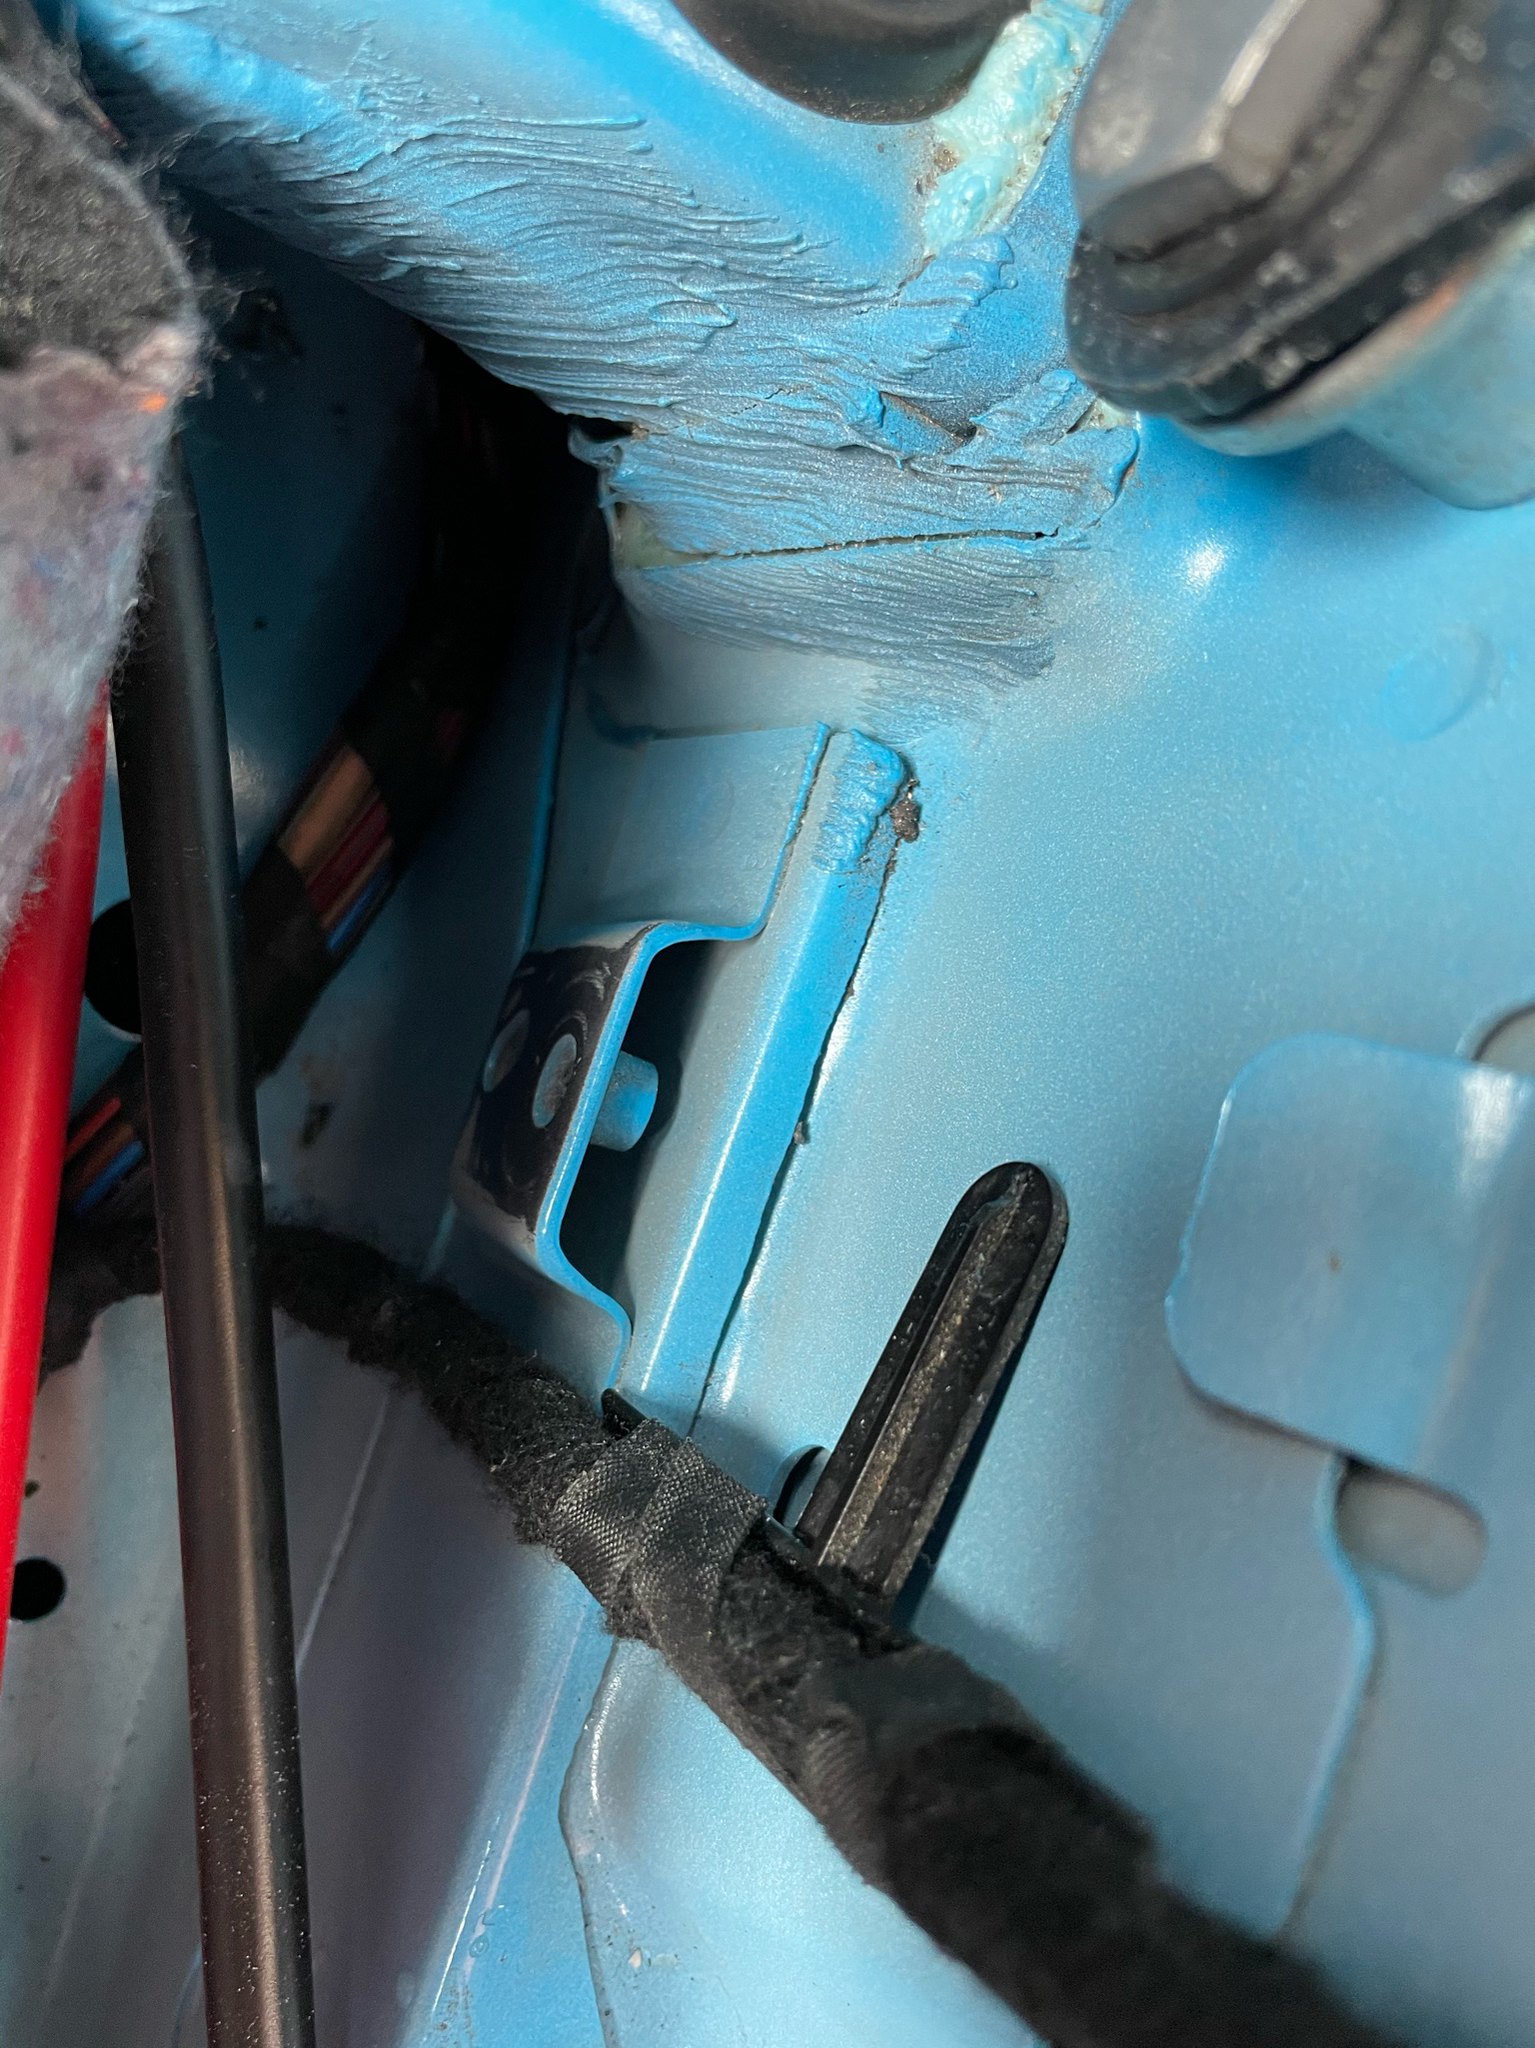
Inside the van I routed the cable behind the glove box and down alongside the passenger footwell.

And out through a hole I cut in the carpet into the footwell.

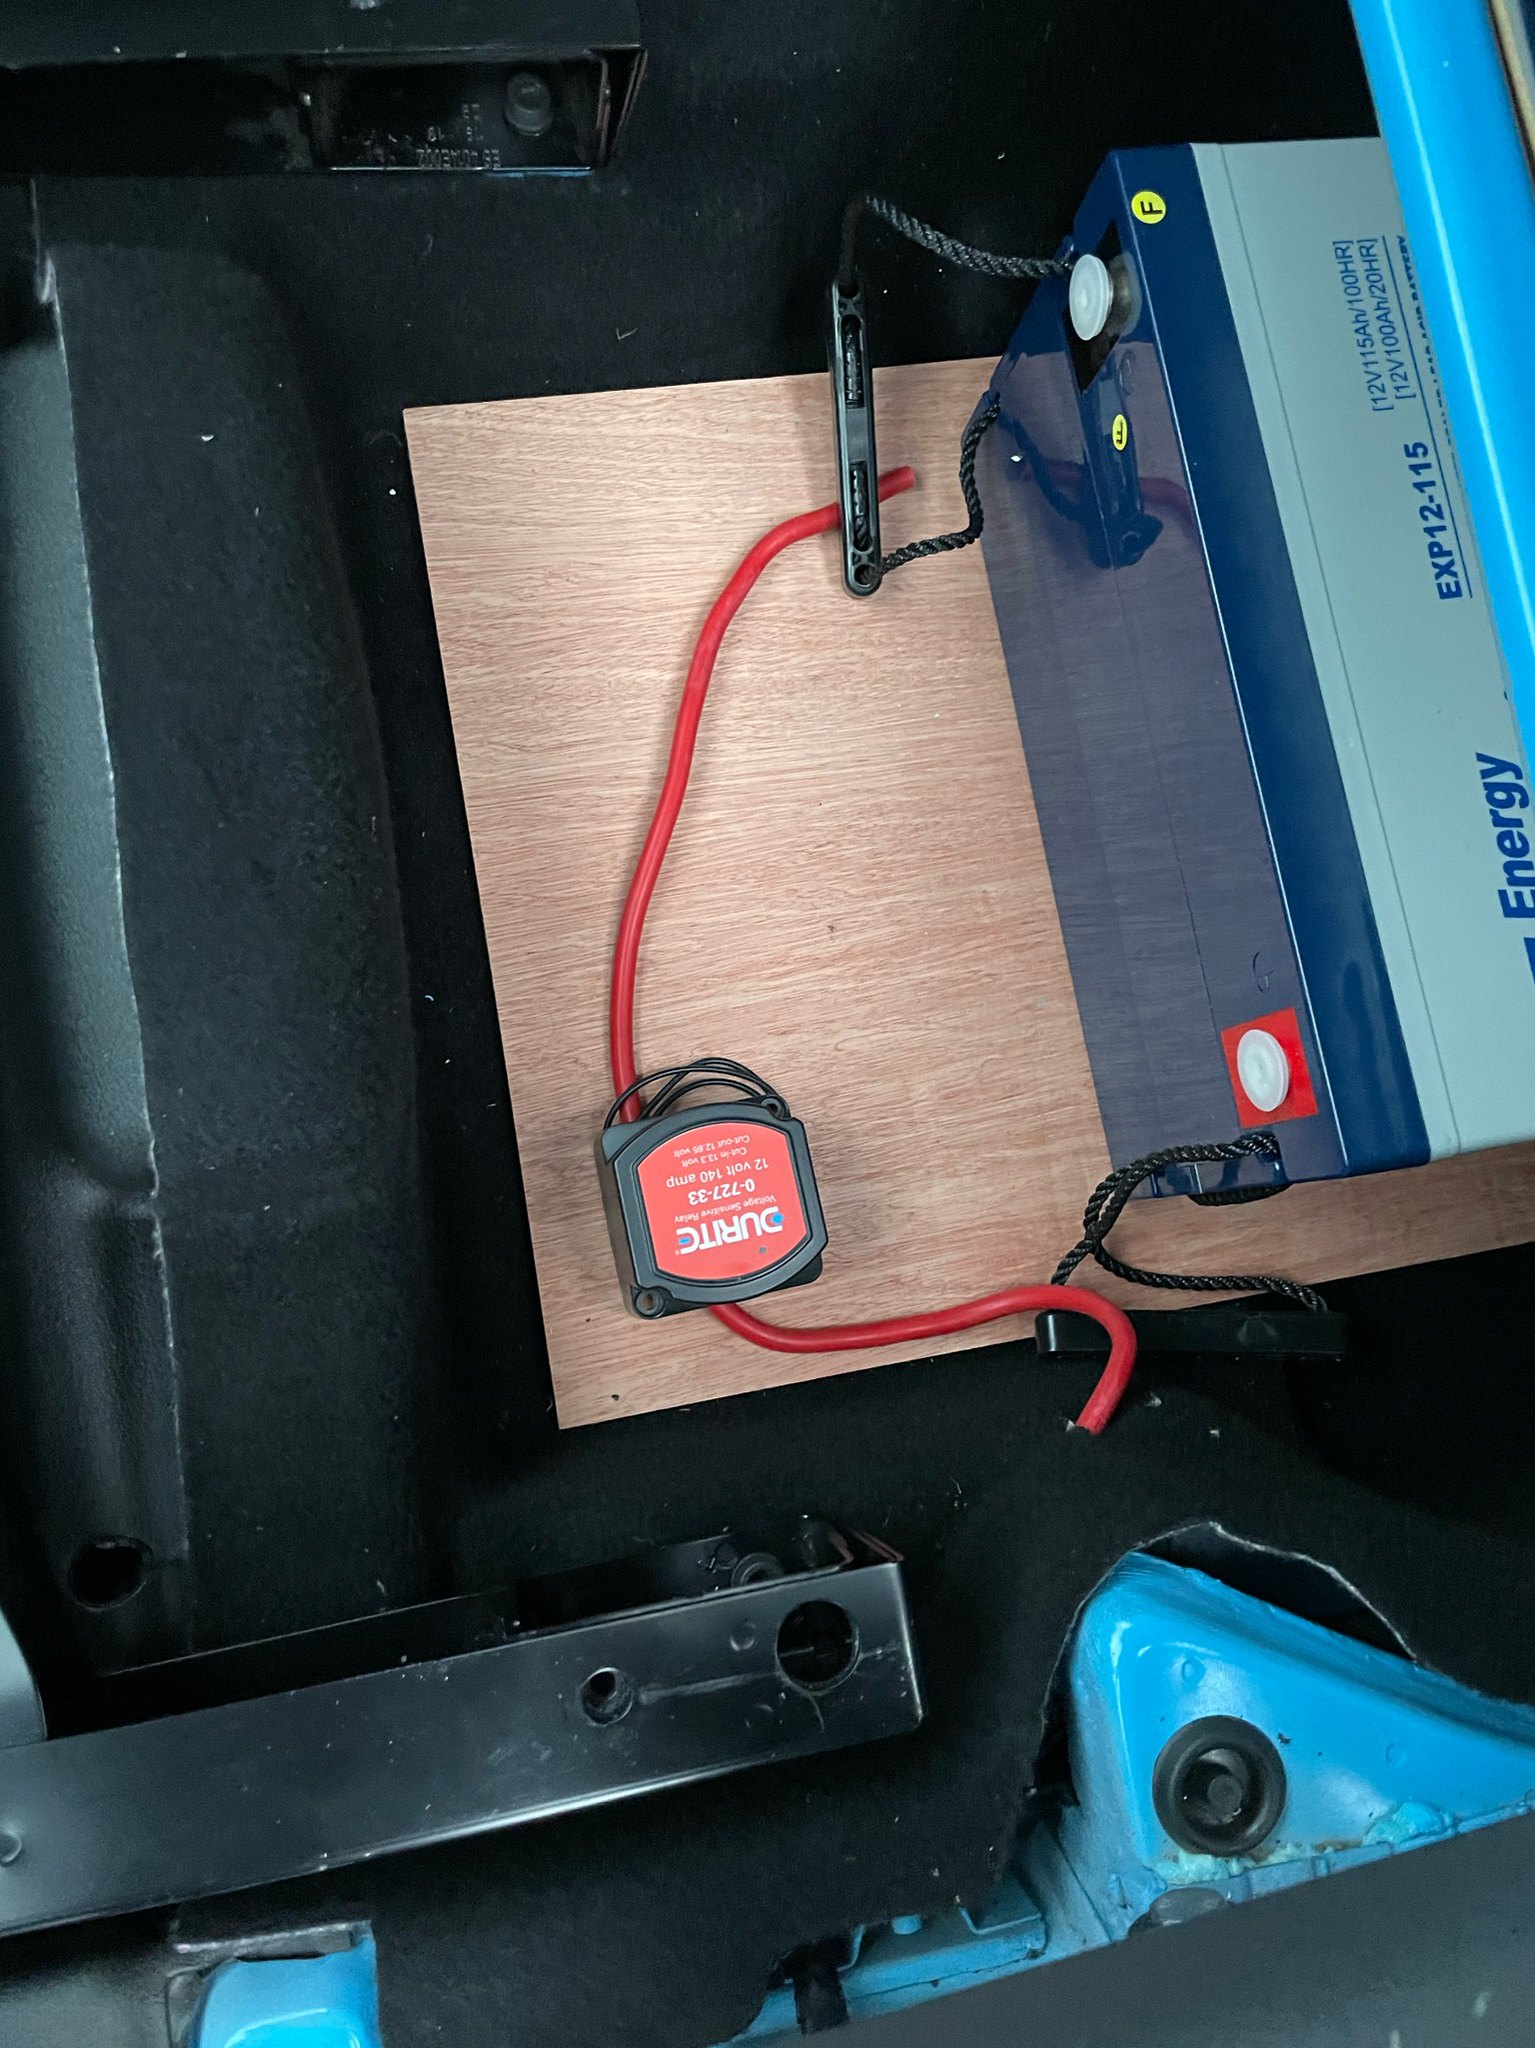
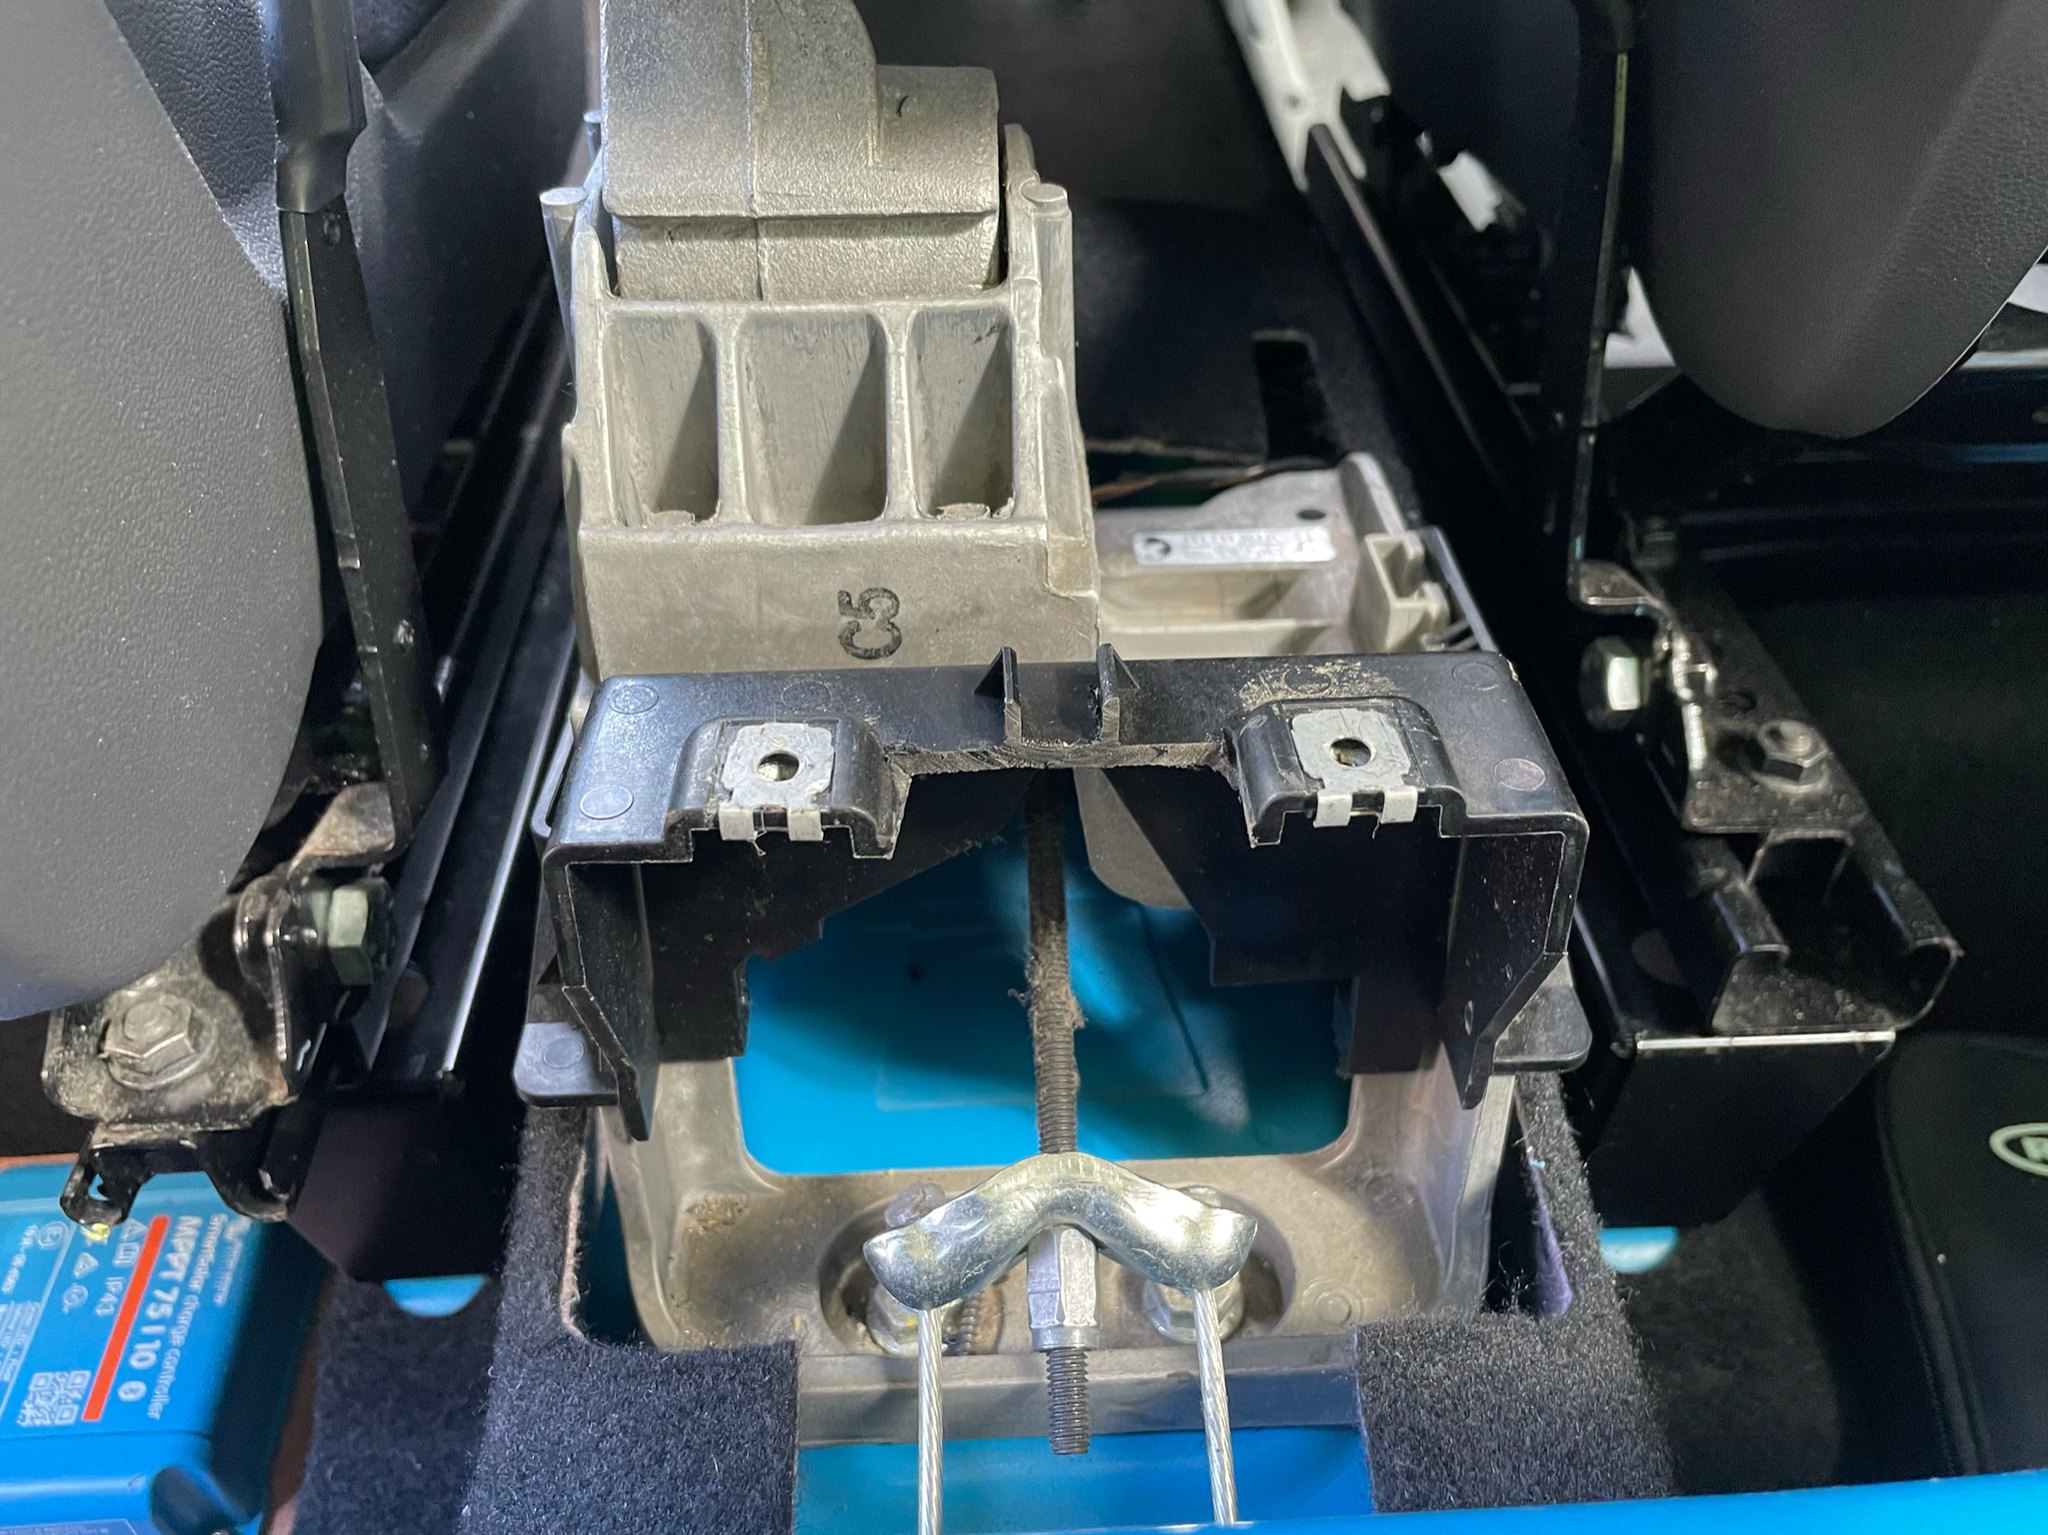
Trial fitting the battery and VSR.
There’s a handy tapped hole earth point just behind the carpet here too that I lightly sanded down to bare metal.
Fitting some brackets to keep the battery from sliding forward and laying out the electrical components.

Everything wired in and fixed in place. I still need to run the 2 cables from the solar panel into the MPPT once the panel is on the roof. I didn’t have the right size yellow ring crimps for the MPPT to leisure battery wire (M8) so they need connecting too.

My plan is to use the SmartSolar controller to manage all the leisure electrics through its load output. This will go to a separate fuse box I’m going to mount on a small raised platform above the MPPT and VSR once it arrives in the post. The charge controller can be controlled via Bluetooth on my phone and will let me see real time power usage and charge level. It also lets me turn the load output off if needed if I’m not using the van.
First up trial fitting the panel on the roof with the cross bars.
My plan is hopefully to route the two panel cables through the existing BG aerial holes in the roof rather than drilling more holes (the third hole is blanked off and luckily covered by the rear most roof rail foot), just waiting on some M12 cable glands to arrive before I can see if it will work.
Drilling 9mm clearance holes in the cross bars (4 on each).
M6 rivet nuts inserted.
Felt like I needed hands like a vice to compress these steel rivet nuts

Matching holes drilled on the panel frame and then bolted on.
The finished item!
Hoping this will be a fairly discreet way to mount the panel and less messy than using glue to bond to the roof and/or drilling holes. It should also give great airflow around the panel. I did consider stick on panels at first as they’re so slim but they’re much more expensive and seemingly prone to failure.
Next up the leisure battery and VSR install. First thing was to route the 12v supply cable from the engine bay to the rear passenger footwell. This was a proper pain to do working on my own, especially as the BG fuse box feed wiring takes up most of the space in the channel passing through the firewall. Removing this would have made it easier but I think the extra fused ignition terminals might come in handy in future so decided to keep it for now (with all the fuses and wiring removed).
Ended up routing the cable through both ends, taping together and then pulling through back into the engine bay. In hindsight removing the scuttle panel or just having an extra pair of hands from a friend handy would probably have made this easier!
Cable pulled through.
Fused and wired up to the spare connection in the fuse box.
Inside the van I routed the cable behind the glove box and down alongside the passenger footwell.
And out through a hole I cut in the carpet into the footwell.
Trial fitting the battery and VSR.
There’s a handy tapped hole earth point just behind the carpet here too that I lightly sanded down to bare metal.
Fitting some brackets to keep the battery from sliding forward and laying out the electrical components.
Everything wired in and fixed in place. I still need to run the 2 cables from the solar panel into the MPPT once the panel is on the roof. I didn’t have the right size yellow ring crimps for the MPPT to leisure battery wire (M8) so they need connecting too.
My plan is to use the SmartSolar controller to manage all the leisure electrics through its load output. This will go to a separate fuse box I’m going to mount on a small raised platform above the MPPT and VSR once it arrives in the post. The charge controller can be controlled via Bluetooth on my phone and will let me see real time power usage and charge level. It also lets me turn the load output off if needed if I’m not using the van.
-
charlie-
- Caddy2k Groupie
- Posts: 27
- Joined: Thu Feb 25, 2021 3:44 pm
- Engine size/power: 1.6 CR TDI (102bhp)
Re: Ex-BG Caddy Maxi Camper Build
Maybe in a few months when this is all finishedthemtbphysio wrote: ↑Mon Mar 29, 2021 6:44 pm @charlie-
Are you taking bookings on Caddy clean ups? Asking for a friend.... Cracker work, super turn around on the bits so far
 I couldn’t face doing it again now, took forever! Definitely glad I did it though, made a massive difference.
-
charlie-
- Caddy2k Groupie
- Posts: 27
- Joined: Thu Feb 25, 2021 3:44 pm
- Engine size/power: 1.6 CR TDI (102bhp)
Re: Ex-BG Caddy Maxi Camper Build
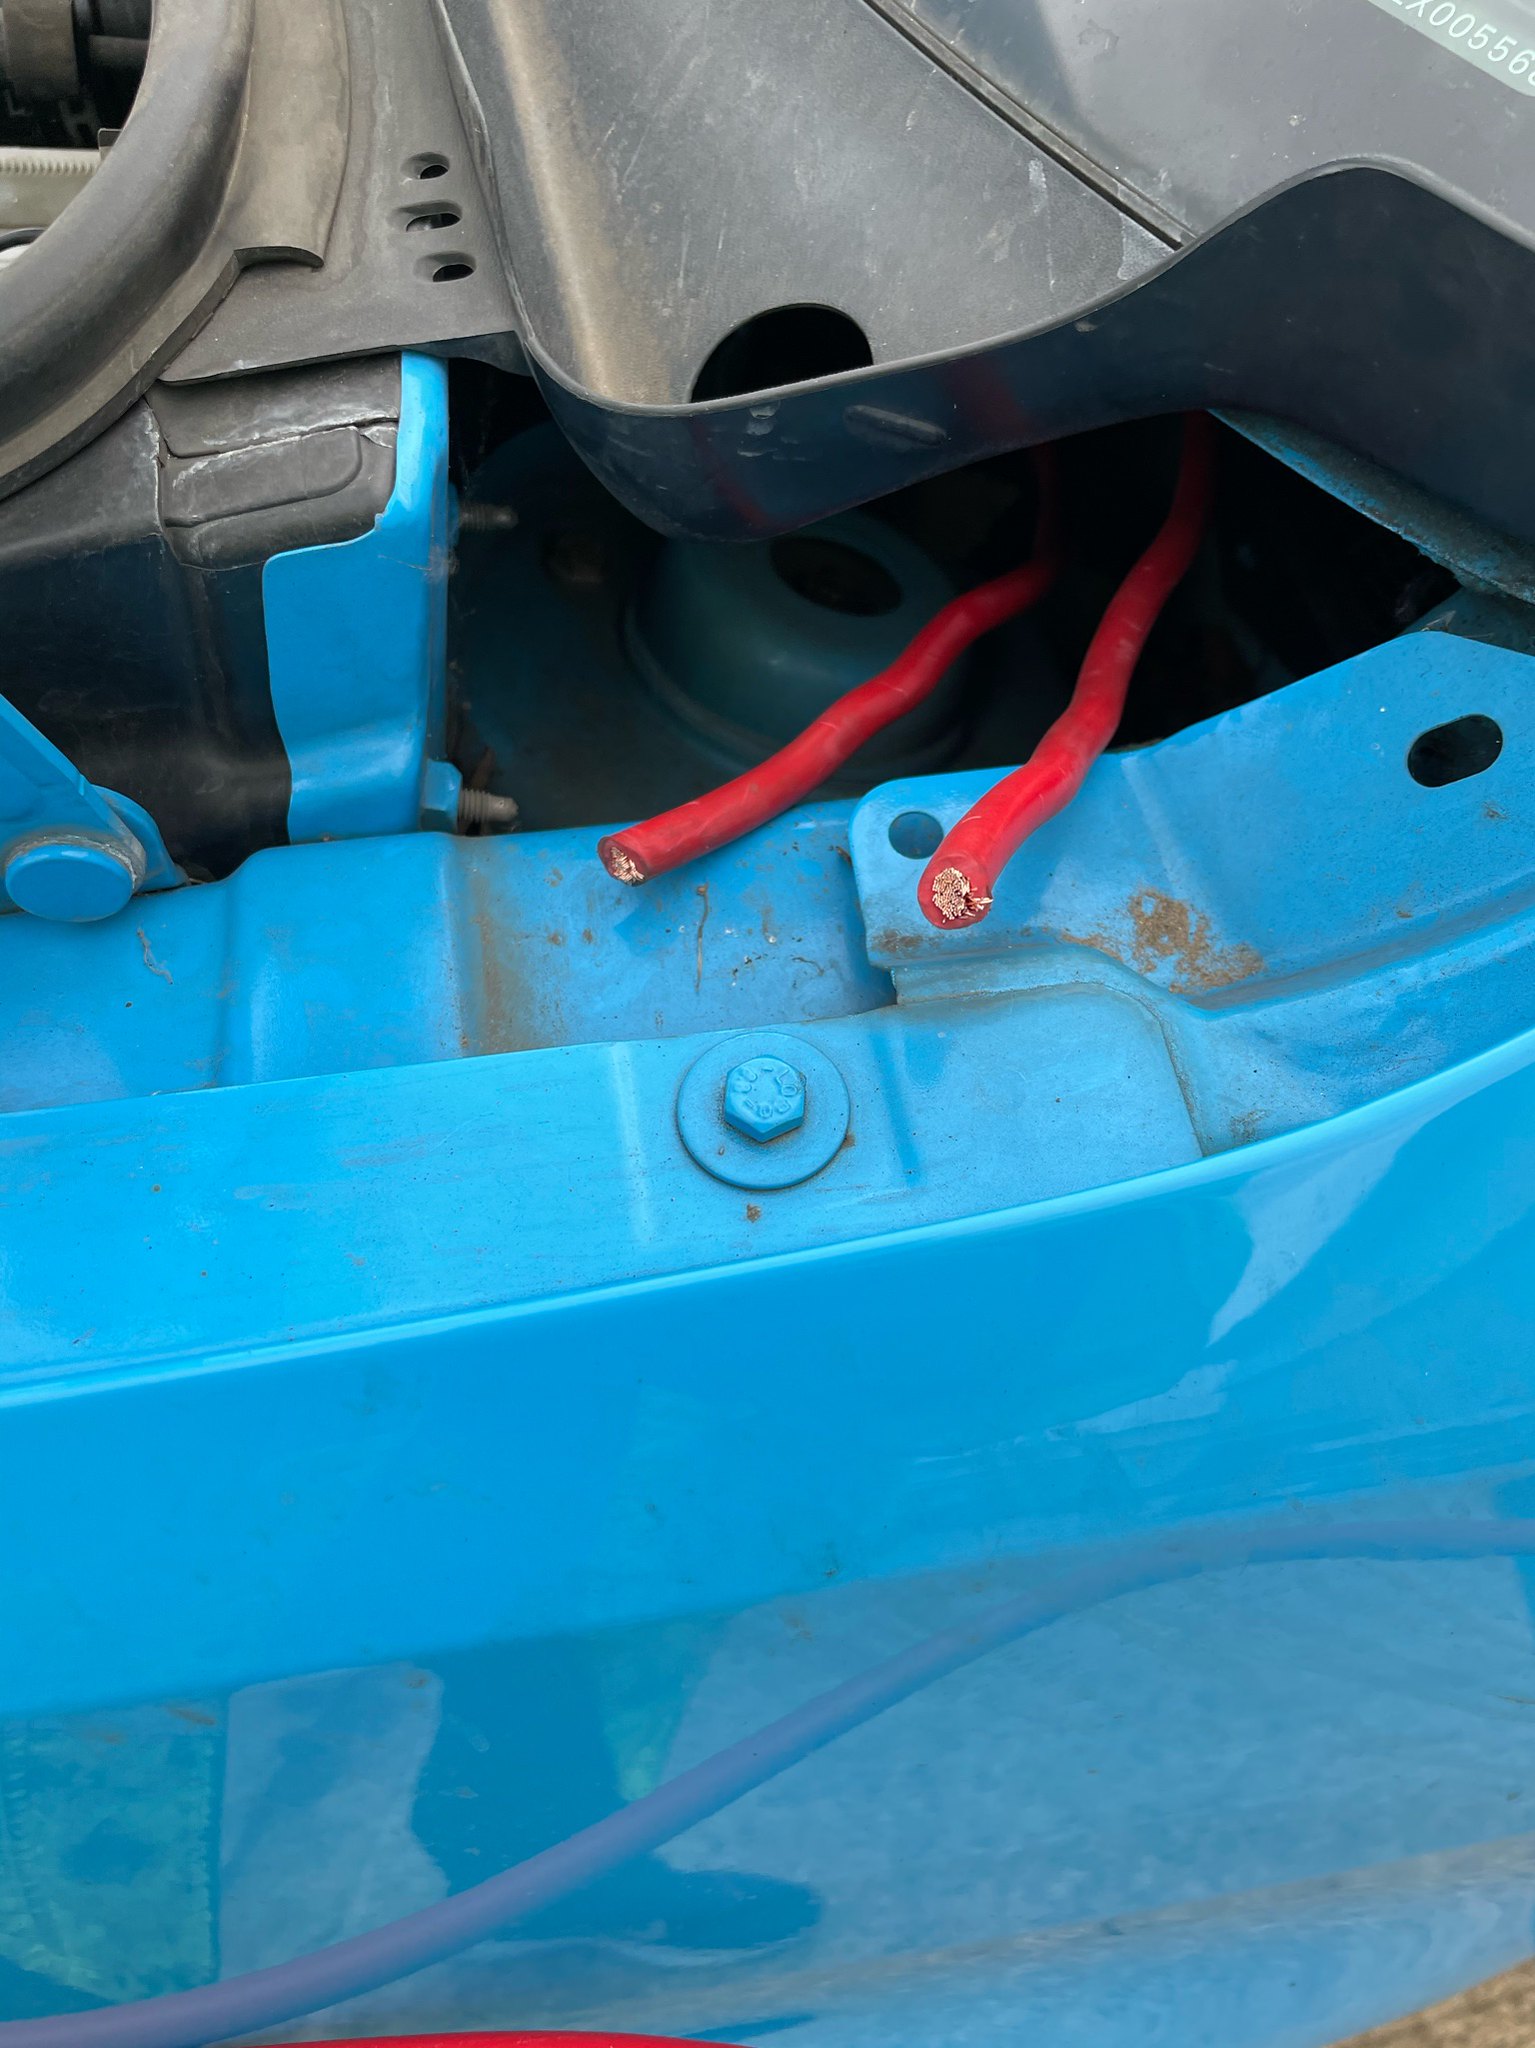
Almost forgot, here’s the amount of spare red cable I had after fitting

(For reference I ordered from Simply Split Charge 3m of red cable, 1m of black.)
(For reference I ordered from Simply Split Charge 3m of red cable, 1m of black.)
Last edited by charlie- on Mon Mar 29, 2021 8:10 pm, edited 1 time in total.
-
Ripley55

- Hyper Poster
- Posts: 1134
- Joined: Sun Apr 07, 2019 4:38 pm
- Engine size/power: 2.0 TDI (140bhp)
- Location: Kent/Suffolk
Re: Ex-BG Caddy Maxi Camper Build
That’s bloody brilliant mate, excellent idea 

Chestnut Brown Caddy MK4 Maxi Life 2.0Tdi 150bhp , 18” Matt Bronze OZ Ultraleggera’s 8Jx18 ET45 on Bridgestone 225/40/18’s
-
themtbphysio
- Caddy Fan
- Posts: 60
- Joined: Wed Mar 24, 2021 5:56 pm
- Engine size/power: 2.0 CR TDI (108bhp)
Re: Ex-BG Caddy Maxi Camper Build
Wicked update that, smart fit too.
I await my booking confirmation for that clean up, thanks
I await my booking confirmation for that clean up, thanks
-
robblowen

- Twin Turbo poster
- Posts: 431
- Joined: Tue Apr 02, 2019 6:54 am
- Engine size/power: 1.6 CR TDI (102bhp)
- Contact:
Re: Ex-BG Caddy Maxi Camper Build
Looks like you "measured" it perfectly mate!  Van's looking good, you're flying with the build. What's next on the list?
Sent from my SM-G973F using Tapatalk
Van's looking good, you're flying with the build. What's next on the list?Sent from my SM-G973F using Tapatalk
-
charlie-
- Caddy2k Groupie
- Posts: 27
- Joined: Thu Feb 25, 2021 3:44 pm
- Engine size/power: 1.6 CR TDI (102bhp)
Re: Ex-BG Caddy Maxi Camper Build
Ton of progress over the last couple of weekends, feels like a new van now 
First up thought of an easy way to blank off the leftover BG window plate holes with some rivets. Looks much better now.


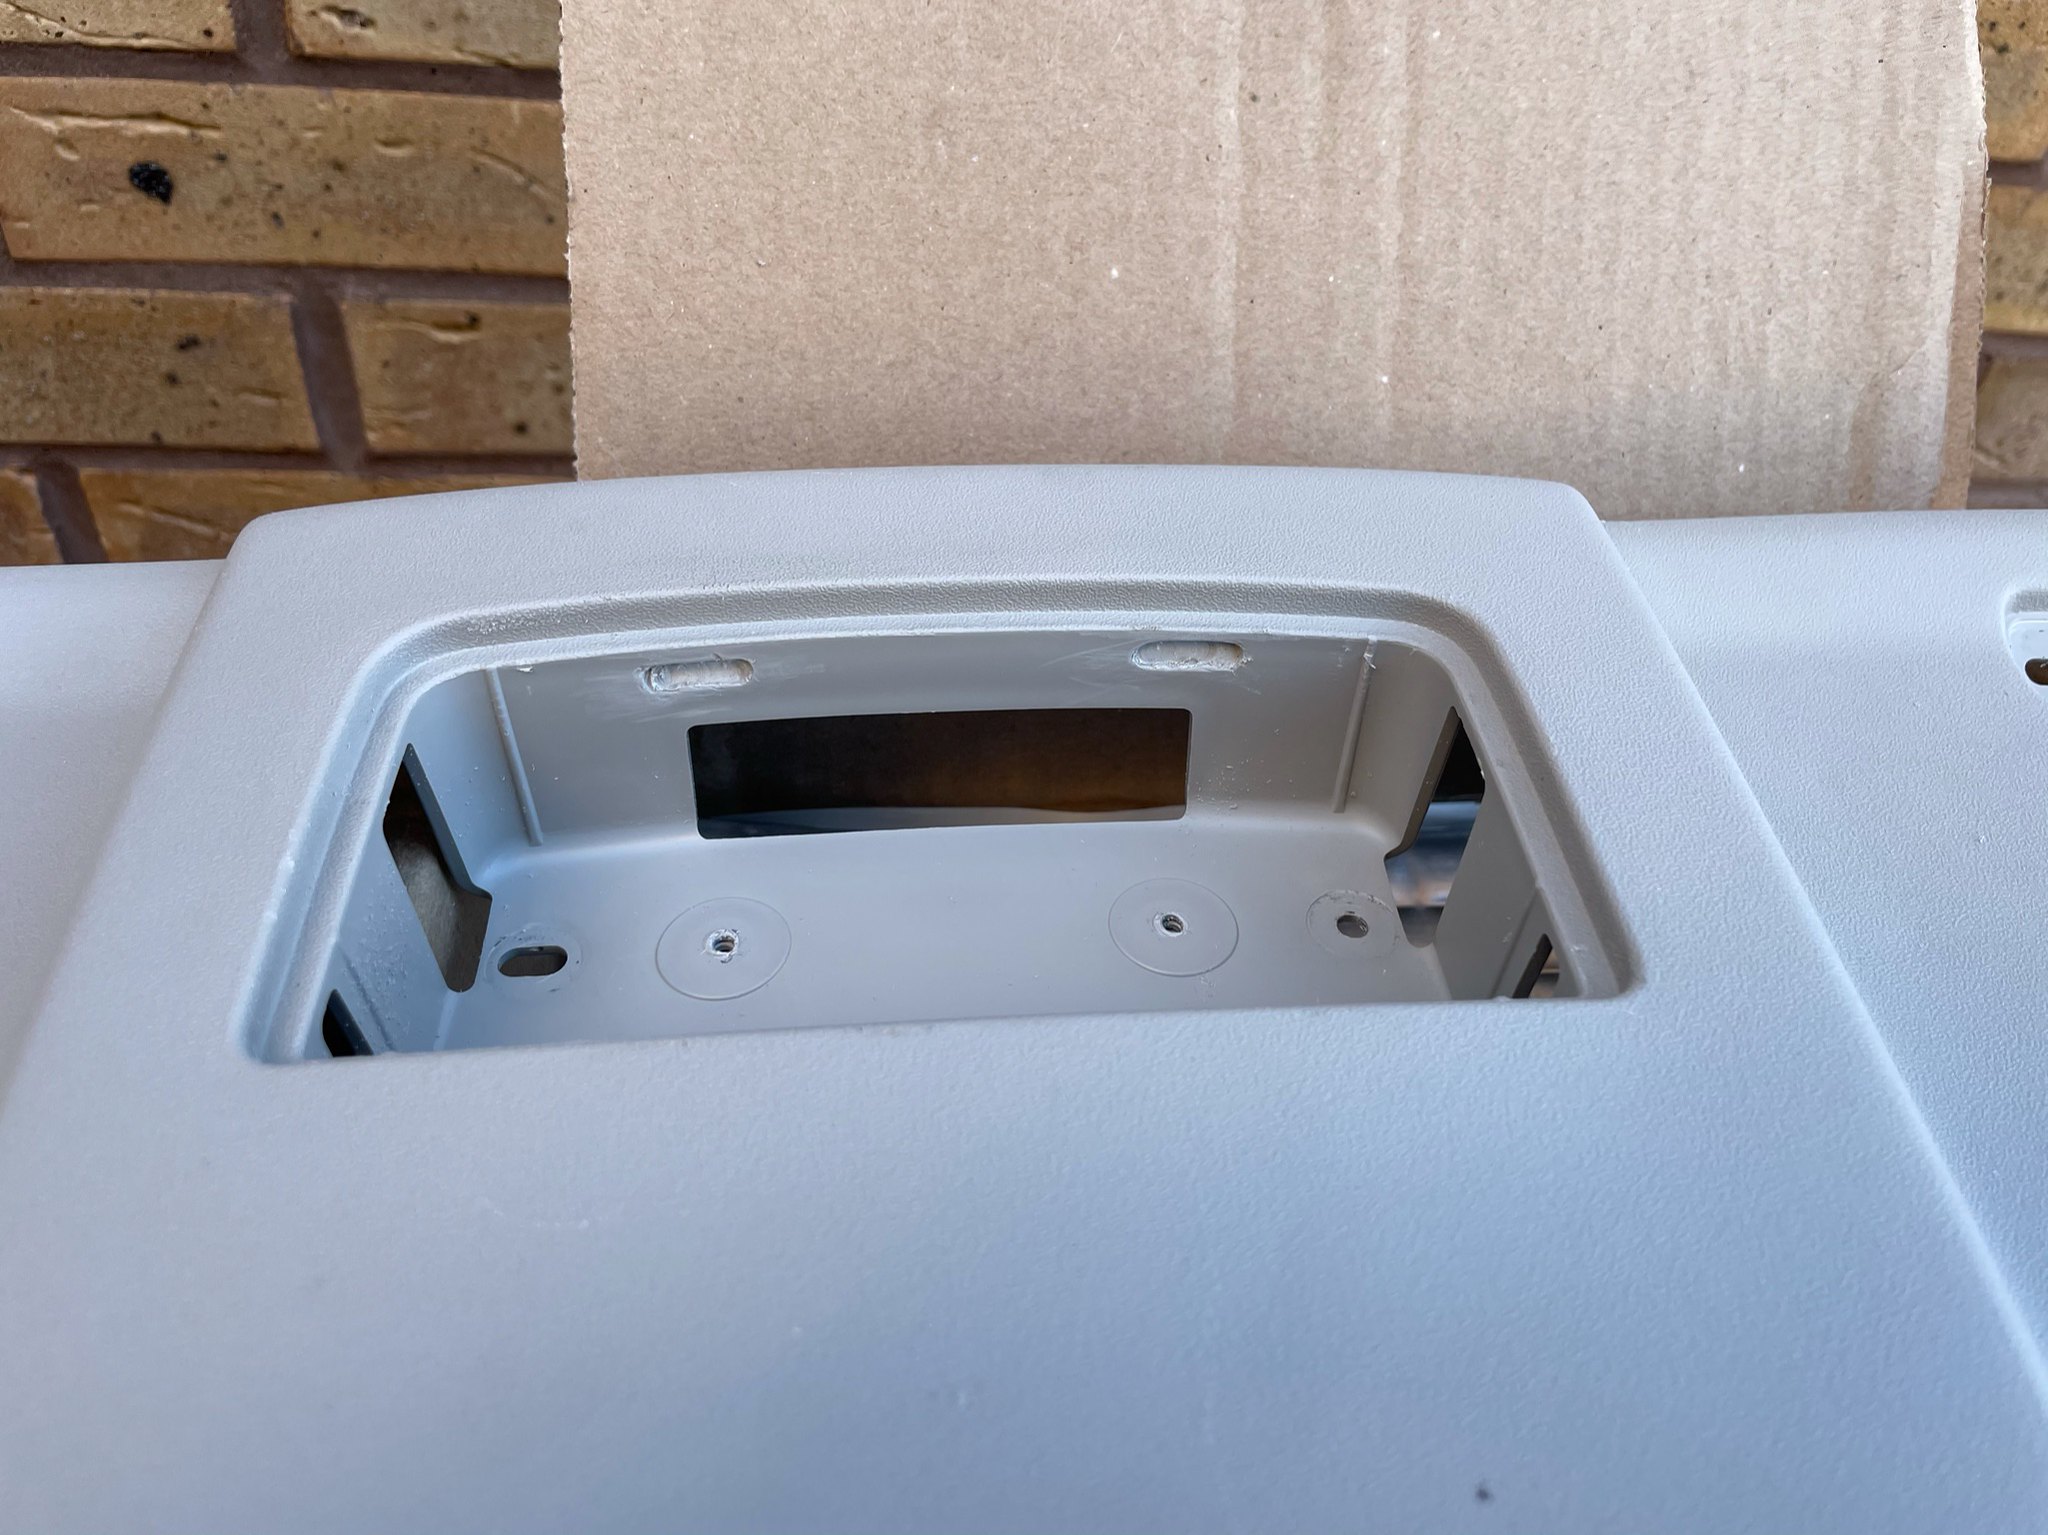
My LLL Parts order finally arrived. Centre console trim blank fitted.


Interior barn door handle fitted.
Replacement near side barn door catch.

Replaced the broken interior light with an upgrade W8 light. Cut away the light housing with a dremel to allow the connector to fit and created some grooves for the new light clips.


Took the opportunity with the headlining out to add some silent coat, dodo mat thermo van liner and recycled plastic insulation.
Properly sick of removing the interior trim at this point! Hopefully this was the last time, I hate that A pillar trim with a passion...
Reassembled everything including some replacement sun visor clips after I destroyed the original set

Also added some silent coat in the front and rear footwells.

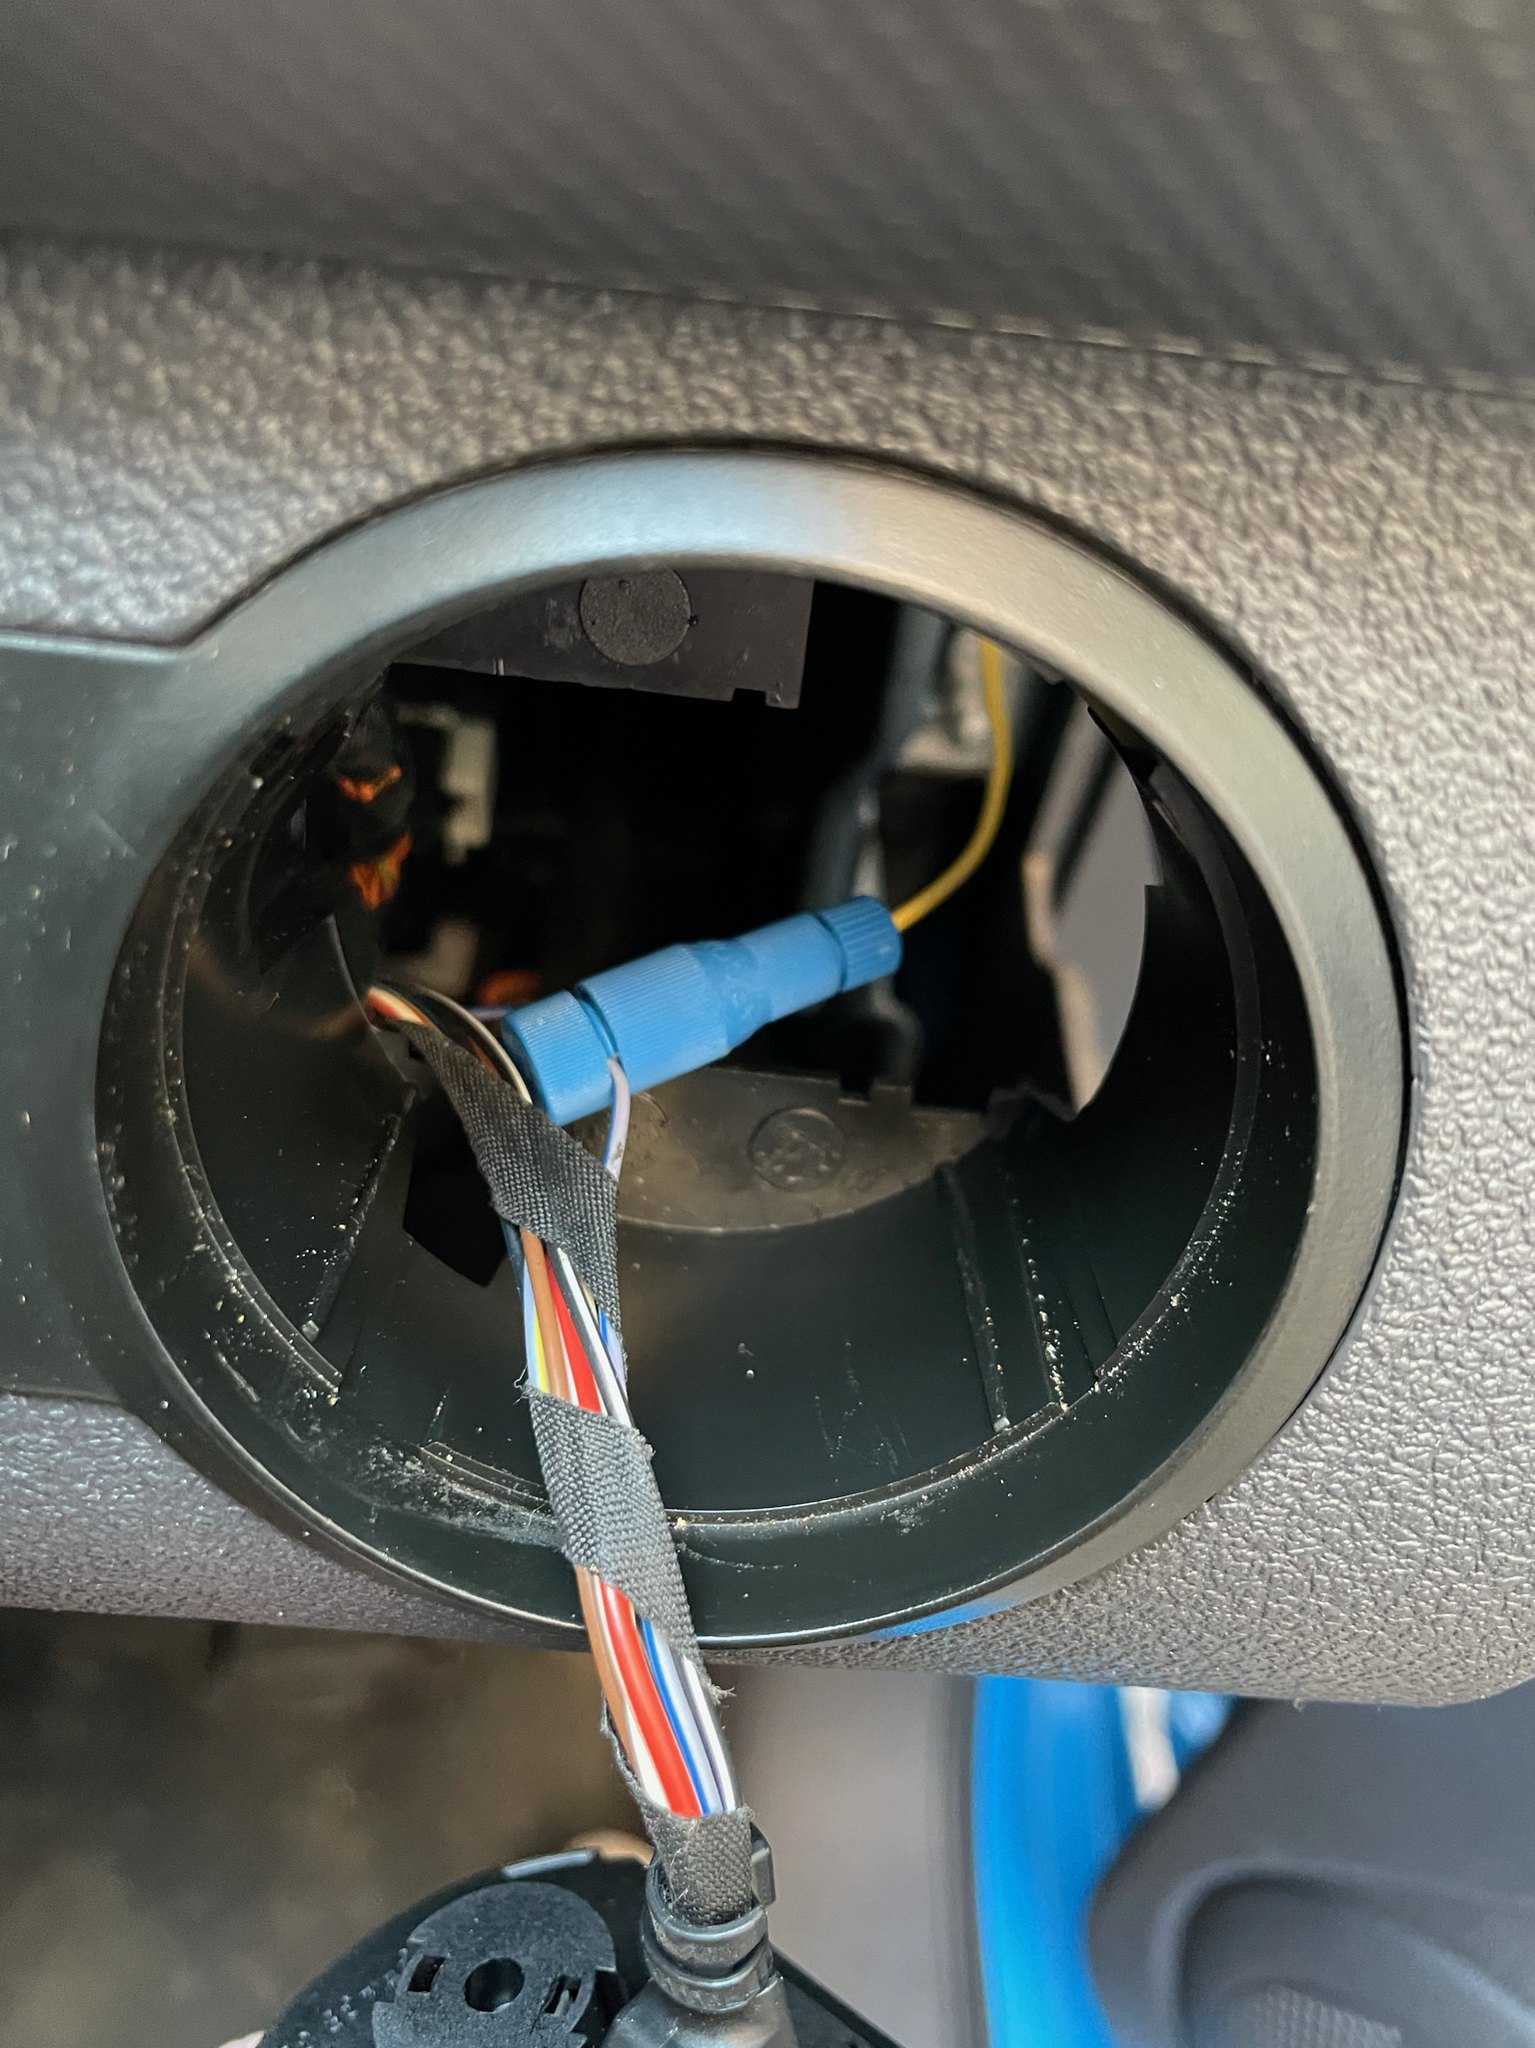
The M12 plastic grommets I ordered arrived so finally able to get the solar wired up! Fit perfectly in the spare British Gas aerial holes.

Added some sealant just to be safe.
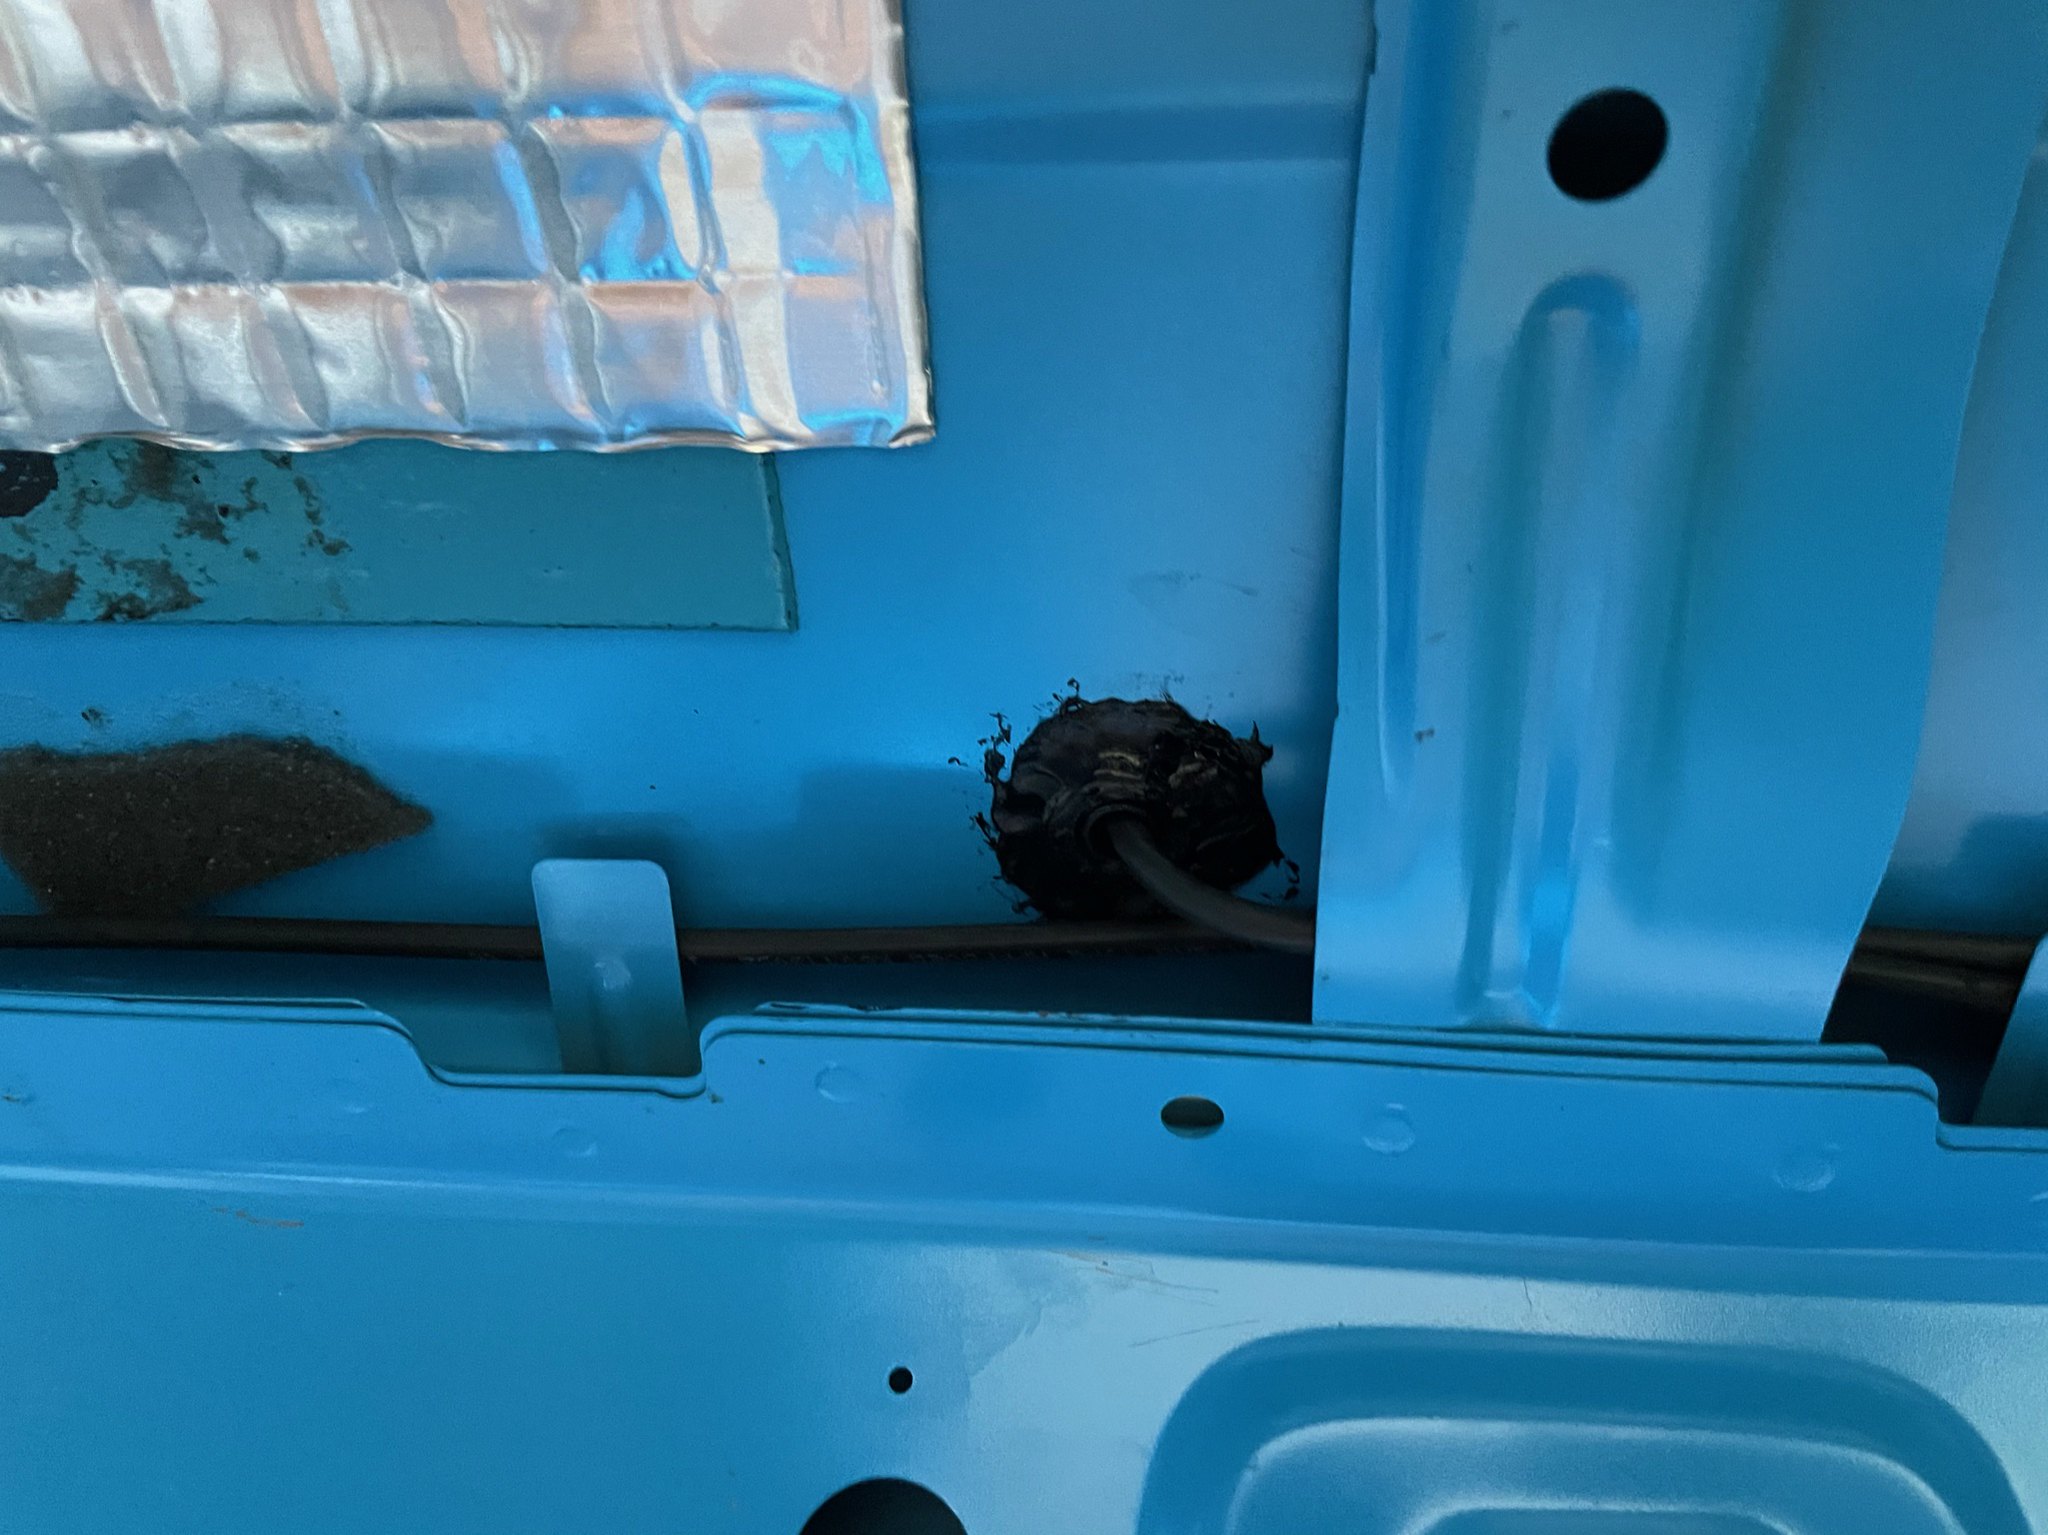
Threaded the cable along the inside of the roof and down the passenger side to the leisure electrics.

Tidied up the excess cable on the panel.

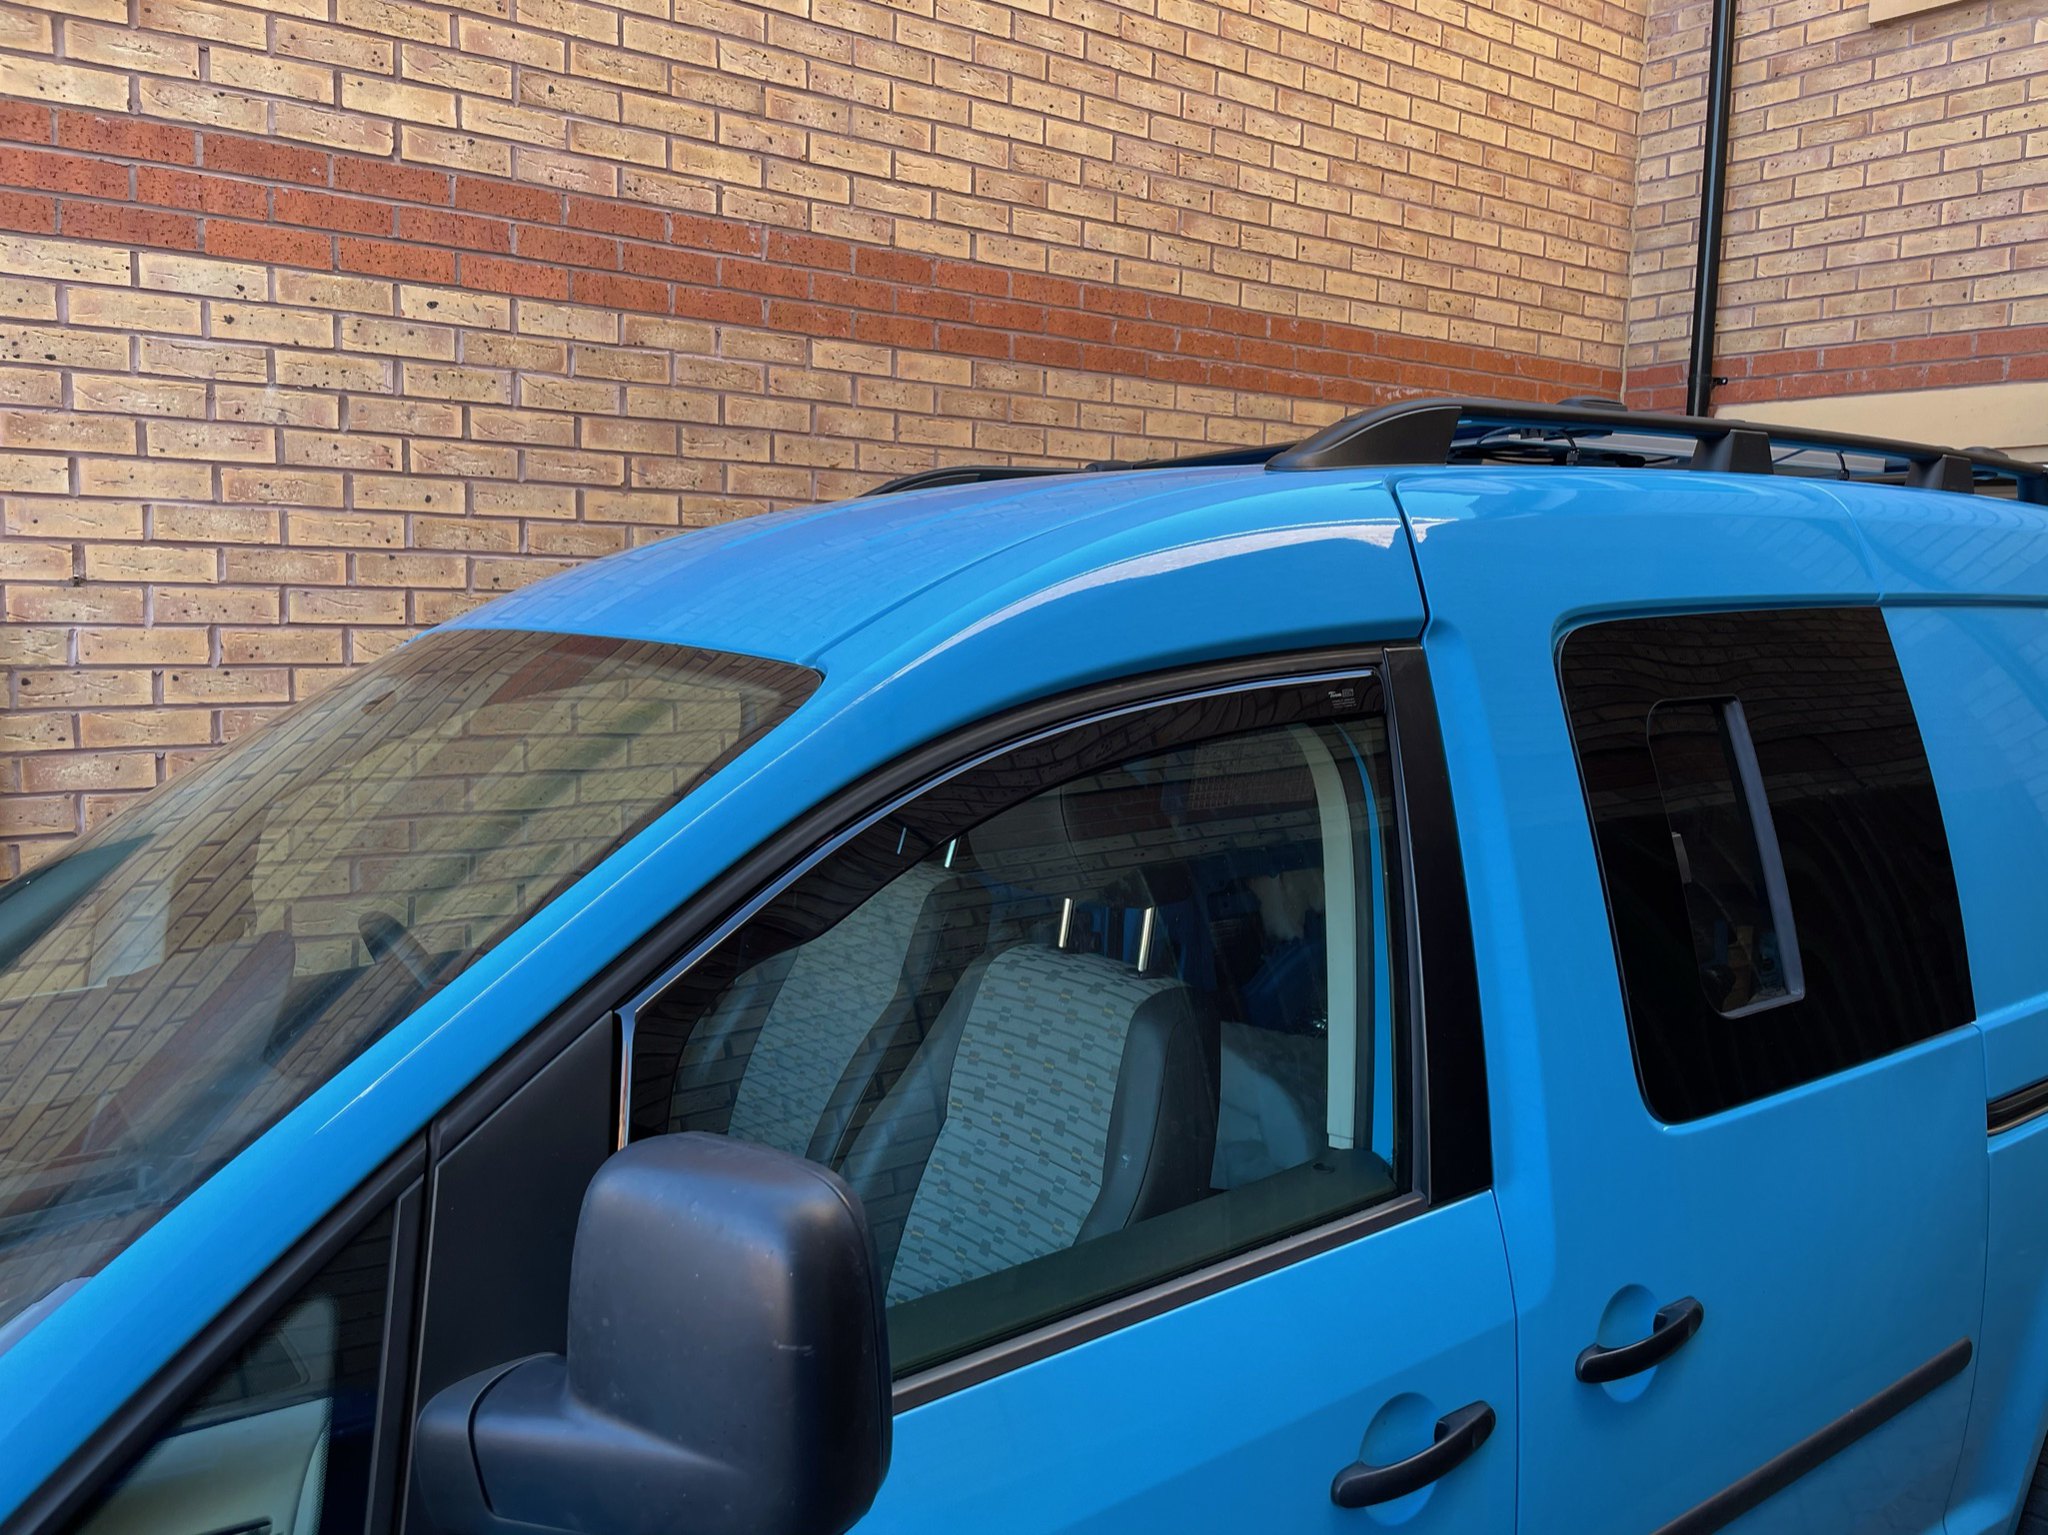
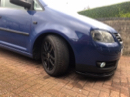
Panel installed. Properly pleased with how this turned out, it’s so discreet. Barely noticeable it has a solar panel on the roof looking at the van from head height.
Installed a 12V socket I’m planning to use for a fridge. I had to trim the plastic mount under the centre console to fit the spade connectors in though.

Next up was the van-x curtains. Mixed feelings about these to be honest. The material is decent quality but for the price I had expected the rails to be pre-shaped. Instead I had to make up a little tool with some spare ply to bend them into shape.


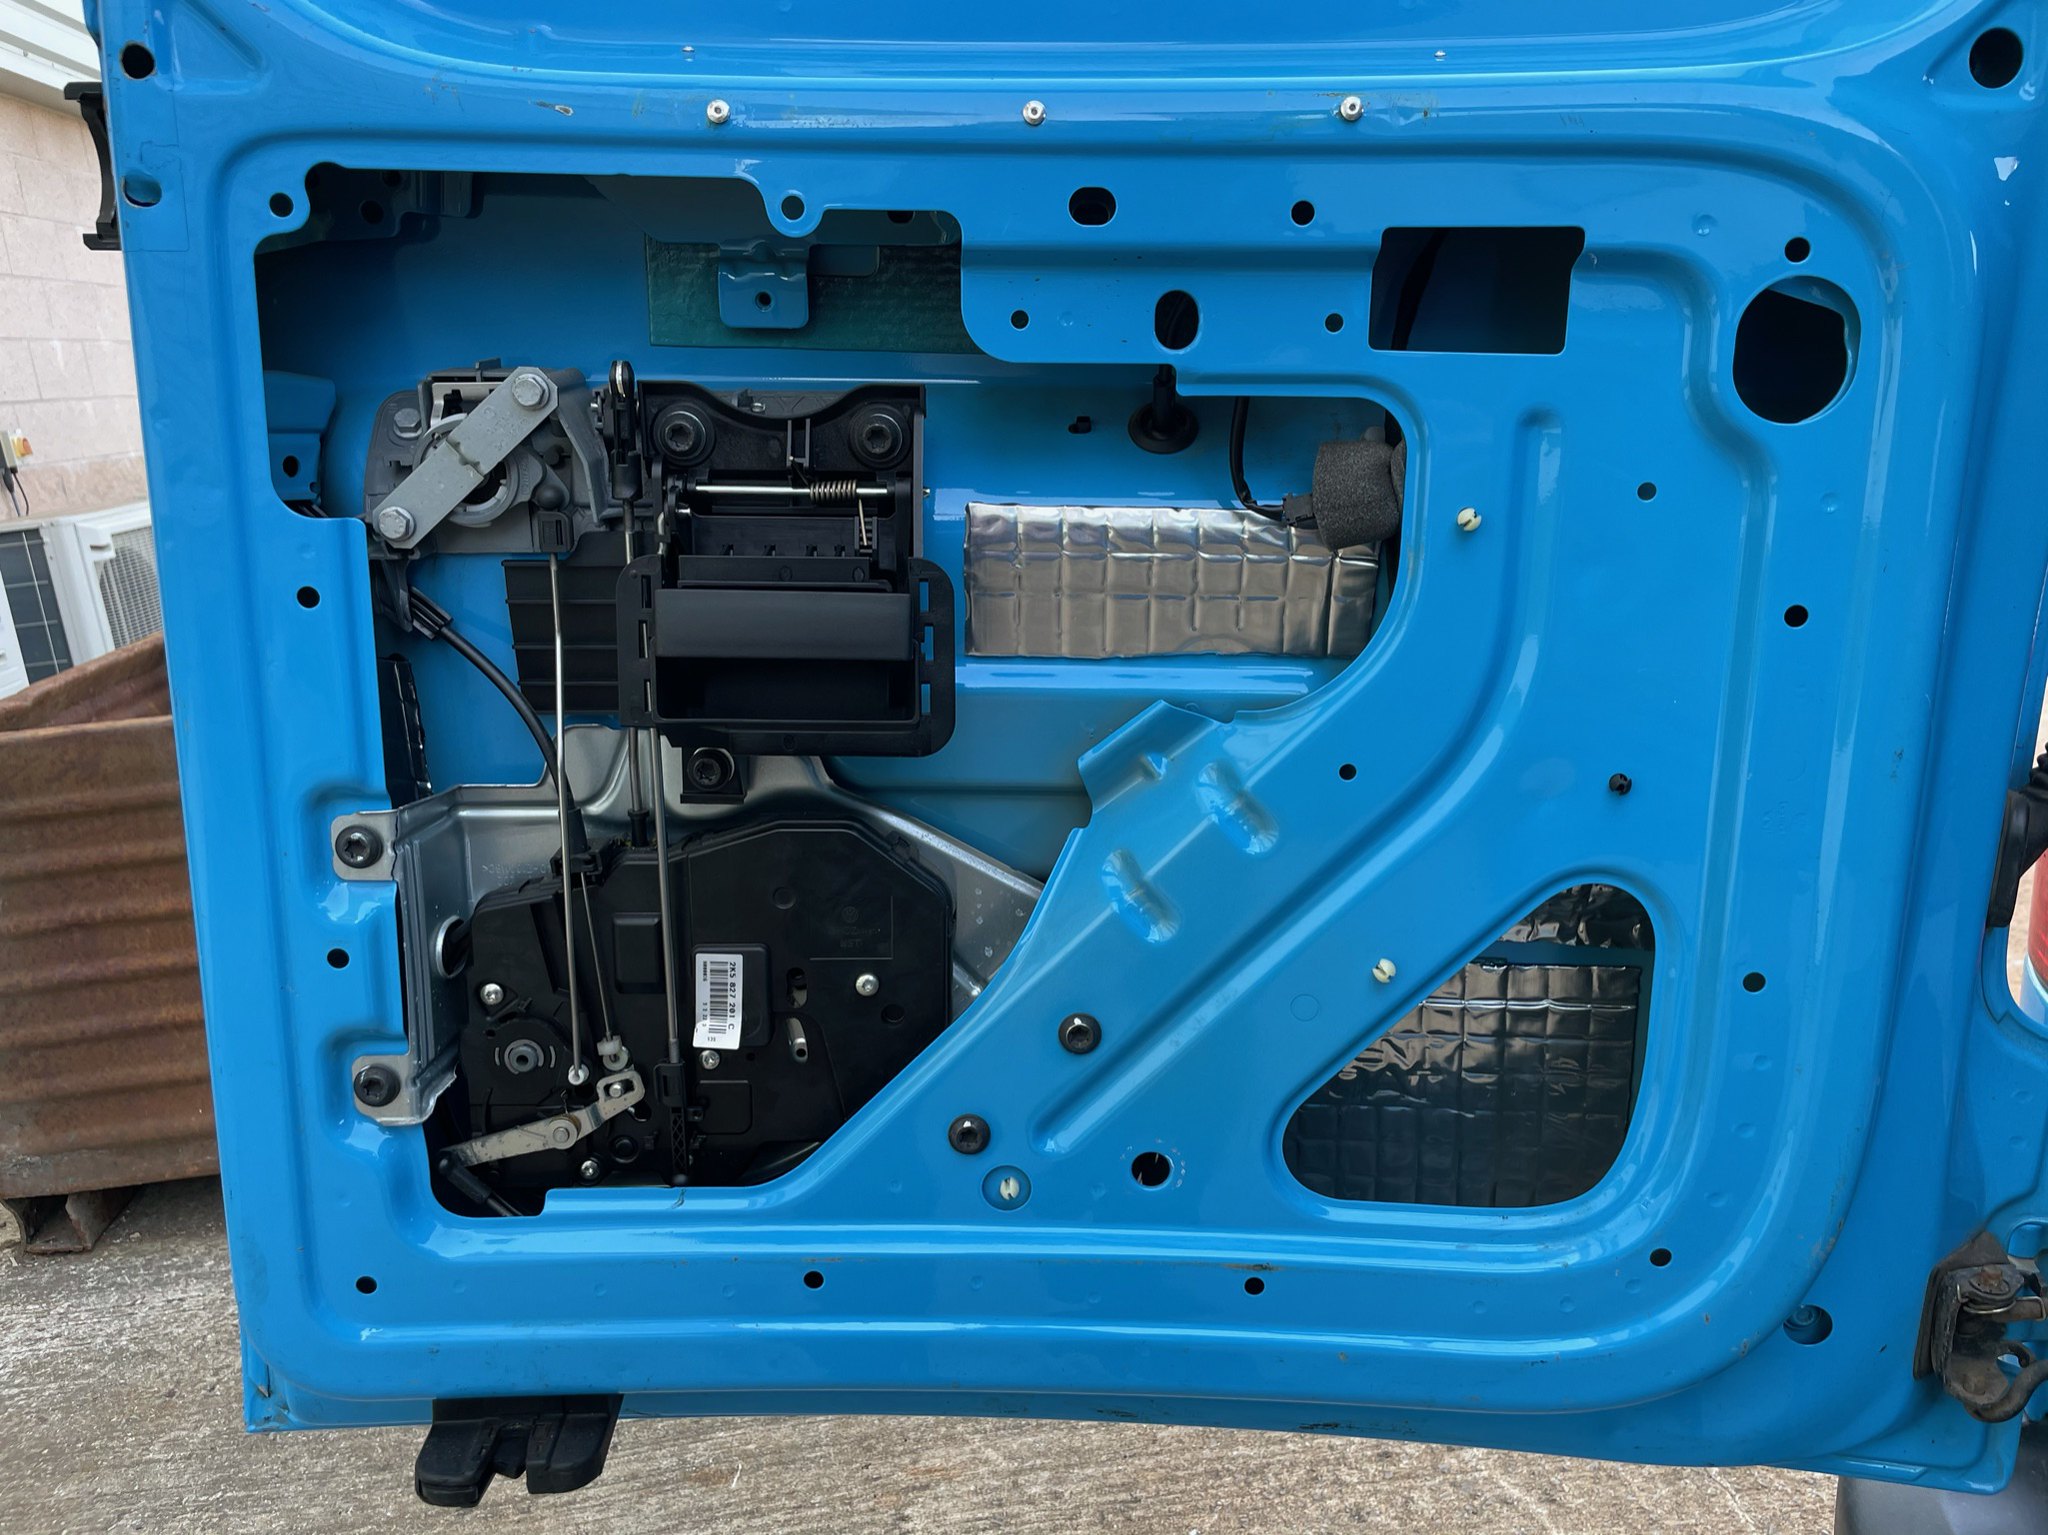
Insulated the sliding and barn doors with B&Q recycled plastic (on top of the silent coat I applied a while back) and then covered with a layer of dodo mat thermo van liner.

Used the existing door and side trim panels as templates and cut replacements from 3.6mm ply.

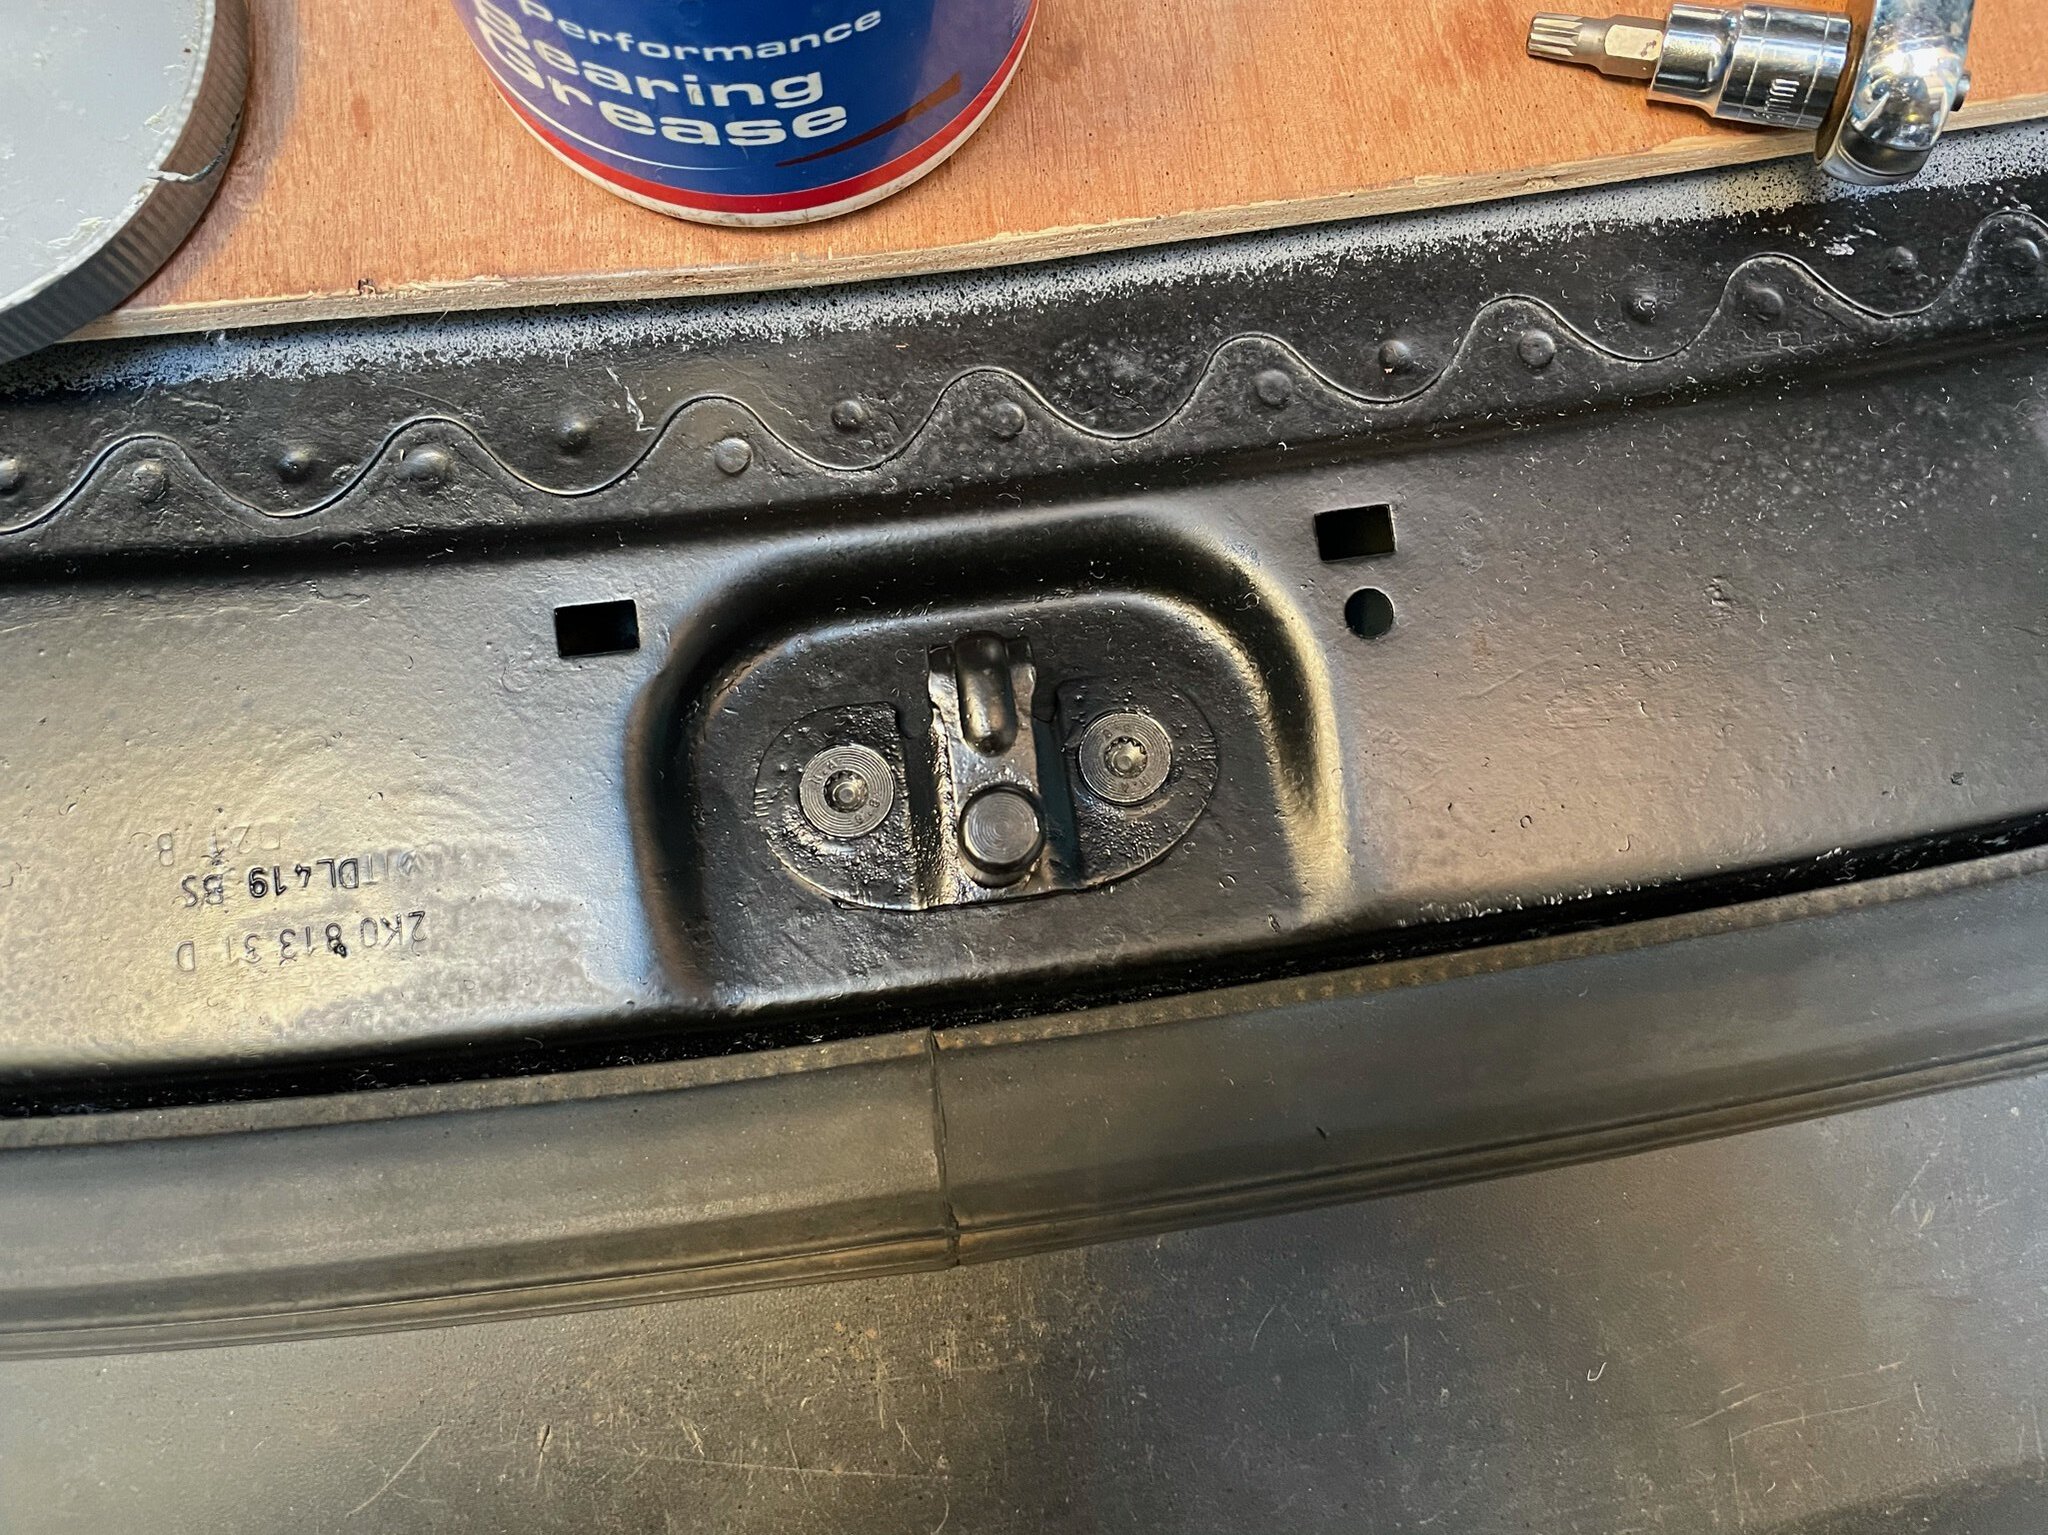
Sprayed the barn door striker plates I’d sandblasted and reinstalled along with replacement VW bolts for the ones I’d had to drill out.
Heko wind deflectors fitted.
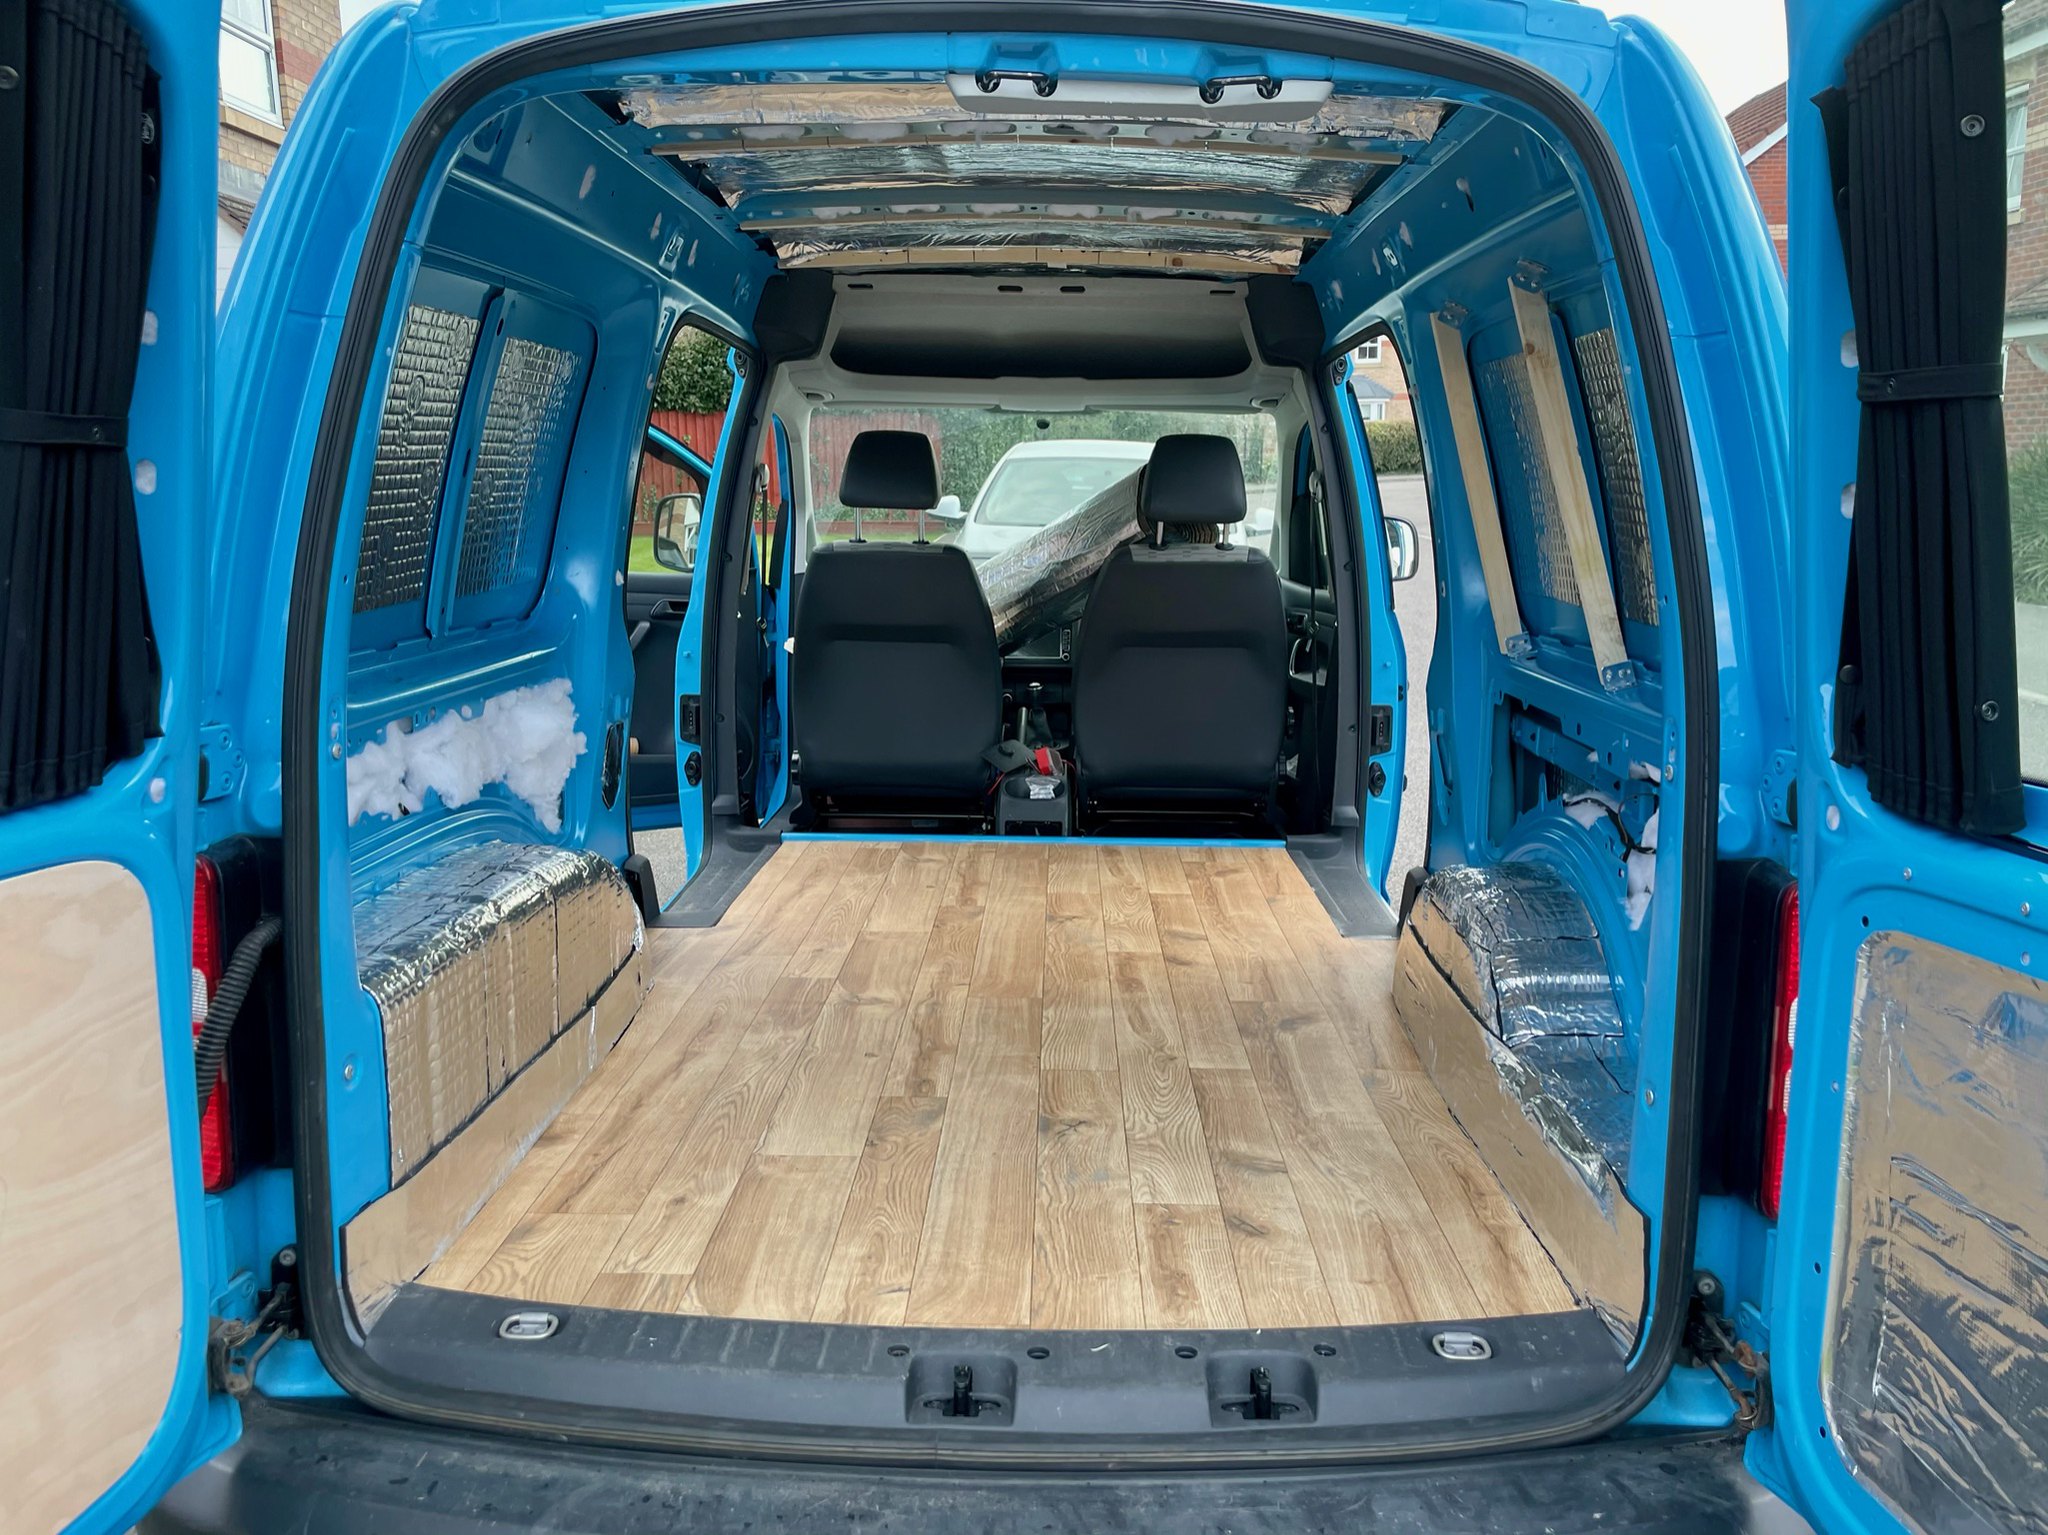
Lifted the new floor ply and added a layer of thermo van liner for insulation and to prevent the ply flexing when walked on.


Used the existing tie down locations with some new countersunk M6 x 50mm fasteners to secure the ply. Also added a little sealant where the two sections met at the middle of the van as there was a small amount of flex I wasn’t happy with.

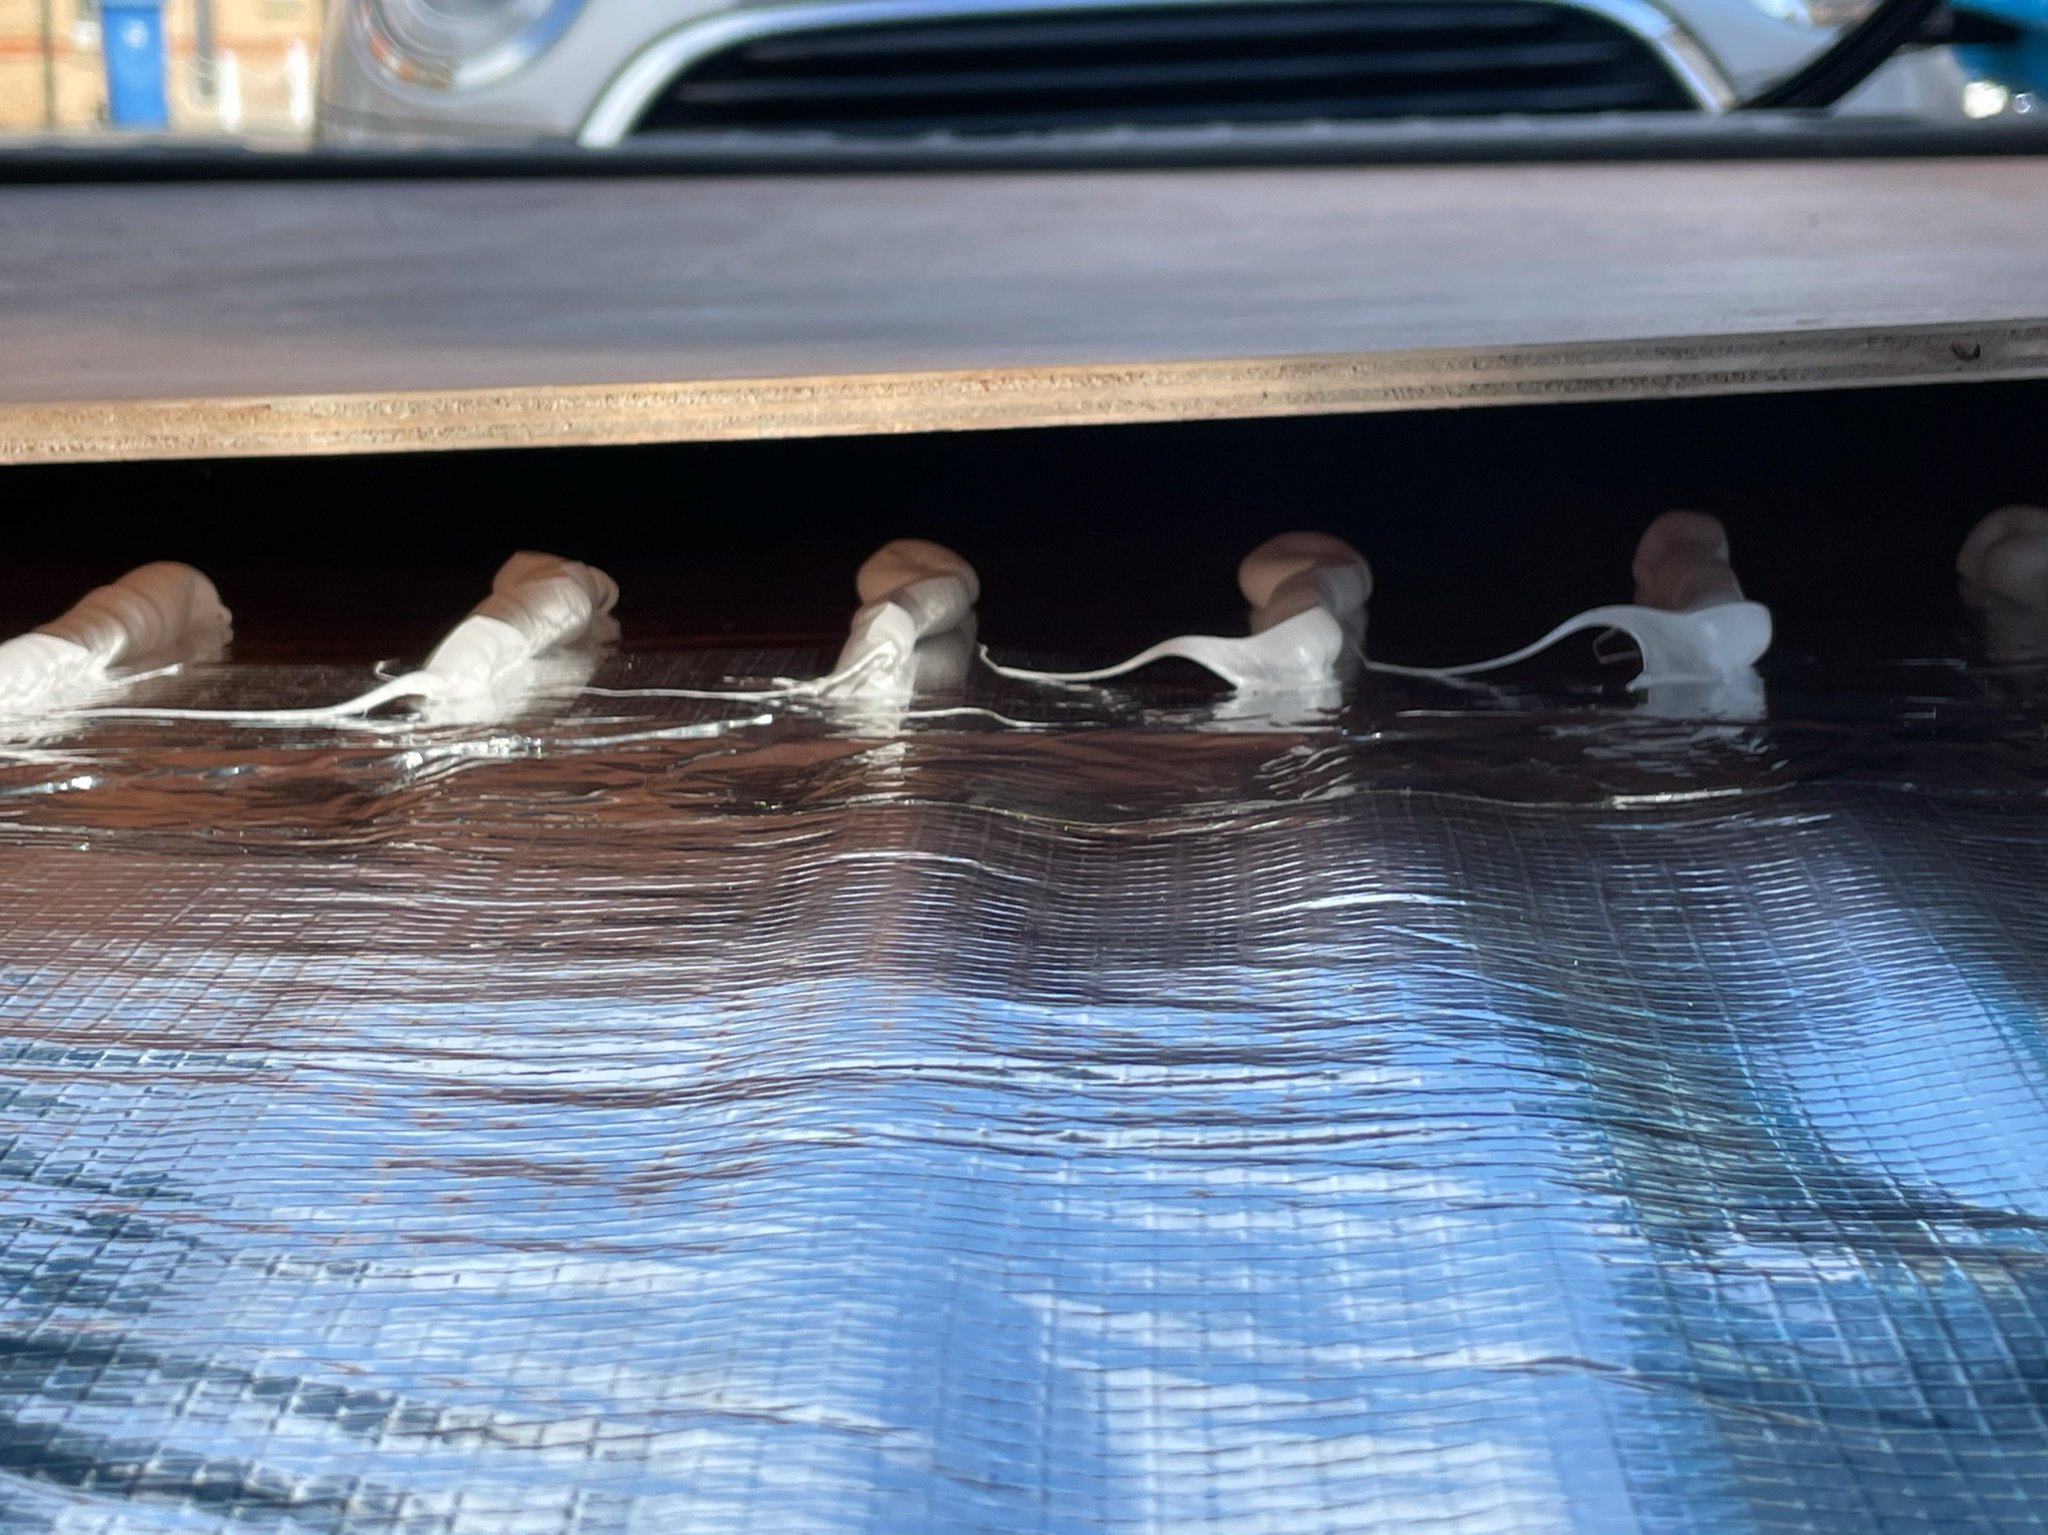
Next up starting the ceiling prep for the cladding to eventually go up. Cut some 19x38mm battens down to size with cuts made along the length to help them flex and then bonded to the ceiling using Sikaflex EBT sealant. I’d seen this recommended no end online but was massively disappointed. It takes an absolute age to cure.
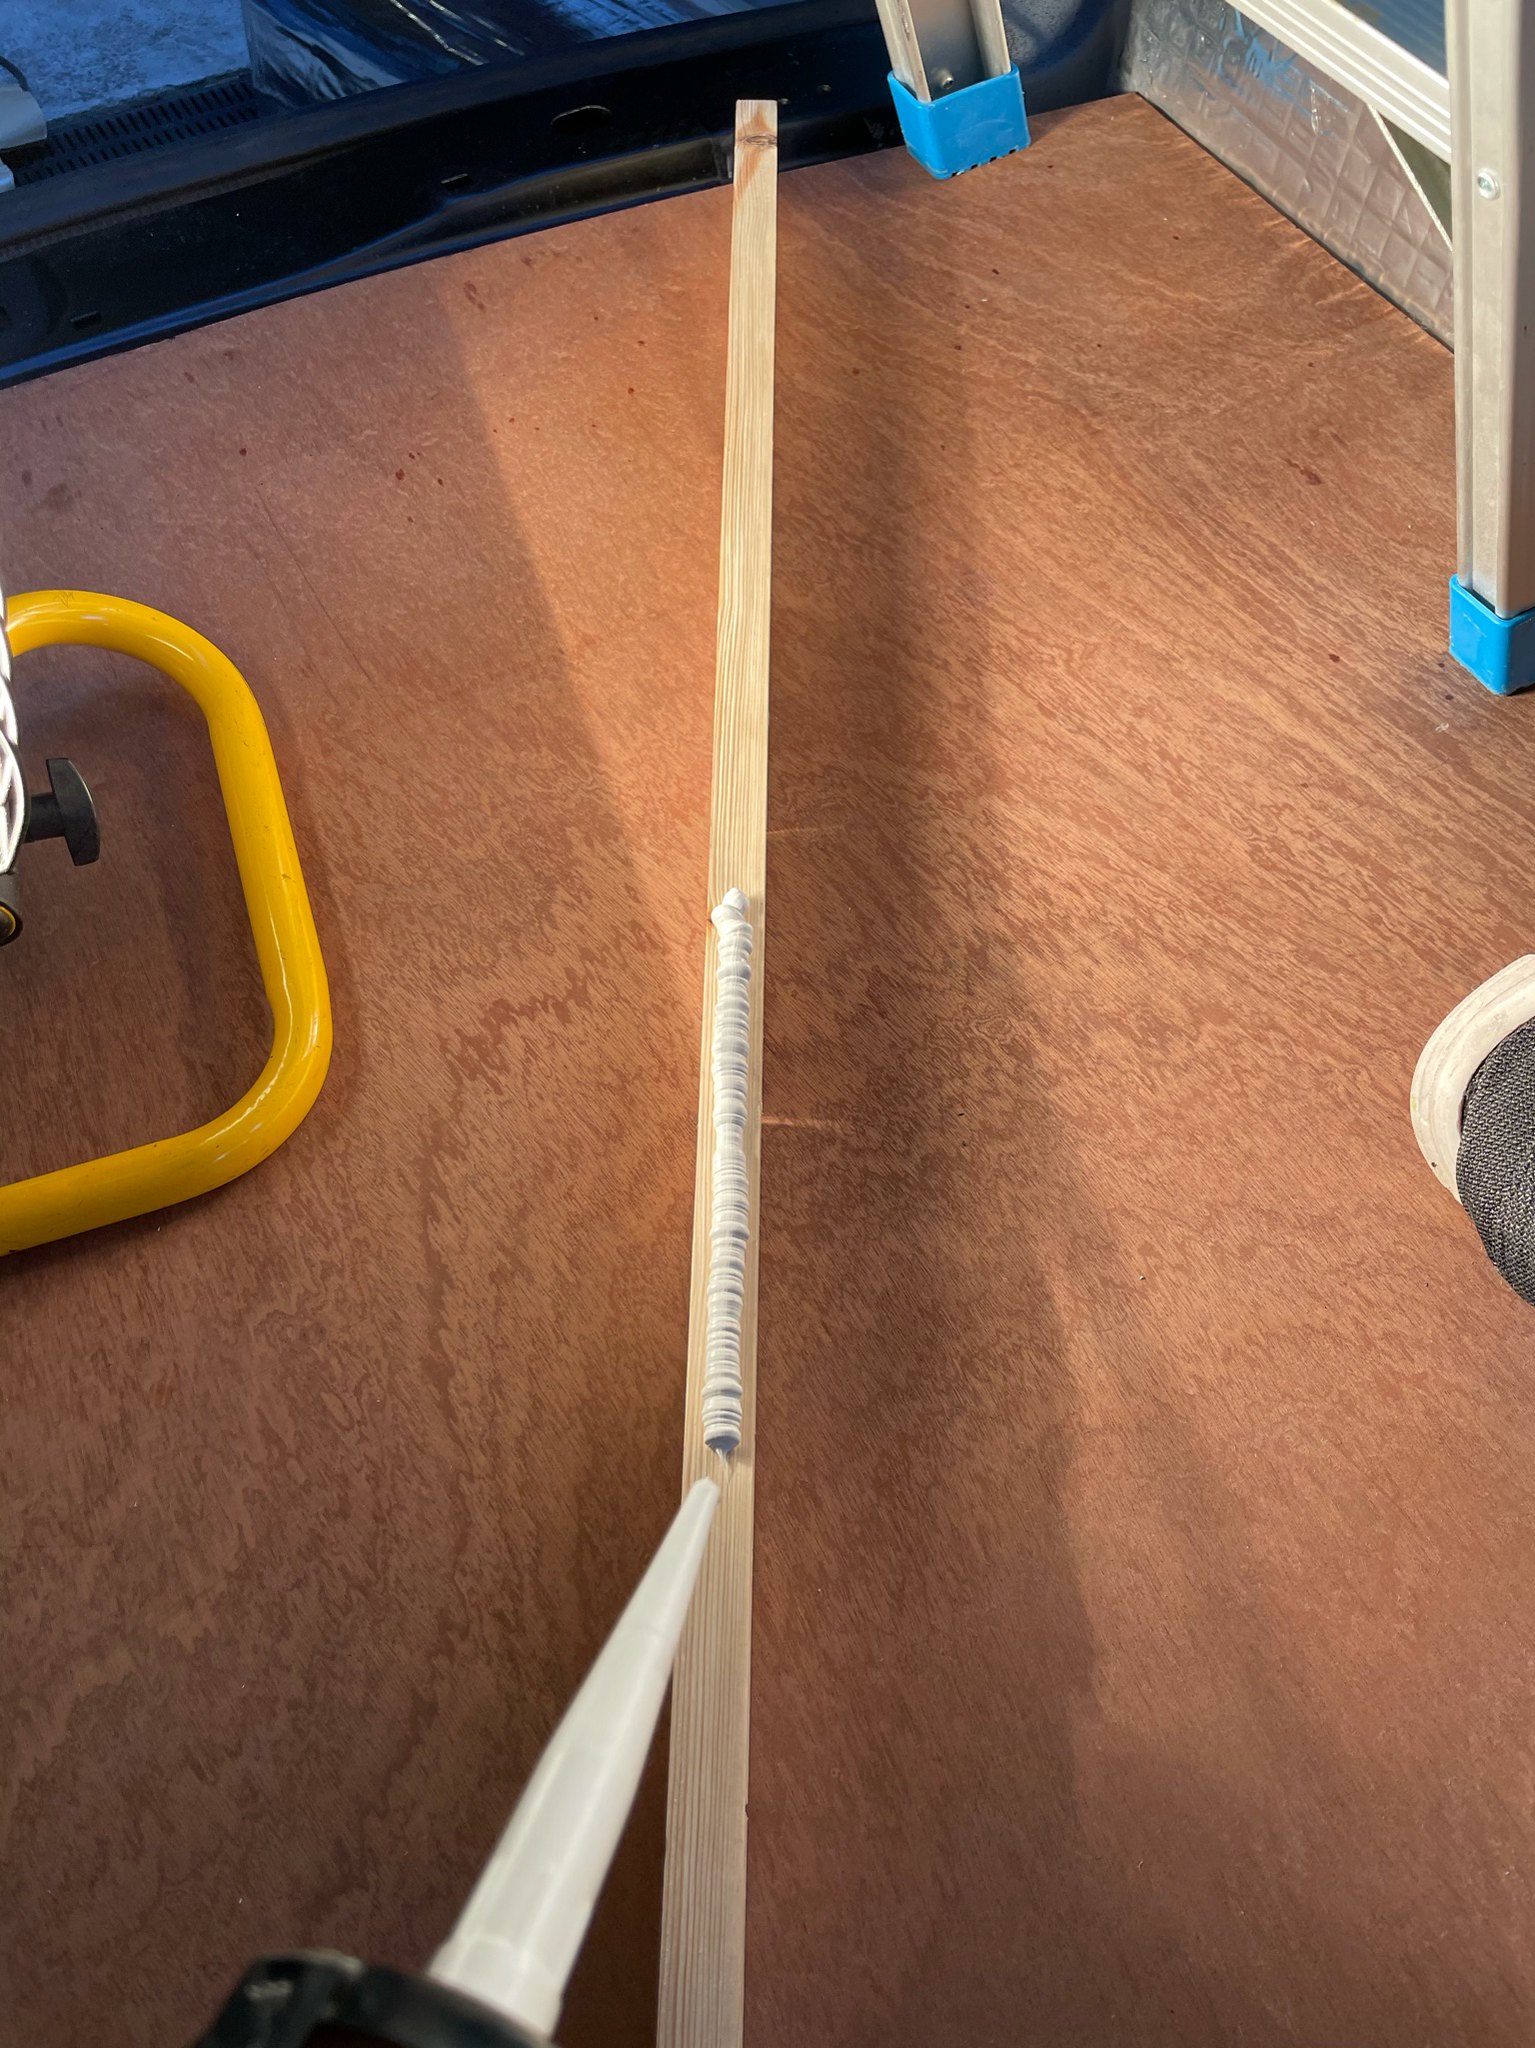
I had to assemble a makeshift support to hold each batten in place while the Sikaflex set. As an aside those Irwin quick grips are bloody brilliant!

I could have drilled battens to the ridged supports and saved myself this hassle but I wanted to try and maximise every cm possible of headroom in the back when the ceiling is in. The lower edge of the battens was pretty much inline with the metal ridges so I didn’t lose any height.

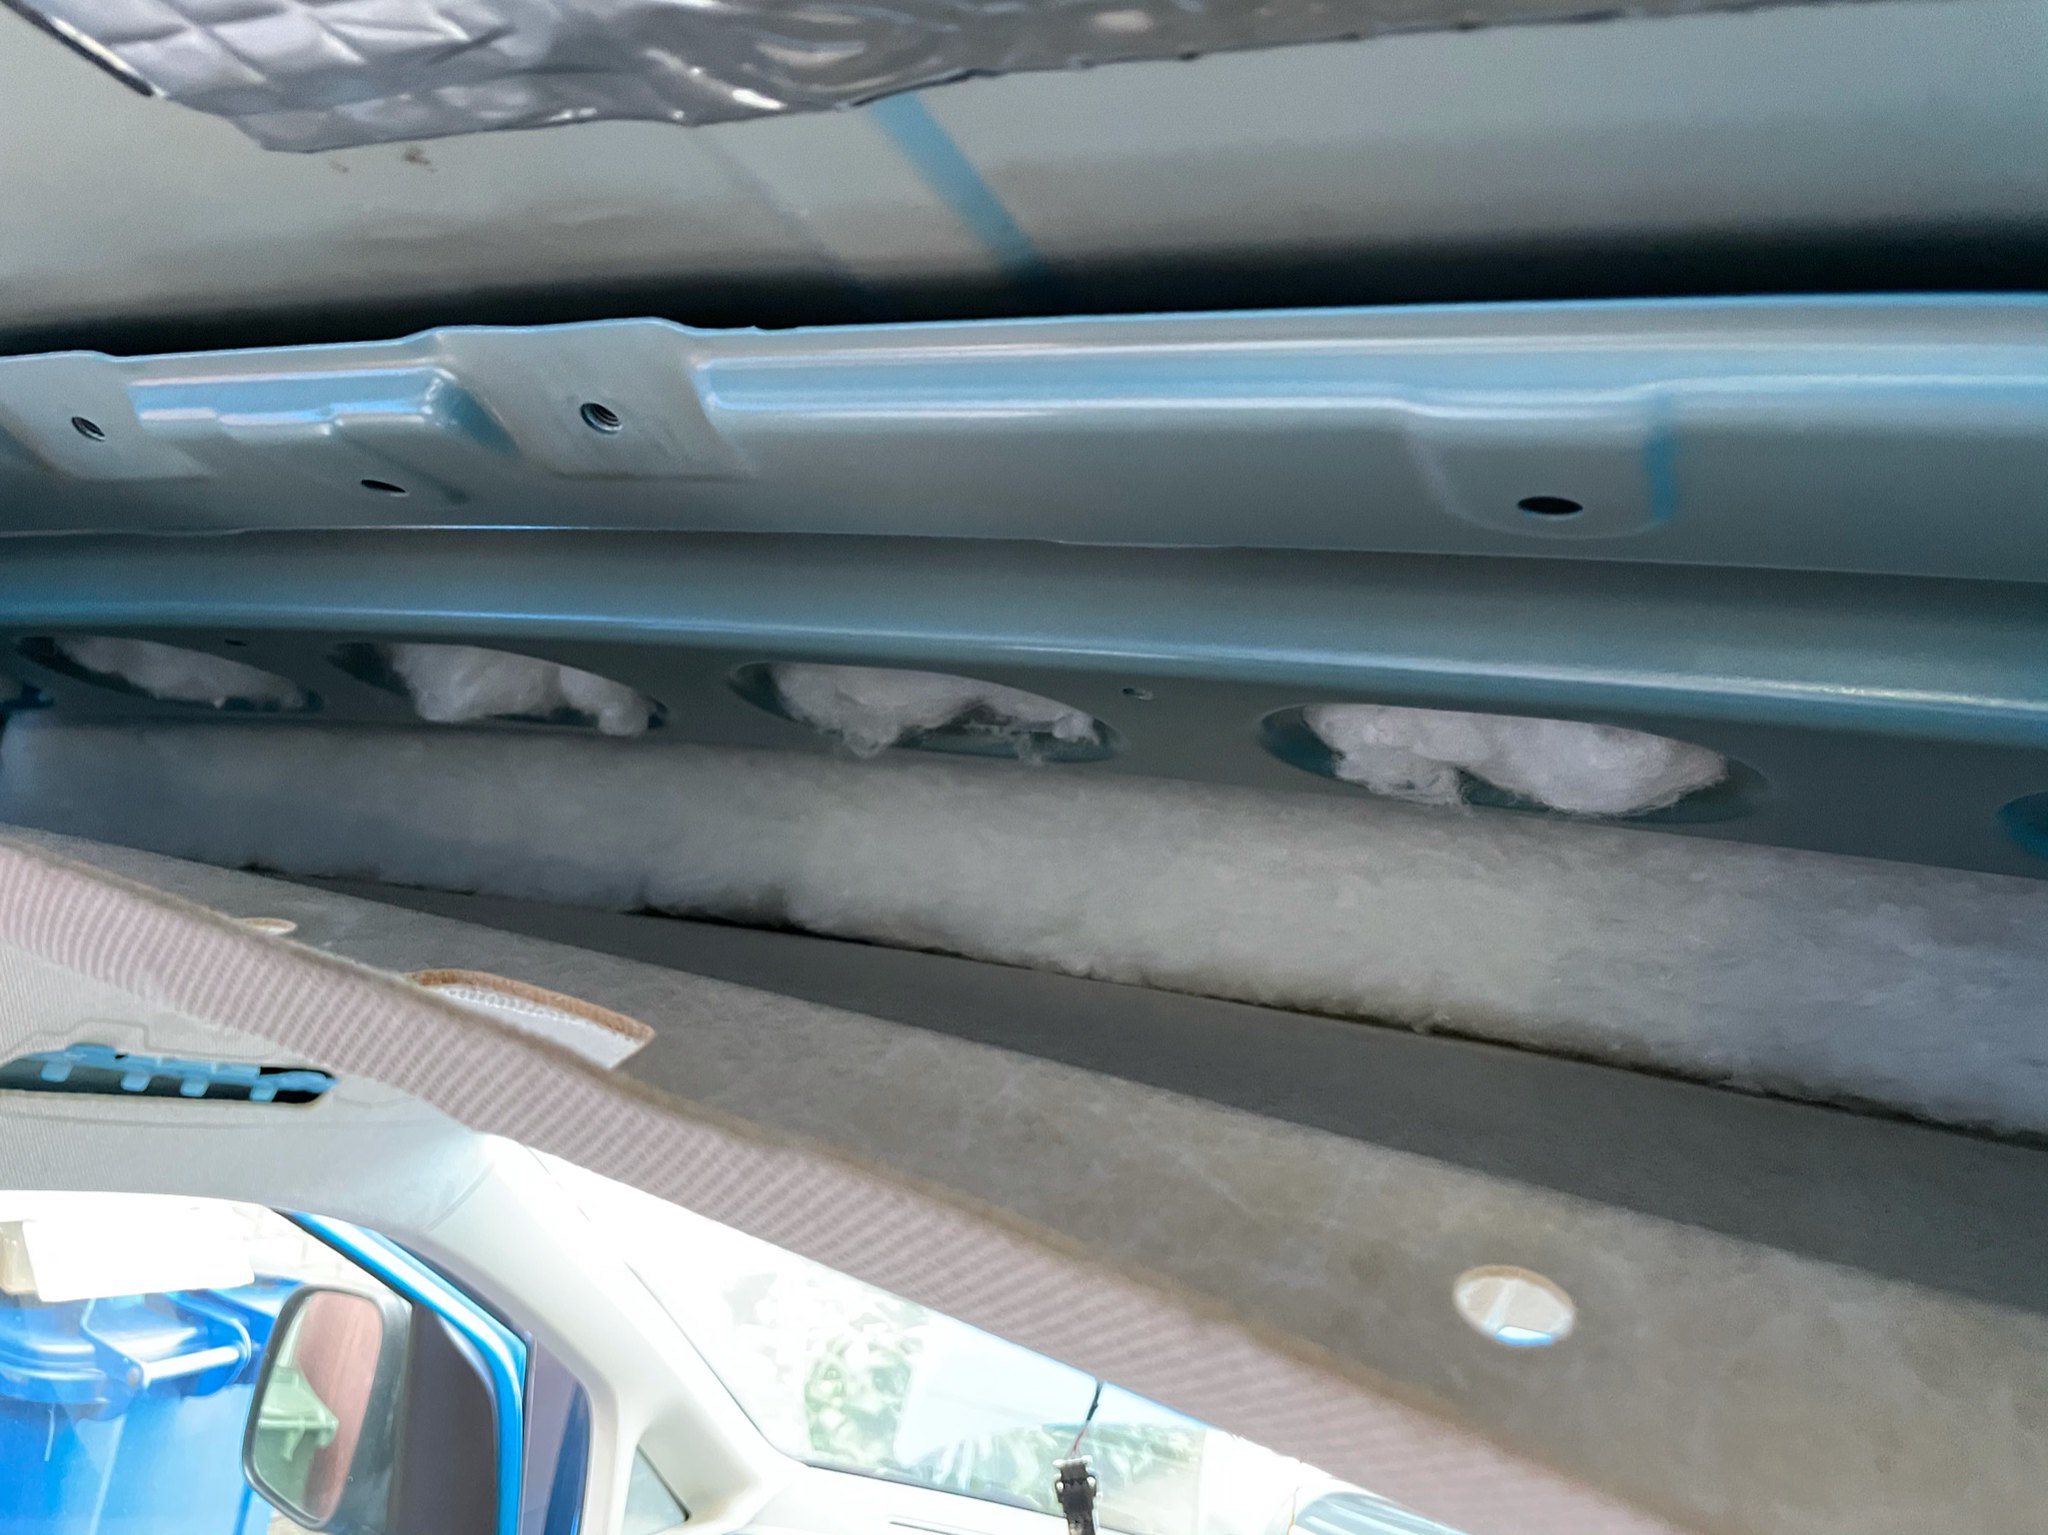
Added a layer of thermo van liner in between each batten and spent what felt like a lifetime adding recycled plastic to every cavity in the ceiling, along the van sides and doors.
Now I could get the flooring fitted. Getting this down has completely changed the look and feel of the van, over the moon with it! I had my head set on having the planks running lengthways in the van to eventually match the ceiling so had to buy way more vinyl than I needed but think it’s worth it. I actually have enough spare to do another caddy maxi if anyone is interested. Will stick it in the for sale section when I get chance.

Picked up some 15x15mm plastic edging to tidy up around the side door trim.


First up thought of an easy way to blank off the leftover BG window plate holes with some rivets. Looks much better now.
My LLL Parts order finally arrived. Centre console trim blank fitted.
Interior barn door handle fitted.
Replacement near side barn door catch.
Replaced the broken interior light with an upgrade W8 light. Cut away the light housing with a dremel to allow the connector to fit and created some grooves for the new light clips.
Took the opportunity with the headlining out to add some silent coat, dodo mat thermo van liner and recycled plastic insulation.
Properly sick of removing the interior trim at this point! Hopefully this was the last time, I hate that A pillar trim with a passion...
Reassembled everything including some replacement sun visor clips after I destroyed the original set
Also added some silent coat in the front and rear footwells.
The M12 plastic grommets I ordered arrived so finally able to get the solar wired up! Fit perfectly in the spare British Gas aerial holes.
Added some sealant just to be safe.
Threaded the cable along the inside of the roof and down the passenger side to the leisure electrics.
Tidied up the excess cable on the panel.
Panel installed. Properly pleased with how this turned out, it’s so discreet. Barely noticeable it has a solar panel on the roof looking at the van from head height.
Installed a 12V socket I’m planning to use for a fridge. I had to trim the plastic mount under the centre console to fit the spade connectors in though.
Next up was the van-x curtains. Mixed feelings about these to be honest. The material is decent quality but for the price I had expected the rails to be pre-shaped. Instead I had to make up a little tool with some spare ply to bend them into shape.
Insulated the sliding and barn doors with B&Q recycled plastic (on top of the silent coat I applied a while back) and then covered with a layer of dodo mat thermo van liner.
Used the existing door and side trim panels as templates and cut replacements from 3.6mm ply.
Sprayed the barn door striker plates I’d sandblasted and reinstalled along with replacement VW bolts for the ones I’d had to drill out.
Heko wind deflectors fitted.
Lifted the new floor ply and added a layer of thermo van liner for insulation and to prevent the ply flexing when walked on.
Used the existing tie down locations with some new countersunk M6 x 50mm fasteners to secure the ply. Also added a little sealant where the two sections met at the middle of the van as there was a small amount of flex I wasn’t happy with.
Next up starting the ceiling prep for the cladding to eventually go up. Cut some 19x38mm battens down to size with cuts made along the length to help them flex and then bonded to the ceiling using Sikaflex EBT sealant. I’d seen this recommended no end online but was massively disappointed. It takes an absolute age to cure.
I had to assemble a makeshift support to hold each batten in place while the Sikaflex set. As an aside those Irwin quick grips are bloody brilliant!
I could have drilled battens to the ridged supports and saved myself this hassle but I wanted to try and maximise every cm possible of headroom in the back when the ceiling is in. The lower edge of the battens was pretty much inline with the metal ridges so I didn’t lose any height.
Added a layer of thermo van liner in between each batten and spent what felt like a lifetime adding recycled plastic to every cavity in the ceiling, along the van sides and doors.
Now I could get the flooring fitted. Getting this down has completely changed the look and feel of the van, over the moon with it! I had my head set on having the planks running lengthways in the van to eventually match the ceiling so had to buy way more vinyl than I needed but think it’s worth it. I actually have enough spare to do another caddy maxi if anyone is interested. Will stick it in the for sale section when I get chance.
Picked up some 15x15mm plastic edging to tidy up around the side door trim.
-
charlie-
- Caddy2k Groupie
- Posts: 27
- Joined: Thu Feb 25, 2021 3:44 pm
- Engine size/power: 1.6 CR TDI (102bhp)
Re: Ex-BG Caddy Maxi Camper Build
Next up finishing off the electrics and getting the ceiling installed! In addition to the 12v fridge socket I installed in the centre console the van is going to have 6 ceiling down lights connected to a dimmer as well as a combo usb, volt meter, switch and 12v socket panel.
I re-used the British Gas conduit I stripped from the van and ran this from behind passenger seat under the door trim and up to the rear side panel. There’s a load of handy earth points near here which made connecting up the ground wires a breeze.


Dimmer wired up.

Combo panel wired up. I wired the usb, 12v socket and volt meter to the onboard switch. This means I can turn off the display and usb port when not needed as they have a small parasitic drain on the leisure battery even when not in use.

Both connected to the fuse box. The fuse box is powered by the Victron MPPT load output which will automatically manage power for me depending on the battery voltage.

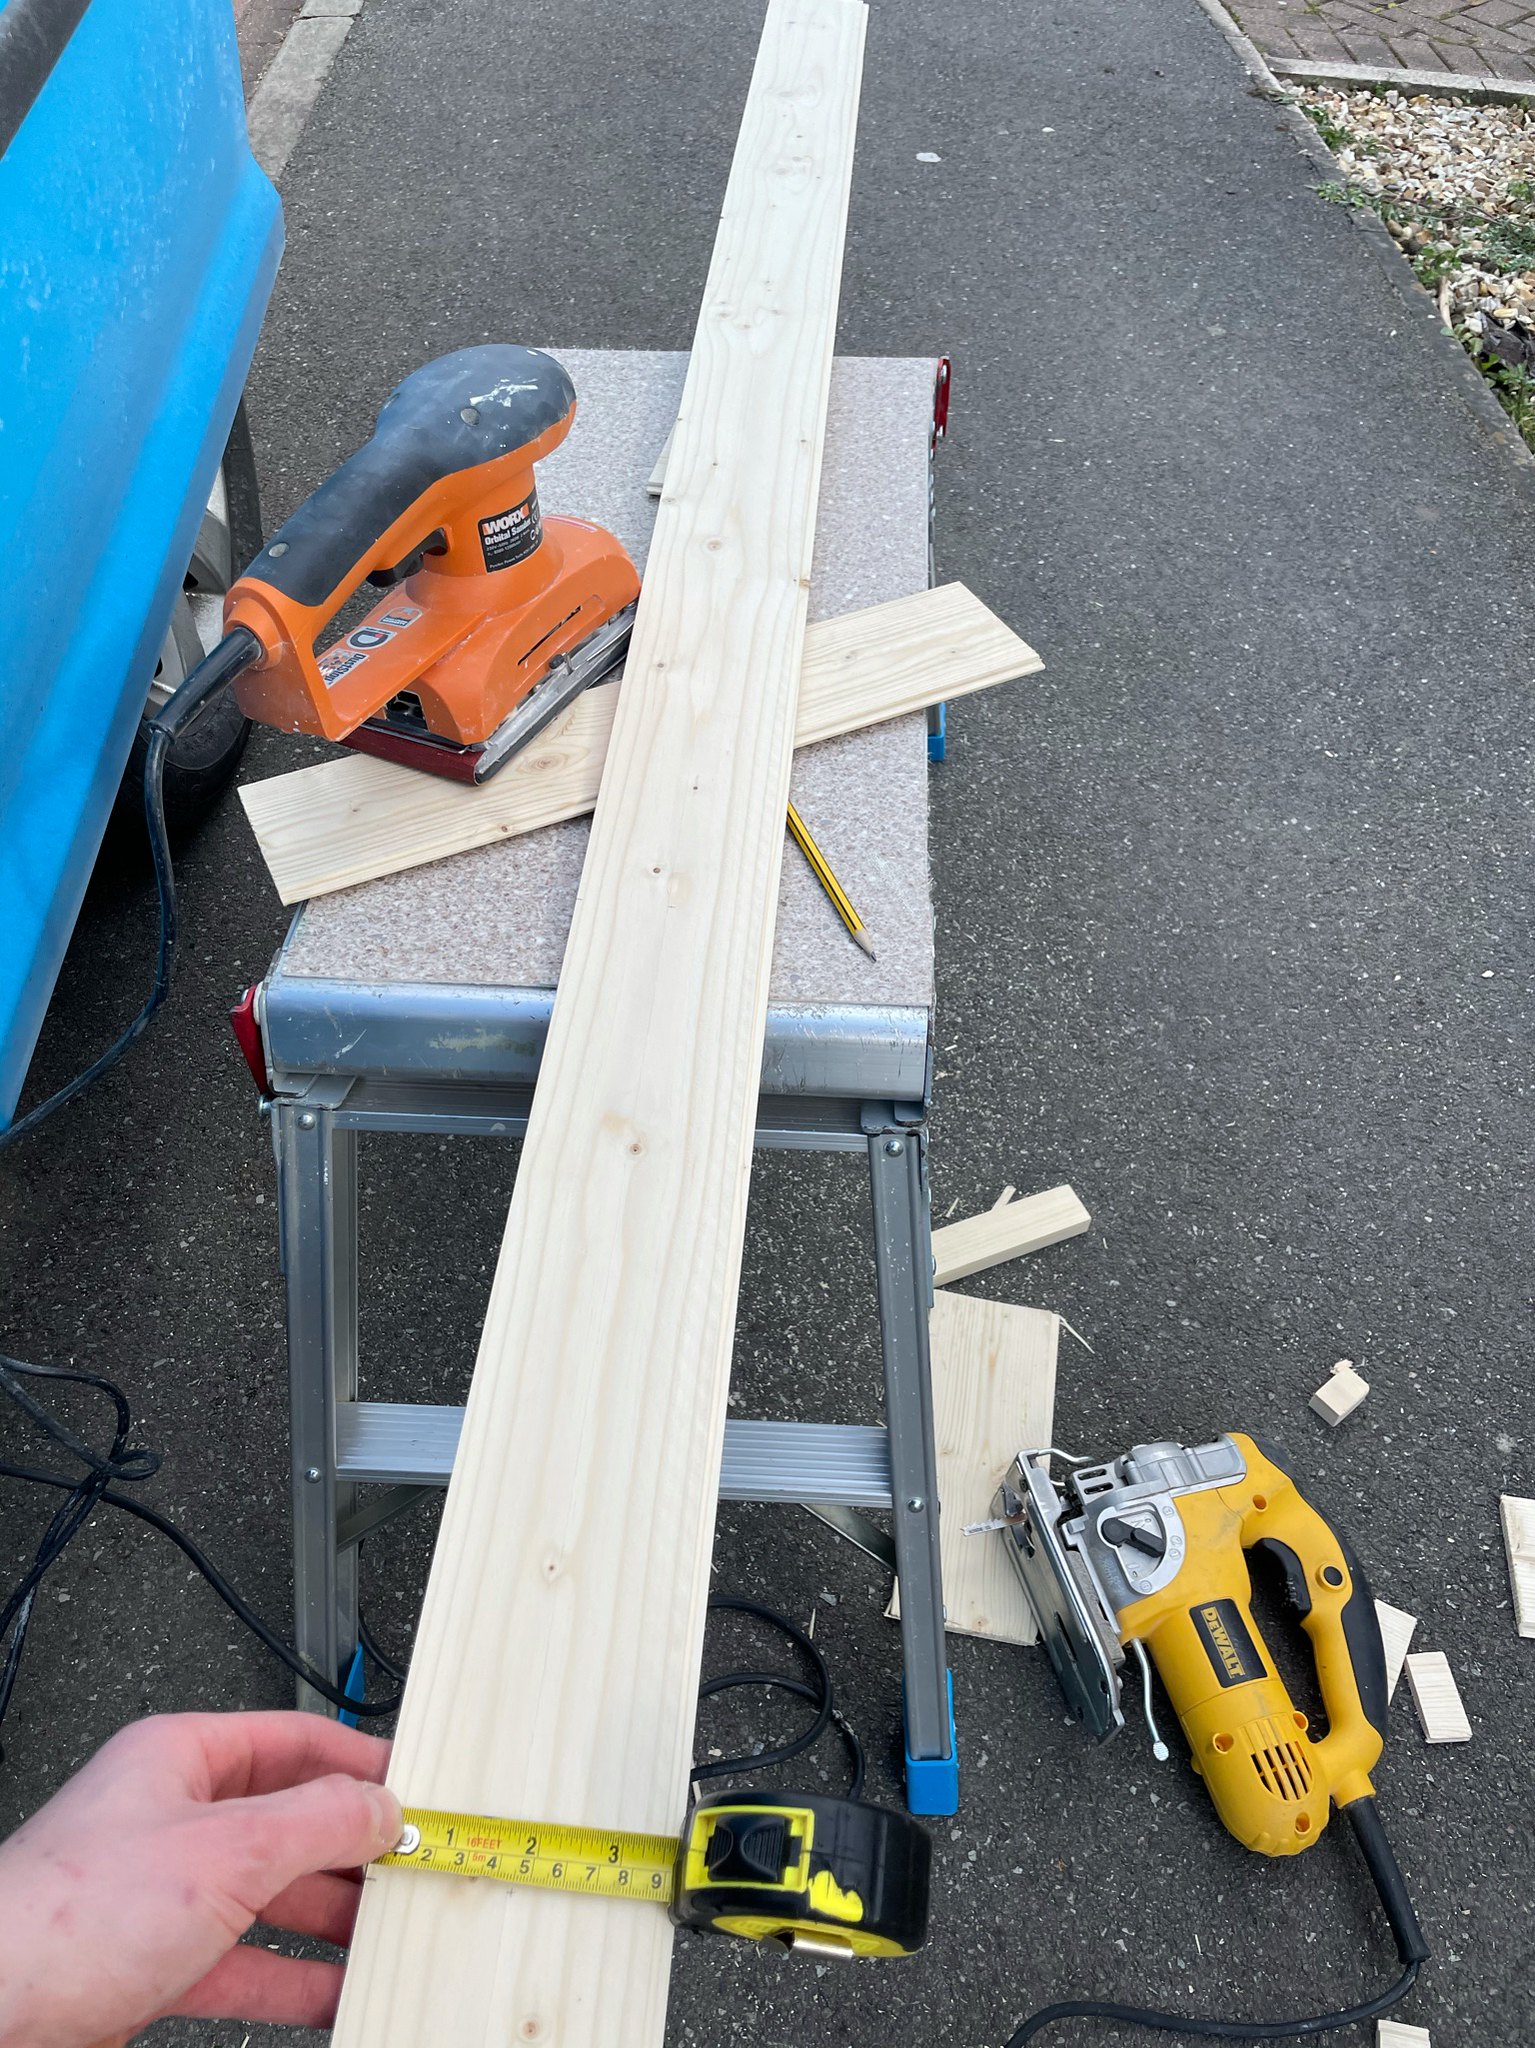
First pieces of cladding cut to length. I picked this up from Wickes 8mm thick x 94mm wide (90mm excluding the tongue) x 2400mm long. It worked out really well as 12 pieces fit along the ceiling almost perfectly!
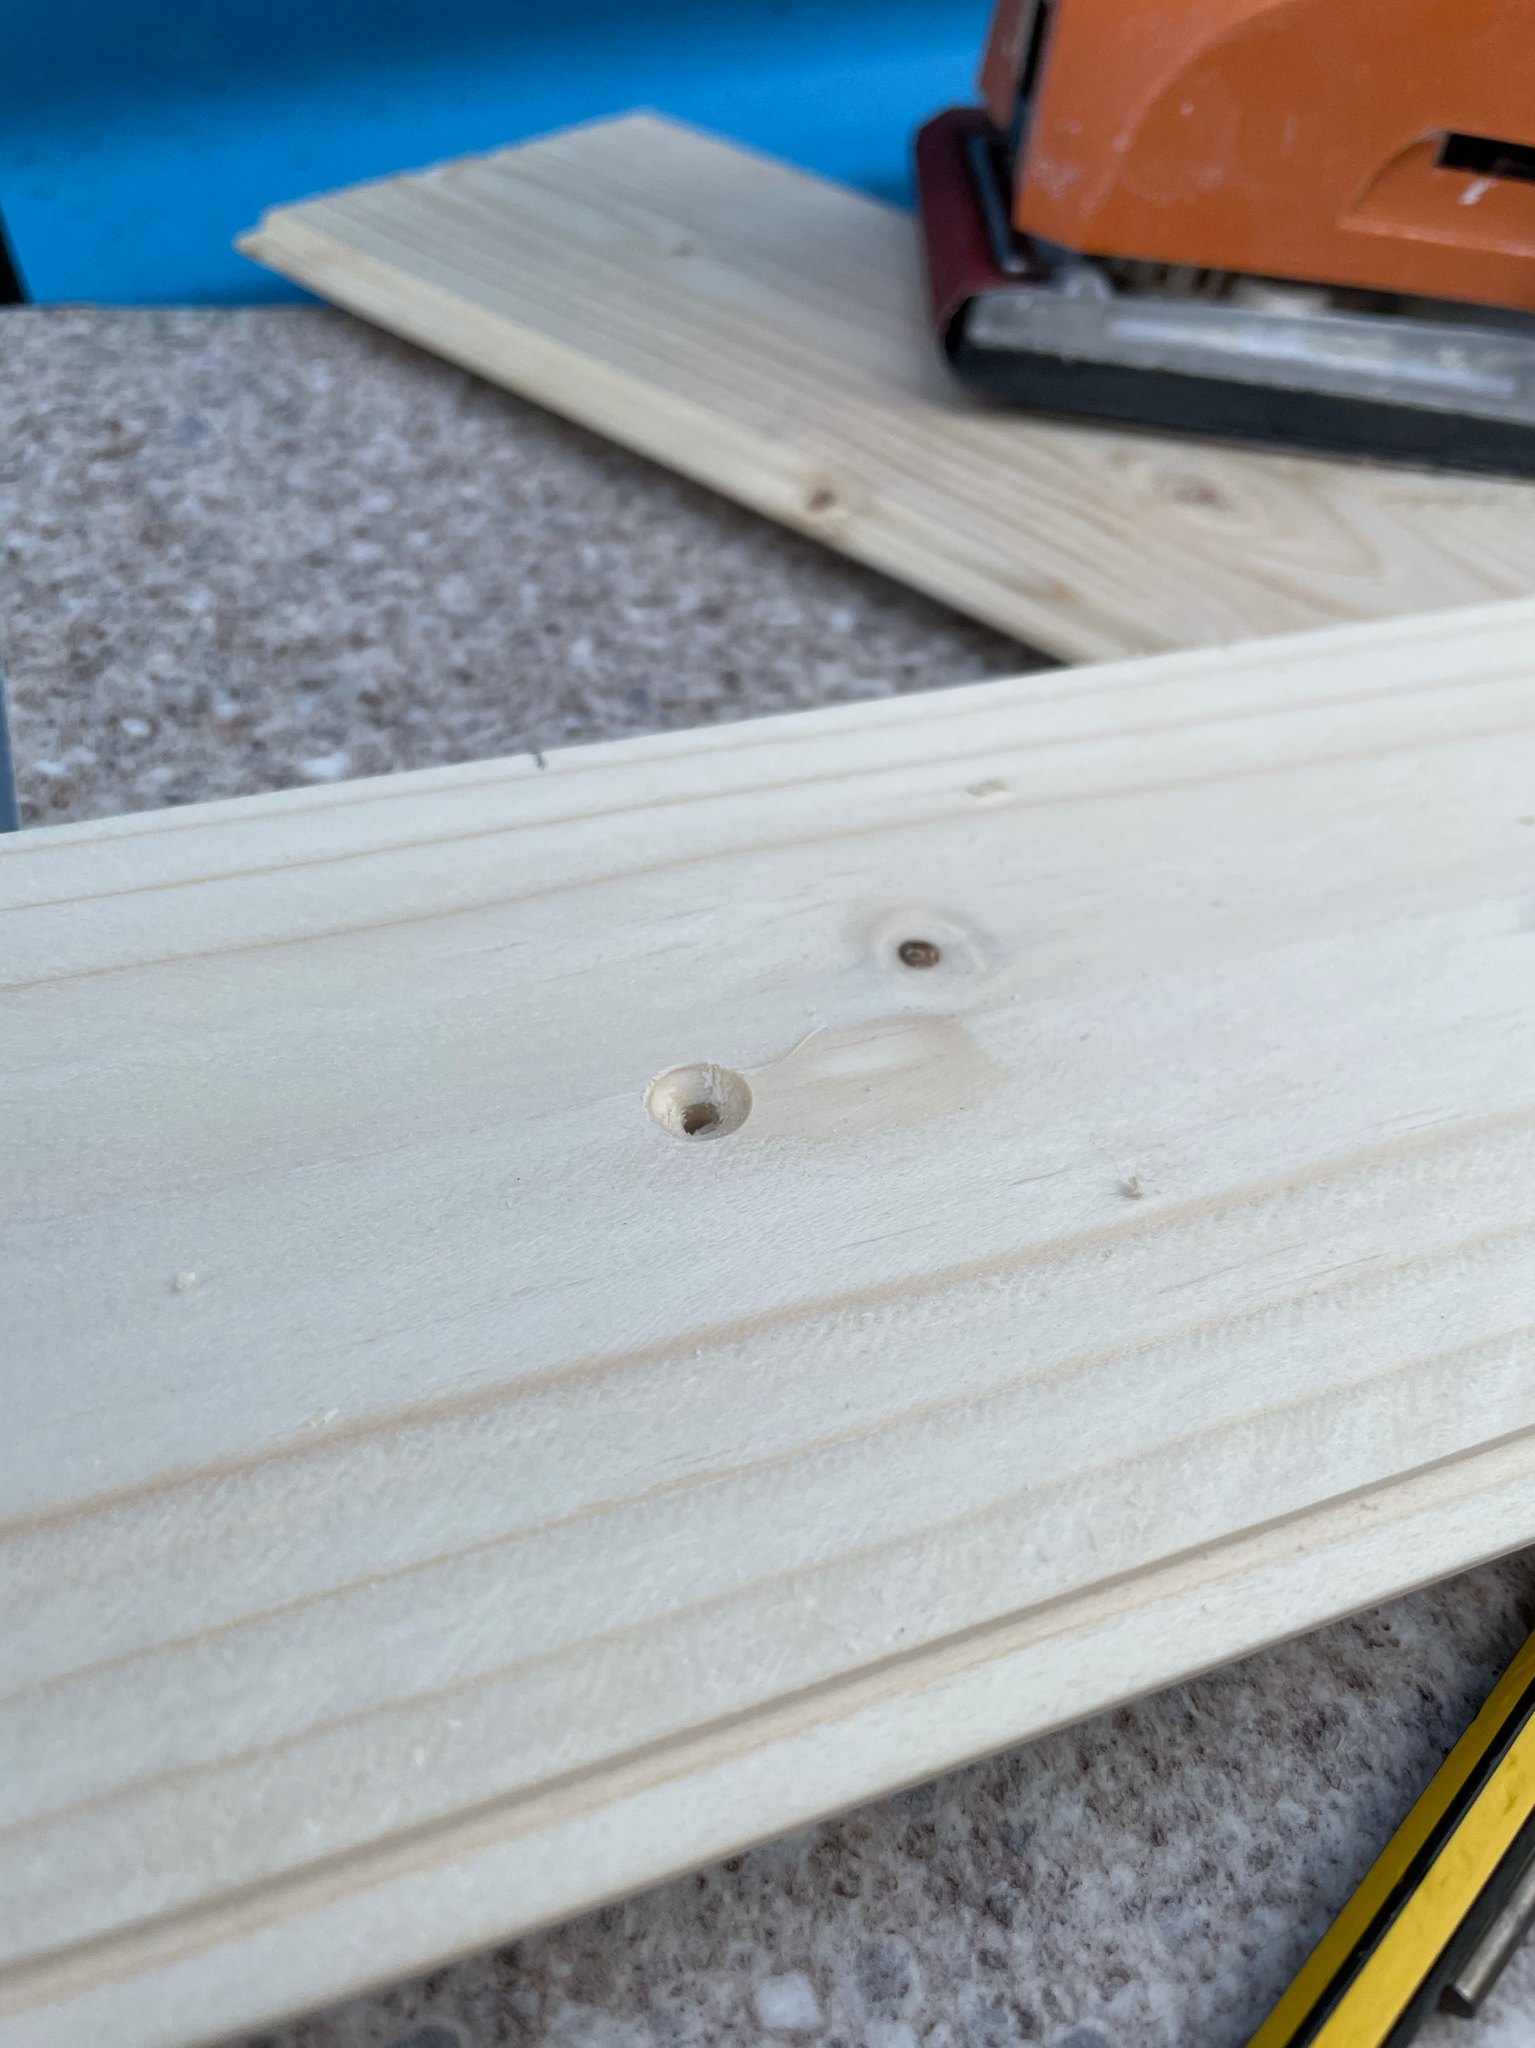
Holes drilled and countersunk for the screws securing the cladding to the glued in battens.
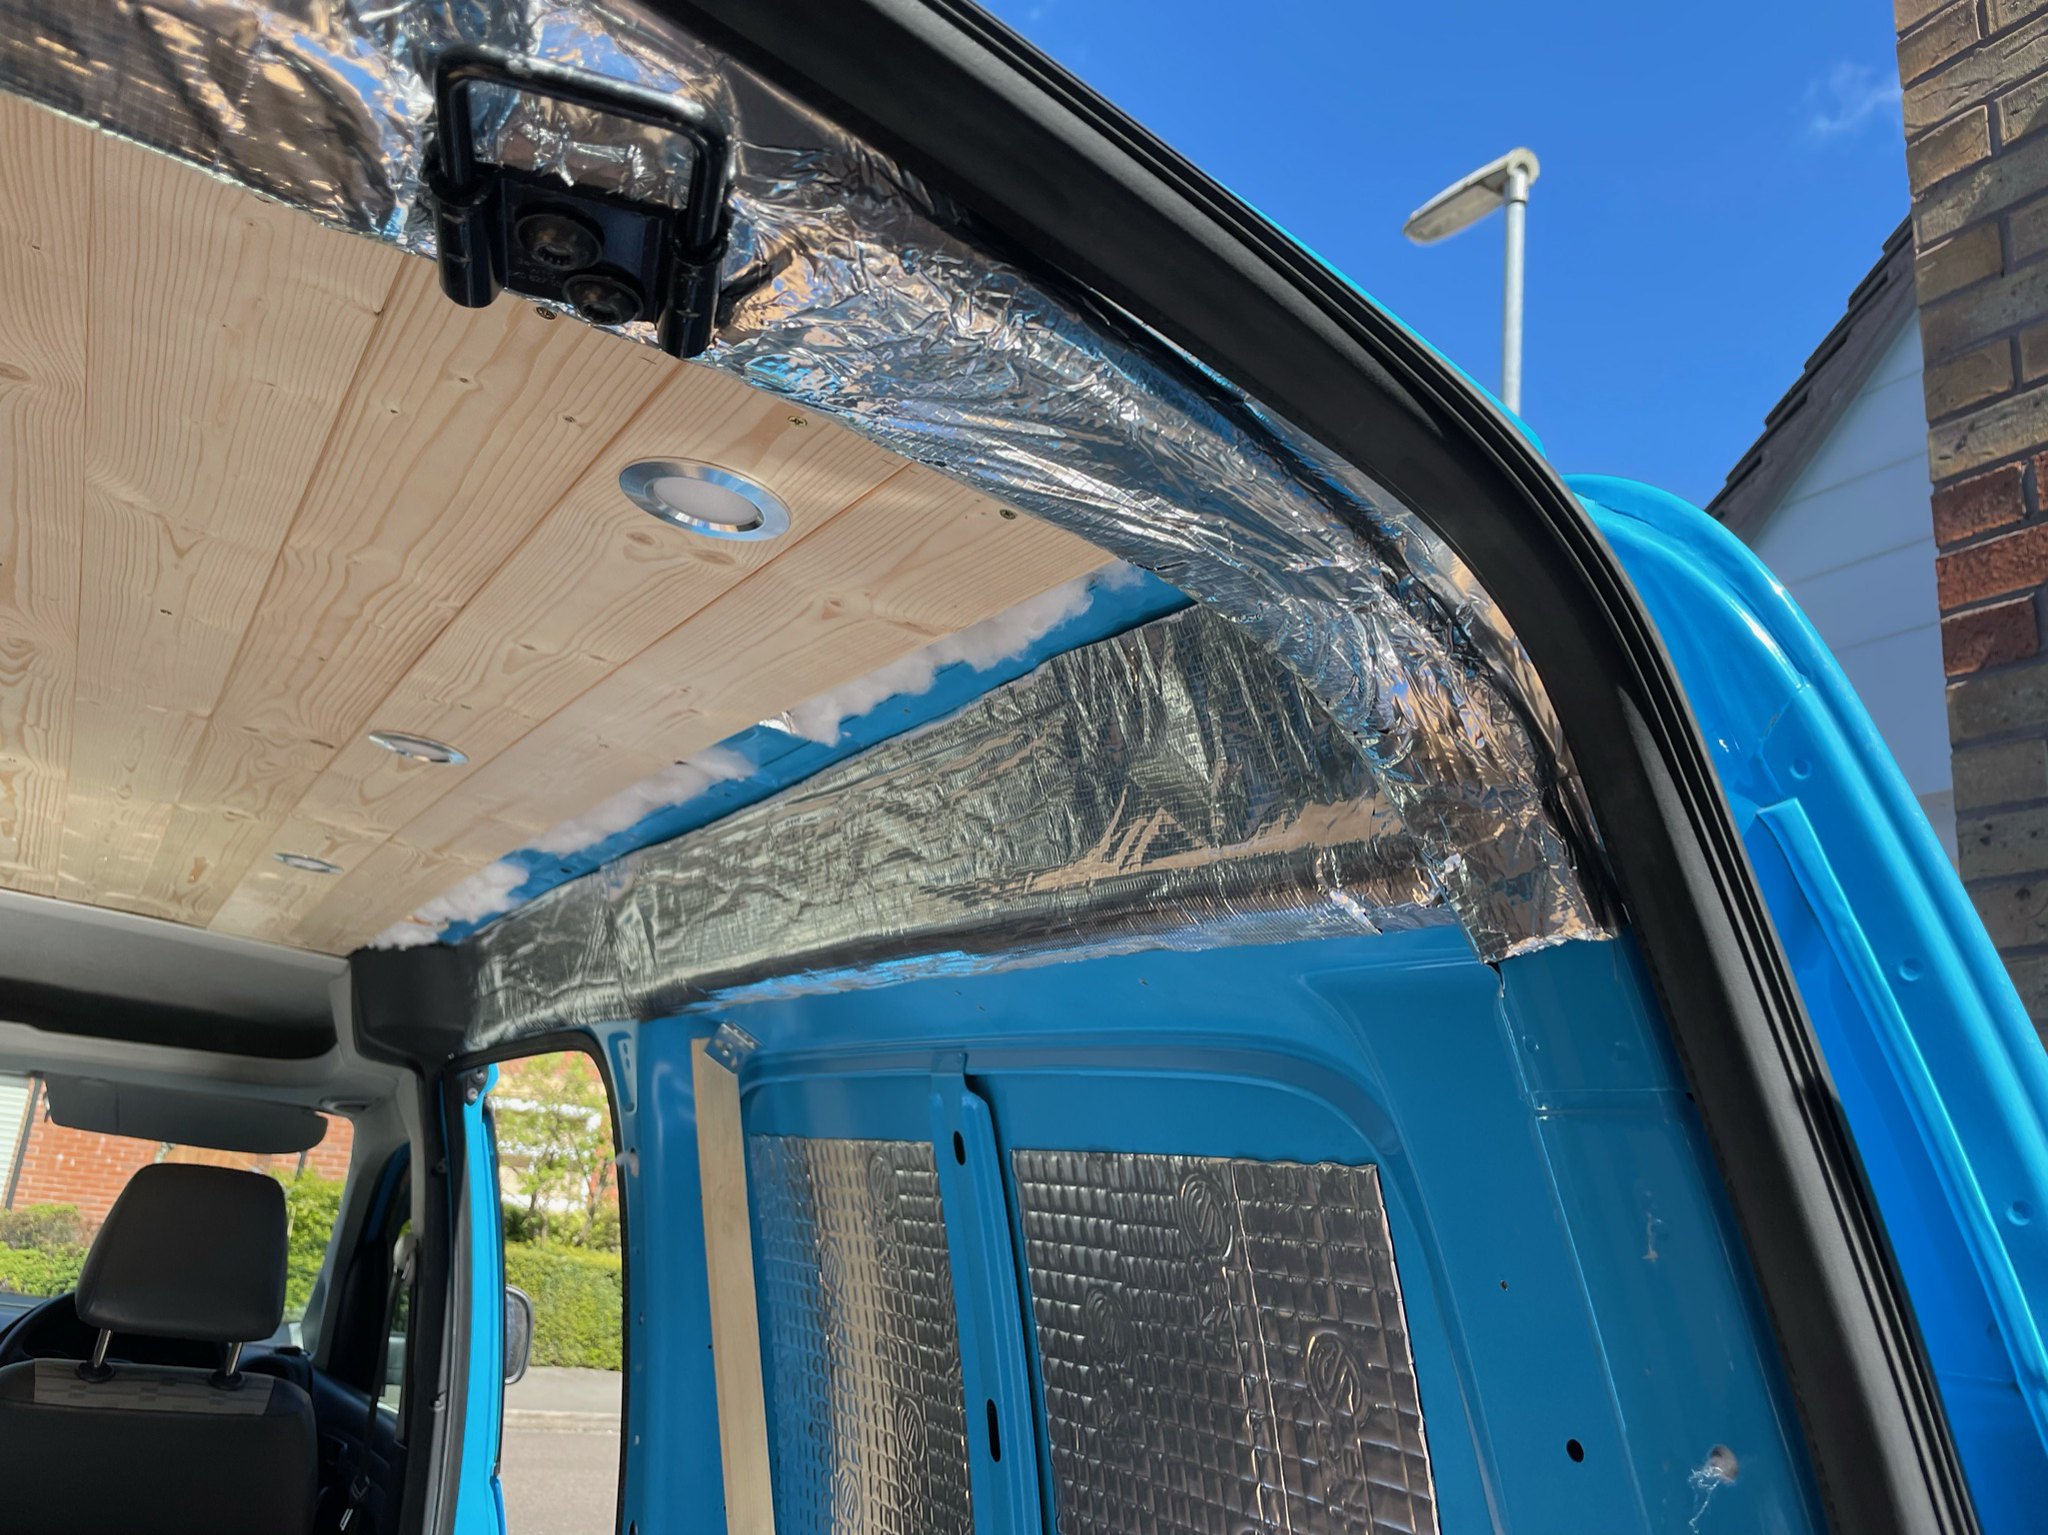
First few pieces installed! I started with two pieces fitted centrally and worked outwards towards each side of the van. I added recycled plastic insulation in the gap as I went.


Used a 51mm hole saw for the light holes. I had to open up the sides where the clips sat a touch with the dremel but it’s a nice snug fit now.


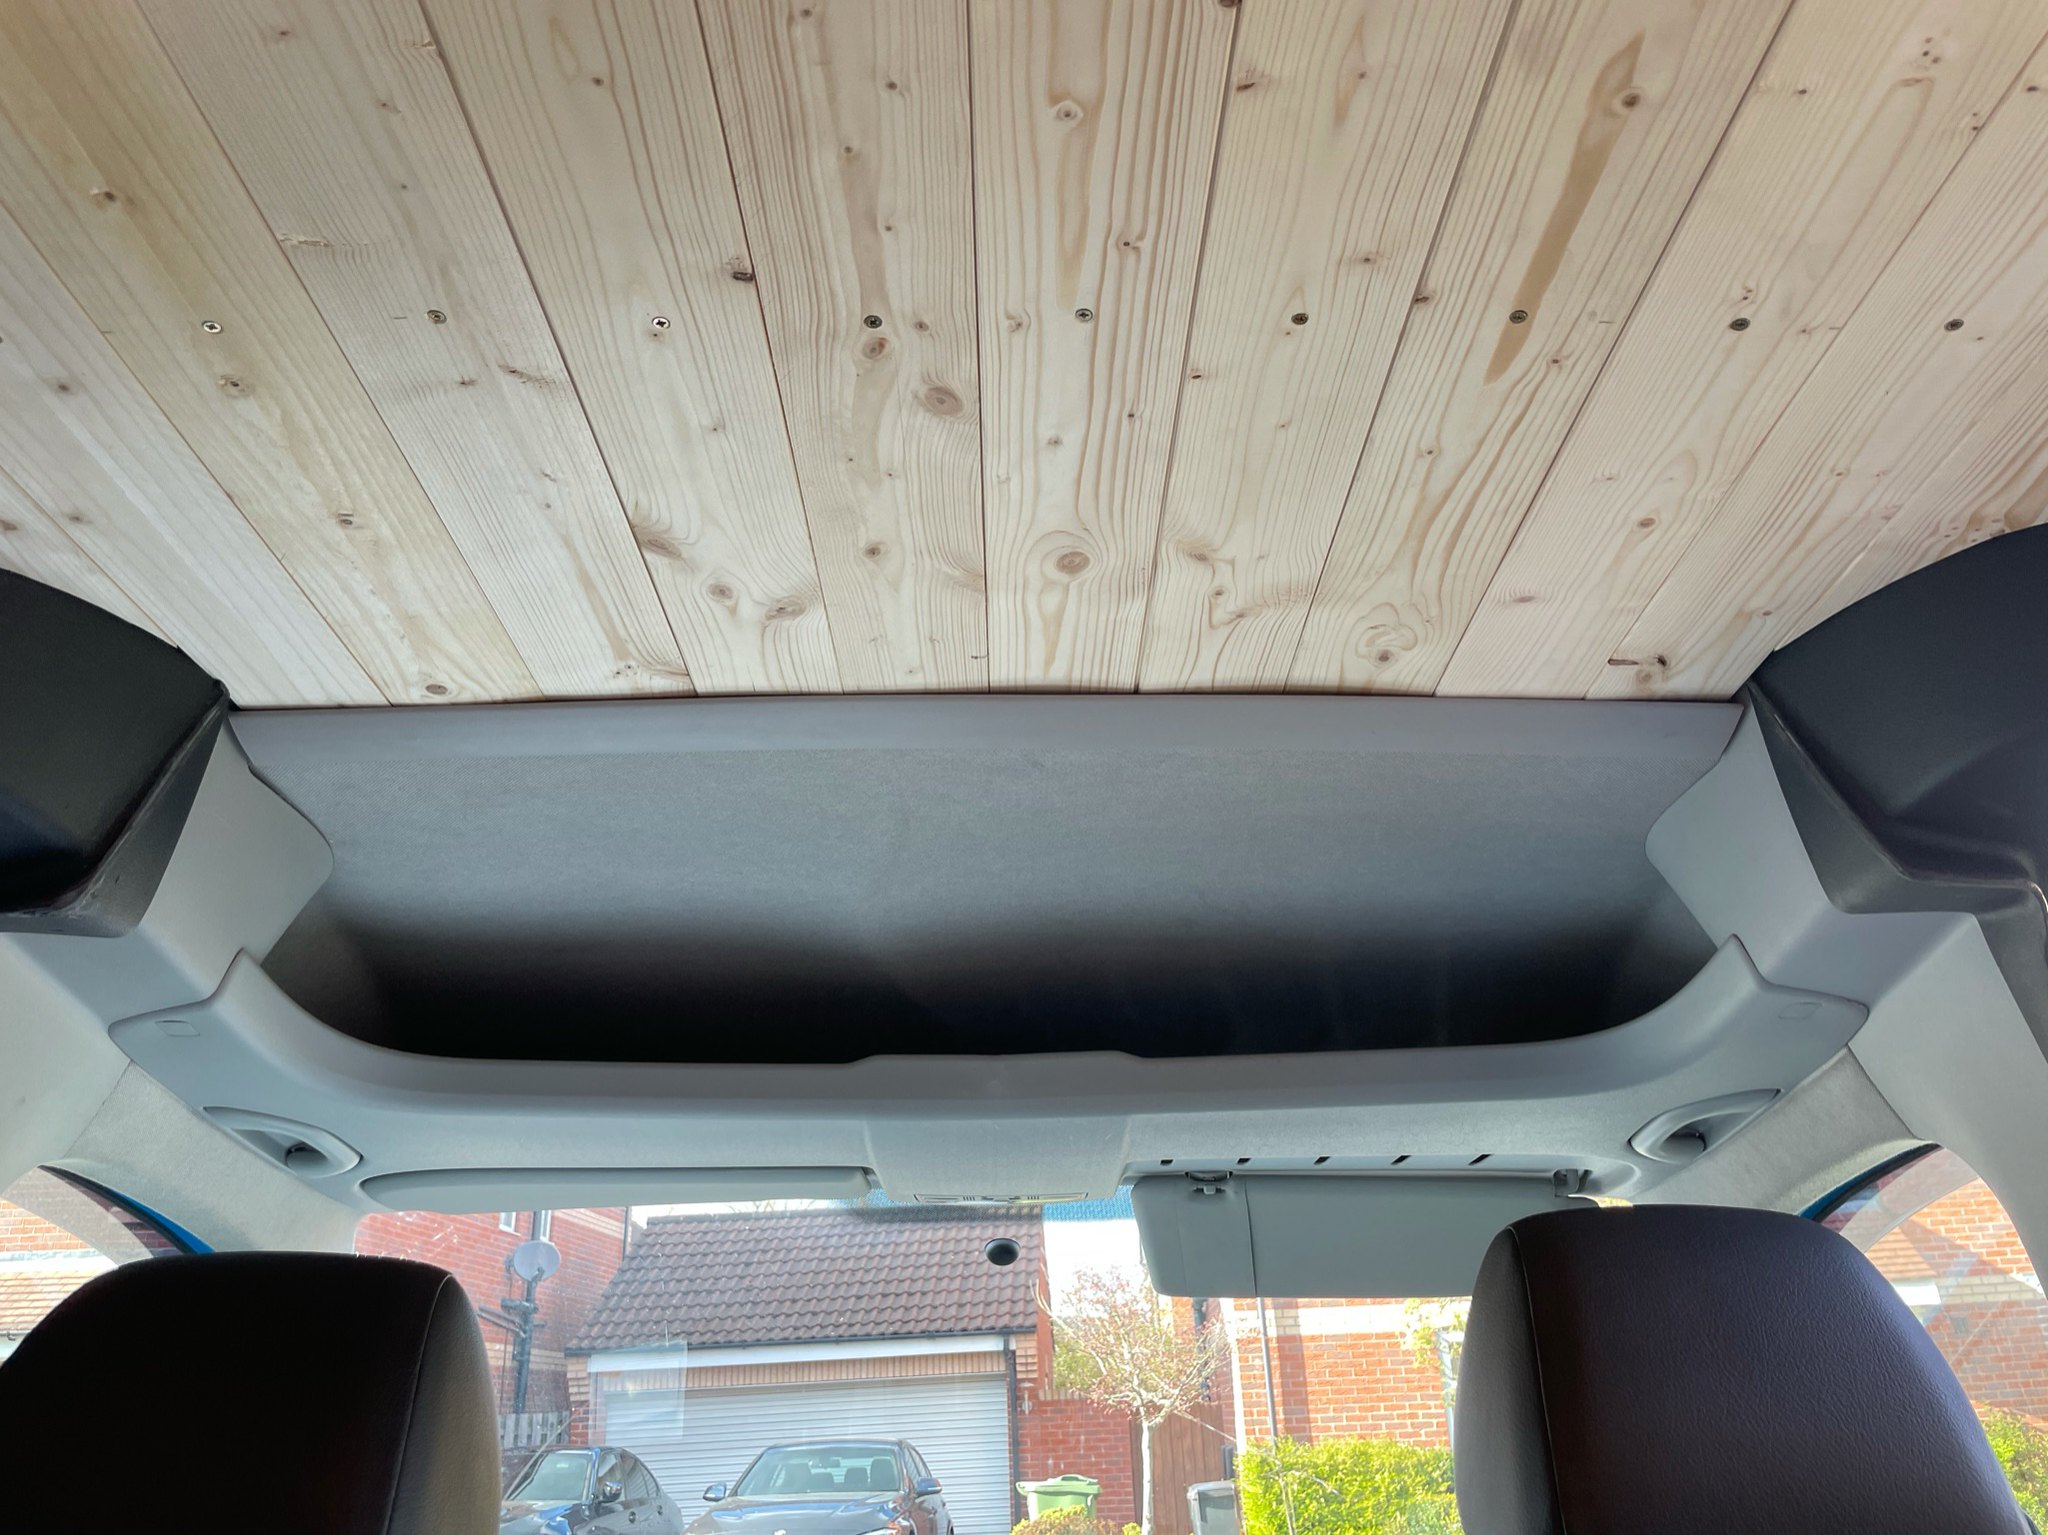
I’d kept the original ceiling trim and used this as a template for the two pieces of cladding that met the cut down bulkhead trim.

Ceiling fully installed.

Now I started finishing off the thermo van liner coating on the sides of the van.

I had to remove the two edge pieces of cladding to finish this. In hindsight should have done this first but got too excited wanting to see the finished ceiling
Starting to look like a space ship.


Managed to cut down and reuse the original ceiling trim piece to finish the edging near the cab area.
I’m planning to try making some recessed shelves in the rear side panel areas which is why these aren’t coated in the van liner yet. Once those are built I’ll be covering with some 3.6mm ply and then carpeting on top of the insulation and each of the ply door panels with some Mega Van Mats anthracite carpet.
I re-used the British Gas conduit I stripped from the van and ran this from behind passenger seat under the door trim and up to the rear side panel. There’s a load of handy earth points near here which made connecting up the ground wires a breeze.
Dimmer wired up.
Combo panel wired up. I wired the usb, 12v socket and volt meter to the onboard switch. This means I can turn off the display and usb port when not needed as they have a small parasitic drain on the leisure battery even when not in use.
Both connected to the fuse box. The fuse box is powered by the Victron MPPT load output which will automatically manage power for me depending on the battery voltage.
First pieces of cladding cut to length. I picked this up from Wickes 8mm thick x 94mm wide (90mm excluding the tongue) x 2400mm long. It worked out really well as 12 pieces fit along the ceiling almost perfectly!
Holes drilled and countersunk for the screws securing the cladding to the glued in battens.
First few pieces installed! I started with two pieces fitted centrally and worked outwards towards each side of the van. I added recycled plastic insulation in the gap as I went.
Used a 51mm hole saw for the light holes. I had to open up the sides where the clips sat a touch with the dremel but it’s a nice snug fit now.
I’d kept the original ceiling trim and used this as a template for the two pieces of cladding that met the cut down bulkhead trim.
Ceiling fully installed.
Now I started finishing off the thermo van liner coating on the sides of the van.
I had to remove the two edge pieces of cladding to finish this. In hindsight should have done this first but got too excited wanting to see the finished ceiling

Starting to look like a space ship.
Managed to cut down and reuse the original ceiling trim piece to finish the edging near the cab area.
I’m planning to try making some recessed shelves in the rear side panel areas which is why these aren’t coated in the van liner yet. Once those are built I’ll be covering with some 3.6mm ply and then carpeting on top of the insulation and each of the ply door panels with some Mega Van Mats anthracite carpet.
-
Gary.8
- Twin Turbo poster
- Posts: 480
- Joined: Mon Sep 17, 2018 5:27 pm
- Engine size/power: 1.6 CR TDI (102bhp)
Re: Ex-BG Caddy Maxi Camper Build
Liking the solar panel idea 
For the screw holes you find on the BG vans I used blue 3M rubber bumpons or screw caps and stuck them on not a bad colour match.. can also get them for the larger holes on the back barn doors.
For the screw holes you find on the BG vans I used blue 3M rubber bumpons or screw caps and stuck them on not a bad colour match.. can also get them for the larger holes on the back barn doors.

-
charlie-
- Caddy2k Groupie
- Posts: 27
- Joined: Thu Feb 25, 2021 3:44 pm
- Engine size/power: 1.6 CR TDI (102bhp)
Re: Ex-BG Caddy Maxi Camper Build
Thanks for that they look good! I’ve already ordered some black plastic inserts for a few quid off eBay, will see how they look if not happy will try and get some 3M stuff. Did you get them from eBay?
-
the swan fiend

- Hyper Poster
- Posts: 5143
- Joined: Sat Feb 18, 2017 10:52 pm
- Engine size/power: 1.6 CR TDI (102bhp)
Re: Ex-BG Caddy Maxi Camper Build
You’re doing a sterling job on this conversion mate I have to say. Very professional.
Sent from my iPhone using Tapatalk
Sent from my iPhone using Tapatalk
Rescue me from the swans in me
-
Gary.8
- Twin Turbo poster
- Posts: 480
- Joined: Mon Sep 17, 2018 5:27 pm
- Engine size/power: 1.6 CR TDI (102bhp)
Re: Ex-BG Caddy Maxi Camper Build
Yeah got the the Phillips screw caps form eBay only a few quid for about  lol..
lol..
the 3M rubber button bumpons where 30x2mm think eBay as well.
lol..the 3M rubber button bumpons where 30x2mm think eBay as well.
-
C Chis
- Hyper Poster
- Posts: 1657
- Joined: Fri Mar 06, 2020 1:13 pm
Re: Ex-BG Caddy Maxi Camper Build
Really liking the work you’re doing!
Sent from my iPad using Tapatalk
Sent from my iPad using Tapatalk
2010 pre-facelift Mk3 3.2 VR6 : Touran Interior : 3D Premium Clocks : R32 Bumper : Climatic A/C
My VR6 Build Thread and Details can be Found Here
My VR6 Build Thread and Details can be Found Here
-
charlie-
- Caddy2k Groupie
- Posts: 27
- Joined: Thu Feb 25, 2021 3:44 pm
- Engine size/power: 1.6 CR TDI (102bhp)
Re: Ex-BG Caddy Maxi Camper Build
Cheers! Looked through your build thread some of the mods you’ve done look brilliant 
