Grey Caddy
-
- Caddy2k Groupie
- Posts: 41
- Joined: Thu Jun 24, 2021 10:15 am
Grey Caddy
Collected my new Caddy on Sunday Made it less than 75 miles, on the M25 when.... you've guessed it, shuddering, warning lights and loss of power
Luckily I was at a section where there was a hard shoulder/emergency lane to head for. AA called who sent a local recovery service to move it due to the dangerous location. Got taken to the nearest services. Whilst I was waiting for recovery there were a couple of close passes by fast moving lorries, I wasn't entirely sure if I minded if it ended being punted down the road. Made it to the services.
Got unloaded next to an AA van working on another car. Plugged in and injector 4 open circuit. Waited for another AA man who changed the injector, coded it and checked for leaks, good to go. Left the services and there was a slight smell of diesel but I thought this might just have been from taking the pipes off. Turns out the return/leakoff pipe wasn't properly clipped in diesel was leaking over the engine Hopefully it can only get better from here. Lots of plans for the van but it comes with a 3 month warranty so I'm might hold of anything major until that's run out just in case.
Last edited by seaniow on Fri Jul 08, 2022 12:19 pm, edited 1 time in total.
-
- Hyper Poster
- Posts: 803
- Joined: Tue Oct 01, 2019 8:49 am
- Engine size/power: 1.9 TDI (104bhp)
Re: Grey Caddy - Off to a poor start
This is the trouble with these bloody injectors when they go it's normally in the worst possible place. Feel your pain, mine went a little further on by the m11. Sowed the seed pretty much there and then I was going down the tfsi conversion route.
Sent from my SM-G981B using Tapatalk
-
- Caddy2k Groupie
- Posts: 41
- Joined: Thu Jun 24, 2021 10:15 am
Re: Grey Caddy - Off to a poor start
I'm just glad there was a hard shoulder to head for, if it had been a few miles before it would have been on the smart motorway section with nowhere to go.
I'll thy and put it behind me and get on with enjoying the van, I'll have to keep at as I've started collecting parts for the upgrades, I was on my way to pick up these when it broke down.
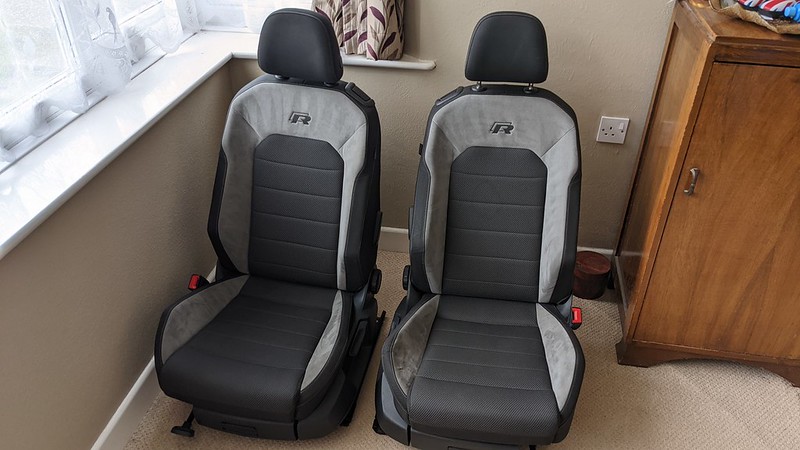
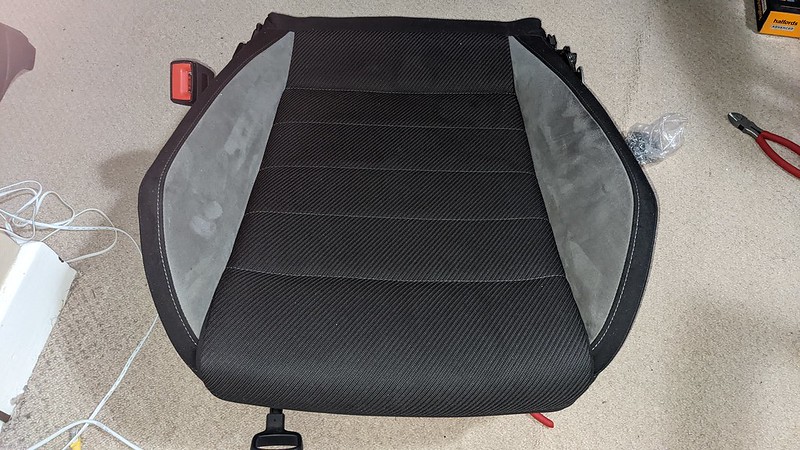
I live on the Isle of Wight so as I was on the mainland with a van it seemed the ideal opportunity for pick up some new seats. I need to repair the bolsters but shouldn't be too tricky, it's the usual foam failure inside.
-
- Caddy2k Groupie
- Posts: 2
- Joined: Fri Feb 05, 2016 8:16 pm
- Engine size/power: 1.4 16V Petrol (74bhp)
Re: Grey Caddy - Off to a poor start
Glad you got it all sorted. Could've been a whole lot worse. Hopefully happy caddy moving forward
Sent from my SM-G781B using Tapatalk
-
- Caddy2k Groupie
- Posts: 41
- Joined: Thu Jun 24, 2021 10:15 am
Re: Grey Caddy
Firstly, amended the title so I won't be reminded of the injector failure every time I add to this thread for years to come
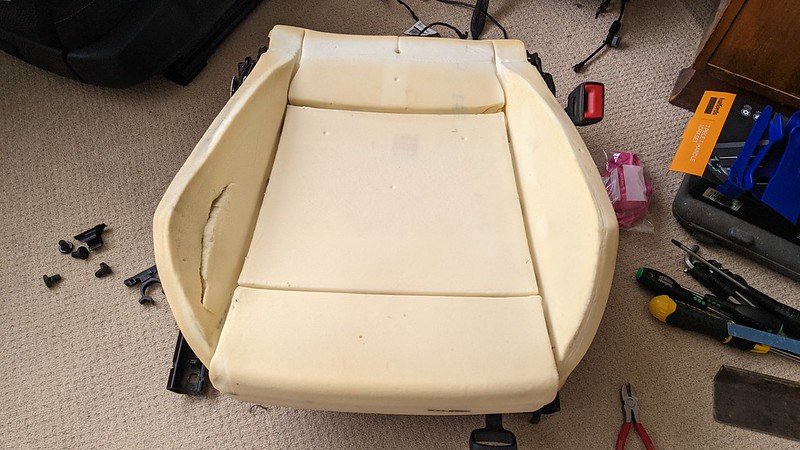
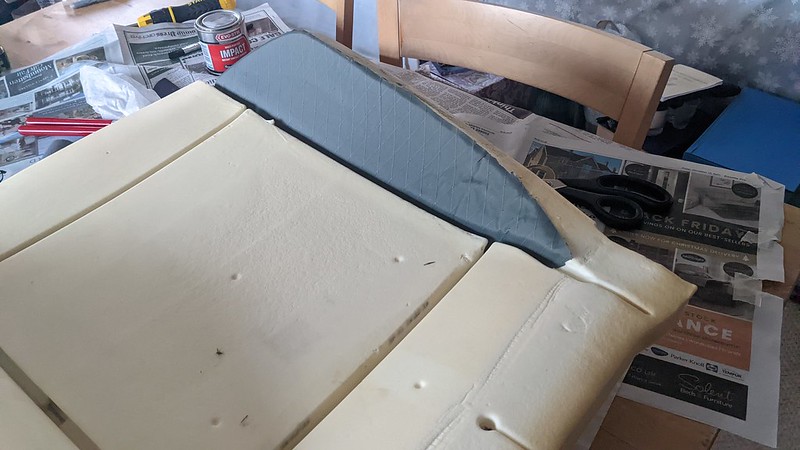
Made some progress on the seats. Stripped them down, it was just a matter of working out how they are assembled, to end up with the base on it's own. Removed the foam from the base and took off the cover, which required cutting the hog rings. Ended up with just the foam with the tear clearly visible.
I had to make a tool to get the foam off the base as it wasn't possible to get anything else in to unclip the plastic retainers around the edge of the cover, it's the cover fixed to the base which holds the foam to the base.
I glued the tear back together and also added a layer of fabric (in this case an offcut of VX21 from another project) to reinforce the bolster. I've also glued a section on the underside in the channel where the metal support bar sits inside the bolster.
[/url]
The fabric being colour matched the Caddy is just coincidence Then it was just a matter of putting the cover back on and fixed in place with new hog rings and then clipping back onto the base. The bases are handed but the foams don't appear to be so I've put the drivers foam on the passenger side base so that the repaired bolster is towards the centre of the van and not subject to the same wear. First time I've even done any upholstery so prety pleased with the results.
Just need to clean and reassemble with the rear section and trims etc. Parts have been arriving on-mass so should be some more updates soon.
-
- Caddy2k Groupie
- Posts: 41
- Joined: Thu Jun 24, 2021 10:15 am
Re: Grey Caddy
It's been a busy few weeks working on the van so not had chance to update the build. The lower engine mount was shot so changed that, which meant taking the sub-frame out, so gave it all a clean at before refitting.
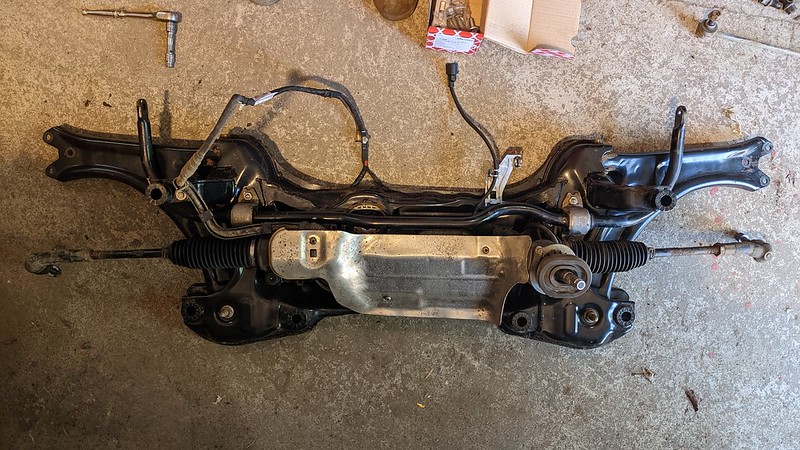
Had to make some tooling to press the new bushes in the sub-frame, basically a close fitting sleeve to press them through so they stay round and don't catch when the cut-out section gets to the lip of the sub-frame
As the van was in the workshop it seemed the ideal time to just tear into it and do some upgrades. New speakers in the doors and added tweeters in the dash top. Added some sound proofing to the doors whist stripped down.
Took apart most of the trim as I was fitting Touran carpets, new head unit and running wires for the reversing camera, gps aerial etc.
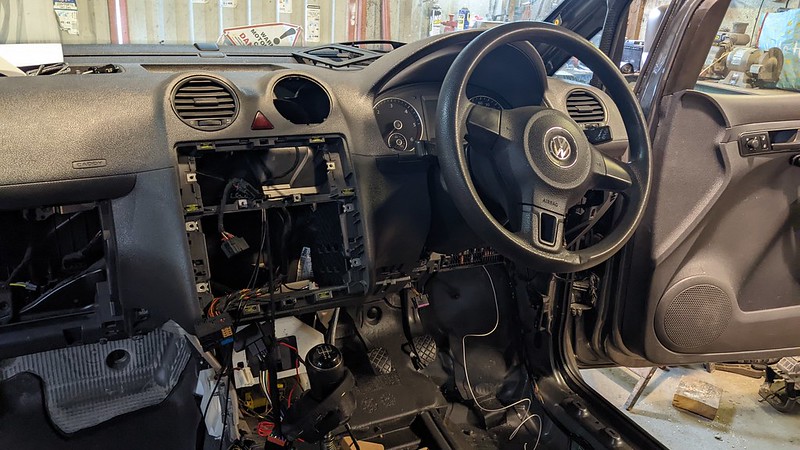
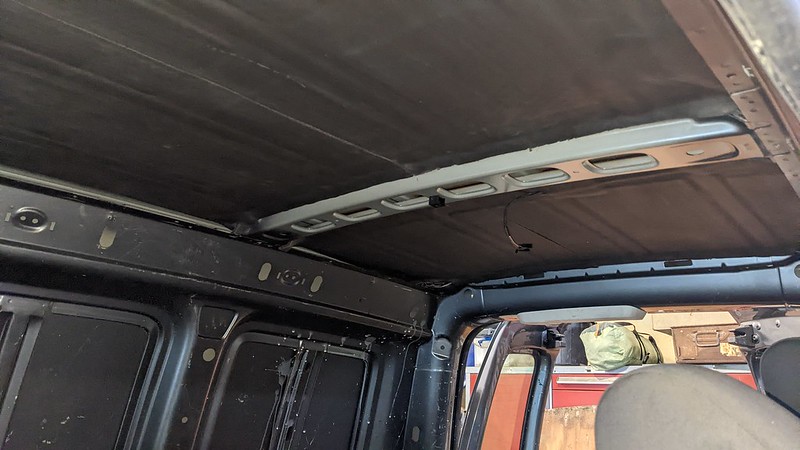
I had the pillar trims off to run the cable for the phone mic up to the interior light. Whist the storage box was off it wasn't much more work to take the headlining out to try and clean it. These things escalate quickly
Half way through and it is better if not perfect but it's nicotine stains I think. Careful use of APC and the spot cleaner to vacuum off the moisture. The storage tray covers most of it.
The side step trim at the sliding door had mortar and cement on it. Working on the basis that brick acid is in a plastic tub and that's mot dissolved I used some (carefully with gloves and goggles on) to dissolve the mortar of the trim.
I've added some sound proofing to the rear and also some insulation.
All of these jobs were necessary but not very exciting. Fitted the R seats which have transformed the driving position. I re-used the Caddy bases and drilled to suit. It's a bit of a pain as the hole for the locating pin is inline with a stiffening web. With a hand drill this would be harder to do but a 3 phase pillar drill made light work of cutting a slot down the web.
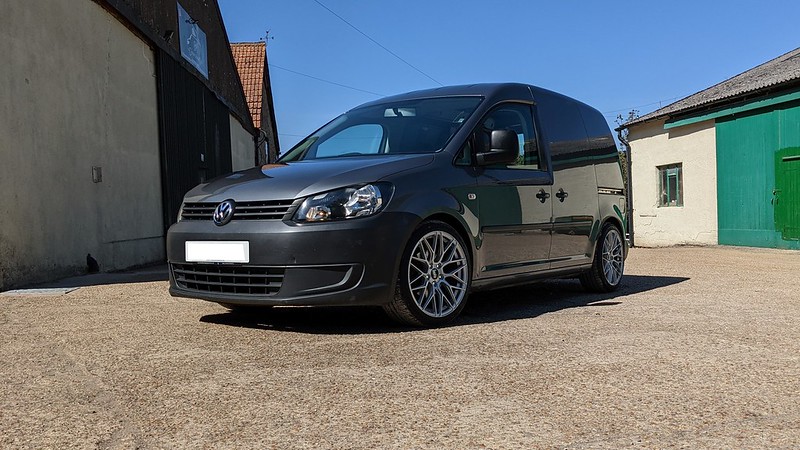
I also fitted coil-overs and flip kit whist it was up on the stands and some new wheels. Managed to get it mobile by last Friday before the hosepipe ban kicked in here. Got it washed off as during the 3 weeks in the workshop quite a layer of dust had settled on it, the workshop I rent is on a farm and the area outside is old concrete and dirt so with the workshop door open quite a bit blows in but even with the door open it was 35 degrees inside so I wouldn't be able to cope with the heat if I kept the doors shut.
It's being tracked up today at the garage opposite my workshop and I'll collect it after work, Rally chuffed with how it's turned out so far and quite a transformation from how it looked on the back of the trailer being recovered off the motorway
Had to make some tooling to press the new bushes in the sub-frame, basically a close fitting sleeve to press them through so they stay round and don't catch when the cut-out section gets to the lip of the sub-frame
As the van was in the workshop it seemed the ideal time to just tear into it and do some upgrades. New speakers in the doors and added tweeters in the dash top. Added some sound proofing to the doors whist stripped down.
Took apart most of the trim as I was fitting Touran carpets, new head unit and running wires for the reversing camera, gps aerial etc.
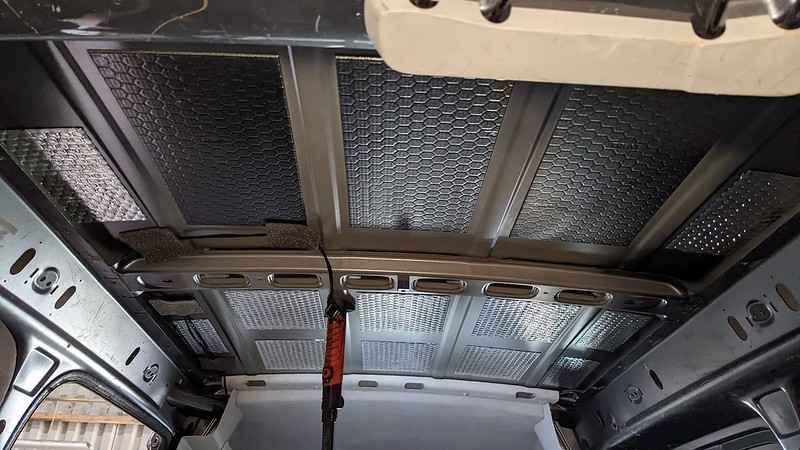
I had the pillar trims off to run the cable for the phone mic up to the interior light. Whist the storage box was off it wasn't much more work to take the headlining out to try and clean it. These things escalate quickly
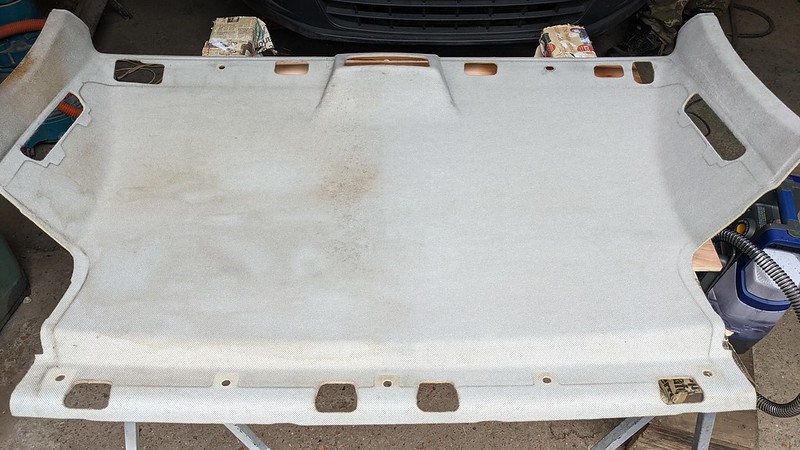
Half way through and it is better if not perfect but it's nicotine stains I think. Careful use of APC and the spot cleaner to vacuum off the moisture. The storage tray covers most of it.
The side step trim at the sliding door had mortar and cement on it. Working on the basis that brick acid is in a plastic tub and that's mot dissolved I used some (carefully with gloves and goggles on) to dissolve the mortar of the trim.
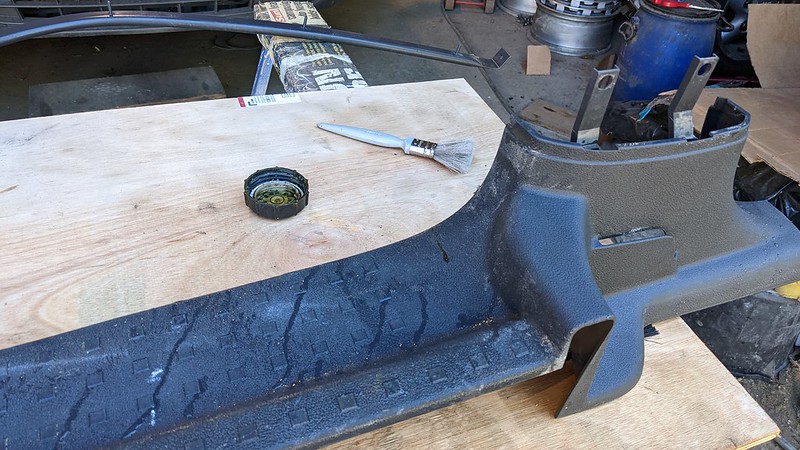
I've added some sound proofing to the rear and also some insulation.
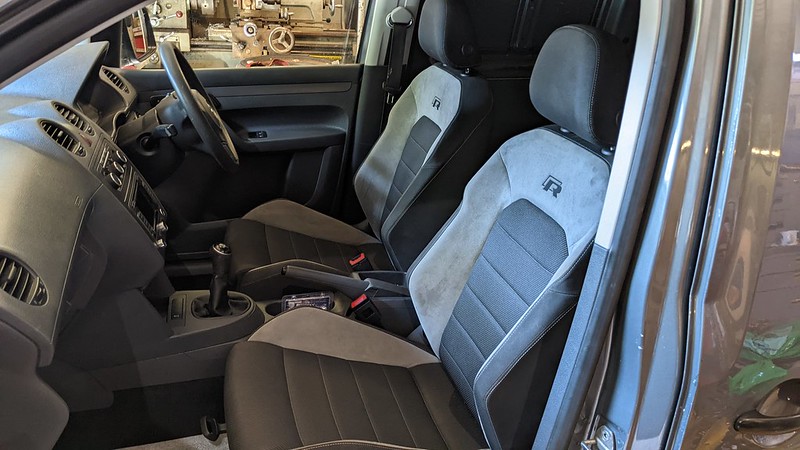
All of these jobs were necessary but not very exciting. Fitted the R seats which have transformed the driving position. I re-used the Caddy bases and drilled to suit. It's a bit of a pain as the hole for the locating pin is inline with a stiffening web. With a hand drill this would be harder to do but a 3 phase pillar drill made light work of cutting a slot down the web.
I also fitted coil-overs and flip kit whist it was up on the stands and some new wheels. Managed to get it mobile by last Friday before the hosepipe ban kicked in here. Got it washed off as during the 3 weeks in the workshop quite a layer of dust had settled on it, the workshop I rent is on a farm and the area outside is old concrete and dirt so with the workshop door open quite a bit blows in but even with the door open it was 35 degrees inside so I wouldn't be able to cope with the heat if I kept the doors shut.
It's being tracked up today at the garage opposite my workshop and I'll collect it after work, Rally chuffed with how it's turned out so far and quite a transformation from how it looked on the back of the trailer being recovered off the motorway
-
- Caddy2k Groupie
- Posts: 20
- Joined: Thu Jun 30, 2022 8:11 am
Re: Grey Caddy
Good work, nice colour
- the swan fiend
- Hyper Poster
- Posts: 5201
- Joined: Sat Feb 18, 2017 10:52 pm
- Engine size/power: 1.6 CR TDI (102bhp)
Re: Grey Caddy
Nice work mate. The stance looks good too
Sent from my iPhone using Tapatalk
Rescue me from the swans in me
-
- Caddy2k Groupie
- Posts: 41
- Joined: Thu Jun 24, 2021 10:15 am
Re: Grey Caddy
Cheers guys, I really like the colour. Today I've been mainly sorting the back, fitted some liners over the wheel arches. I also changed the heater recirculation flap motor, this required glueing one of the screws into the socket with a hot glue gun to get it back in! But it worked, a mate came over and set it up with Vagcom so no more clicking from behind the dash. I'm disproportionately pleased with this. It's quite a fiddle to do but worth the effort.
-
- Caddy2k Groupie
- Posts: 41
- Joined: Thu Jun 24, 2021 10:15 am
Re: Grey Caddy
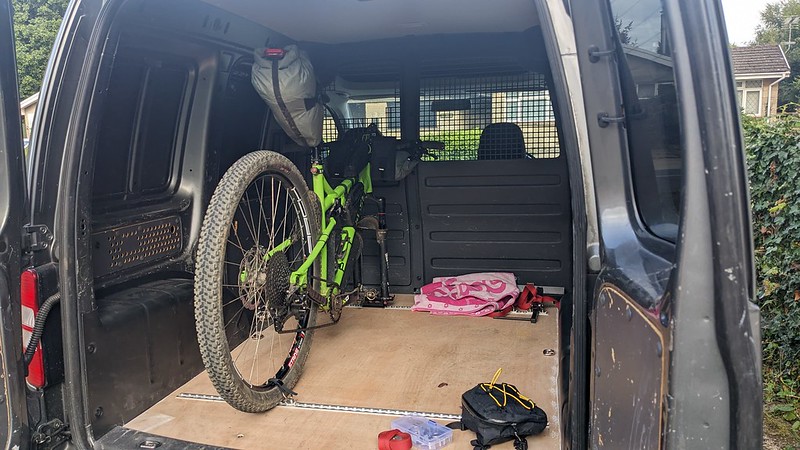
As I bought the van to go away with the mtb I thought I should stop making it cool and get on with actually making it easier to fit the bike in, especially as I had a trip away planned.
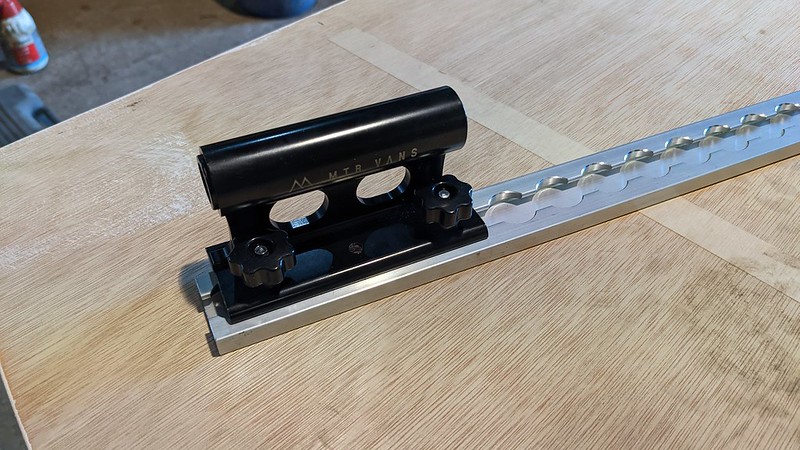
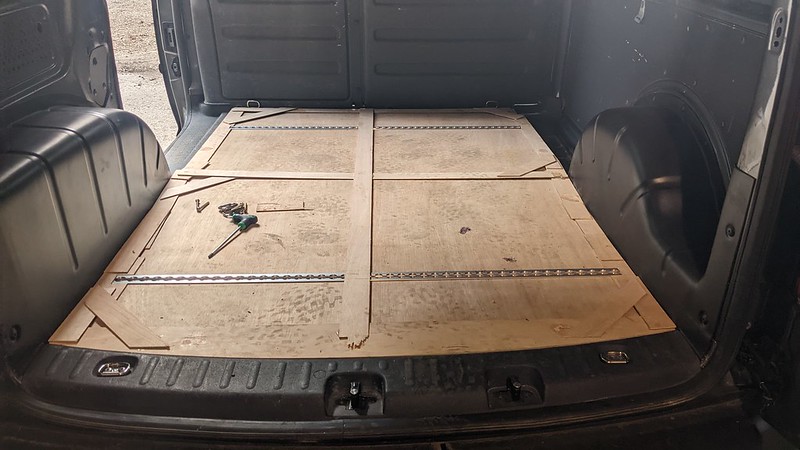
I purchased a fork mount from MTB Vans but I didn't want to fix it permanently to the floor and I also wanted to still have a flat floor for general use. Purchased some load track and made some fixings to be able to fix the form mount down using some plastic star nuts to be able to easily move it.
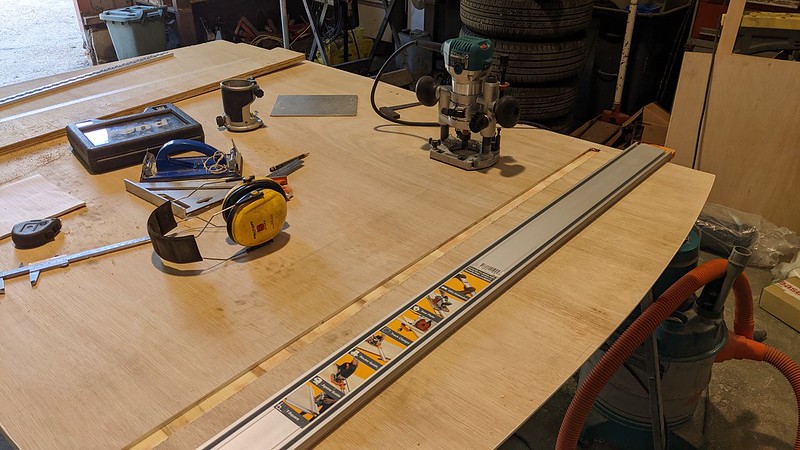
By using 19mm ply I worked out I could recess the track in. I bought the sheet of ply from B and Q and I'd carefully worked out what size I needed it to be to fit in the van to collect and got the lad at B and Q to cut it to length - you get 1 free cut - and wheeled the trolley out to the car park. I hadn't allowed for the curvature of the rear doors and the sides of the van so it turns out it didn't fit. I had to swallow my pride and phone a mate with a pick-up to see if he was busy and fancied a trip to B and Q. He arrived and took pleasure in pointing out that the first time I was using the van to move something I had failed miserably
With the ply cut to the the shape of the floor I then cut two recesses with the router, took a while as I had to make multiple passes to get a clean edge.
The track is left proud of the timber so it will be flush with the final floor finish. This was as far as I got before my trip but worked a treat.
I knocked up some bracket to hold the front wheel to stop it rolling about. Temporally fixed using the trim clips but worked ok.
Trip with the van went really well, so much easier to get a bike in after the ride than it was in a car. Plus I could change out of my riding kit in the back. I'd been bike-packing so had been in the same kit for 4 days so nice to get into some clean clothes
Modified the template I used for the floor to be able to cut the rubber matting to fit.
After looking at the template laid on the matting for for ages I finally had to commit to cutting it out. It was a one chance operation as I only bought enough mat for one go. Luckily it fitted, including the slots for the tracking
Really pleased with the result, its a long way from the tatty old split bit of ply covered in crud and fixed down with wood screws through the floor the van came with.
-
- Caddy2k Groupie
- Posts: 41
- Joined: Thu Jun 24, 2021 10:15 am
Re: Grey Caddy
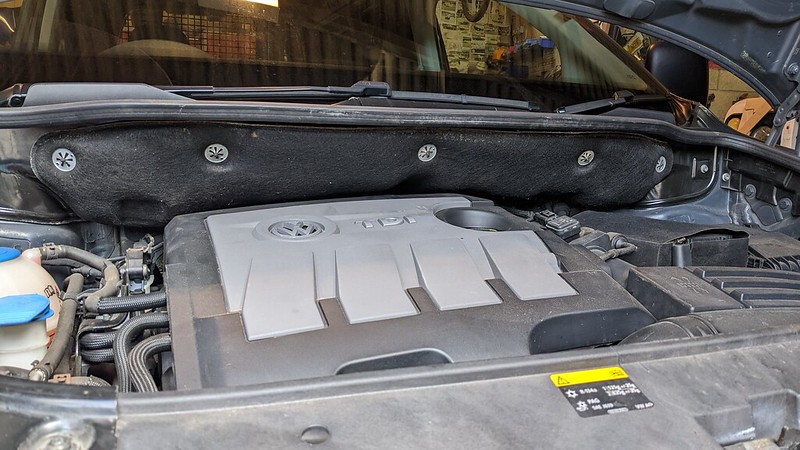
I did this a while back but kept forgetting to take a picture. The sound deadening on the bulkhead hung down at the ends which annoyed me.
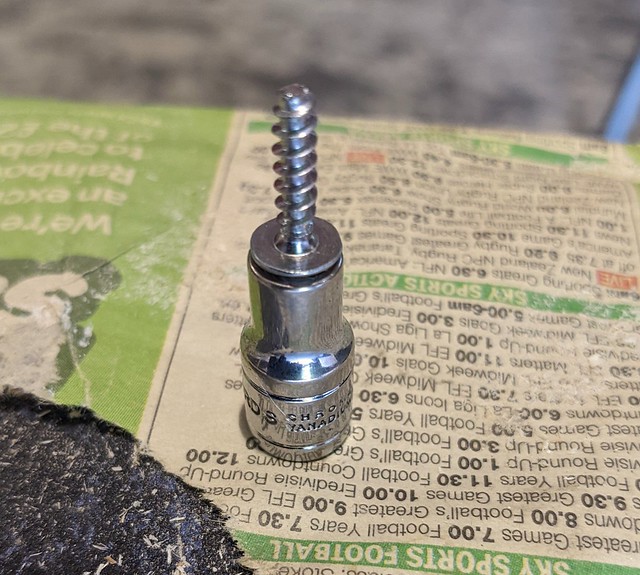
I bought some clips to match the existing. I had the metal panel off when I fitted the coil-overs so with some black self-tapping screws of a size to match the existing studs (point filed off and the bare end painted black) fitted through new holes from the back of the panel and through the sound deadening I was able to fix the ends and centre back.
It's best to remove the sound deadening when drilling the holes as it's very fragile (mine was) and if you try to drill through it then it winds around the drill bit and damages the sound deadening.
-
- Caddy Fan
- Posts: 66
- Joined: Mon Aug 15, 2022 1:13 am
Re: Grey Caddy
Coming along nicely.
Sent from my IN2023 using Tapatalk
-
- Hyper Poster
- Posts: 803
- Joined: Tue Oct 01, 2019 8:49 am
- Engine size/power: 1.9 TDI (104bhp)
Re: Grey Caddy
Engine covers do add a nice touch to the engine bays of these vans. Looks more complete.
Sent from my SM-G981B using Tapatalk