2016 Ex BG Caddy Camper

Show off your caddy
Will47
Caddy2k Groupie
Posts: 13
Joined: Thu Sep 28, 2023 6:26 am
Engine size/power: 2.0 TDI (140bhp)

2016 Ex BG Caddy Camper

Post by Will47 »

Hi All,

Thought I would share my caddy camper build with you, its still a WIP but almost there.

My job involves being away 4 days at a time and driving around 1300 miles a month so wanted something reliable, nice to drive, efficient and just enough room to live in for short periods. I was using my old LT35 conversion but it didnt meet any of the above criteria and soon let me down!

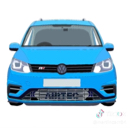
I bought the Caddy in September and have been slowly converting it since then. Ideally I wanted some furniture from the ply guys but couldnt justify the cost so set out to build it myself in a similar style. I need to use it all year round so will be well insulated and include a diesel heater and leisure battery set up that can be off grid but also have shore power.

I will be doing the following:
- Fully sound deadened
- Insulated with 10mm foil backed foam and then 50mm insulation
- Line the sides and ceiling with 6mm birch ply, the ceiling will have a topo pattern on it and remote controlled led spotlights
- Laminate flooring
- A slide out bed made from plywood and a kitchen with large drawer on heavy duty runners to slide out the side door but also be able to use the stove inside too.
- Chinese diesel heater, installed in the rear drivers side footwell
- 100ah lithium leisure battery with victron dc to dc charger, 2kw inverter and shore power hook up all installed in the rear passenger side footwell

Once this is done i will start to upgrade the van slowly, firstly with new seats maybe cruise control if not too much hassle and a wrap as im not a huge fan of the BG blue!

Image

Sent from my SM-S906B using Tapatalk

stu_b
Hyper Poster
Posts: 796
Joined: Sat Mar 18, 2023 5:28 am
Engine size/power: 1.6 CR TDI (75bhp)

Re: 2016 Ex BG Caddy Camper

Post by stu_b »

Welcome Will
Looks like you got yourself a nice project going
4 days a week is a big commitment but sounds like you've planned for all weather's etc
Would love to see more pics of the transformation and all the works you've done / doing
Watching with interest
Stu
Will47
Caddy2k Groupie
Posts: 13
Joined: Thu Sep 28, 2023 6:26 am
Engine size/power: 2.0 TDI (140bhp)

Re: 2016 Ex BG Caddy Camper

Post by Will47 »

Hi Stu,

Thanks for your reply. I work 4 days on 4 days off so its not too bad but still quite a commitment, but the job is definitely worth it, to me anyway.

I will get posting the build pictures and story this week as when I can so keep an eye out.

Cheers
Will

Sent from my SM-S906B using Tapatalk

Will47
Caddy2k Groupie
Posts: 13
Joined: Thu Sep 28, 2023 6:26 am
Engine size/power: 2.0 TDI (140bhp)

Re: 2016 Ex BG Caddy Camper

Post by Will47 »

First step was to completely strip out the rear of the van. Including taking out the bulkhead, I will cut the sides off of this and carpet them then use them to cover the gaps left behind by the seatbelts, the gaps are very useful for running wiring for lights etc.

I also took the ceiling out of the cab to sound deaden and insulate behind. When i did this and replaced it all the lights in the cab stopped working and brought on the warning light for a blown external bulb... very confusing. I found the fuse blown, replaced it and the light went out. This has since come back on with no sign of a blown external bulb so if anyone has any ideas why that might be it would be good to know?

The sides and ceiling were fully sound deadened with dead sound sd roll, i then used dead sound thermal pro sd 10mm foil backed insulation over the top of this, with help from the dog of course! I then used 50mm of thermal fleece (recycled plast bottles) over the top of this. I dont have any photos showing the fleece, it should all keep the interior nice and warm in the winter.

I was very conscious of how thick i end up making the floor as I am 6ft tall and want to make sure I can sit up comfortaby inside the van. As a result I just used thermal sd insulation which is just a 5mm sticky backed roll of foam which is sound deadening and insulating. I will then sheet with ply and put down laminate flooring.

The van will be well ventilated so I am not using any sort of vapour barrier, it has an inlet vent in the right hand sliding door so I will put a hit and miss vent on the inside of this to allow me to adjust airflow, the outlet vent is on the roof which I will keep and may add a fan to for extract if cooking in the van at all or if I need to increase airflow, I will also fit wind deflectors to the front windows to allow the windows to be open slightly all the time. Driving 300 miles a week should provide enough airflow to keep things nice and dry! The heat from the diesel heater and thick insulation will also ensure there is minimum condensation in the van in the colder months.

The strip out, sound deadening and insulating took approximately two days of on and off work. Next step is to template and cut out the birch ply side and ceiling panels. ImageImageImageImage

Sent from my SM-S906B using Tapatalk

Urq180
Caddy2k Groupie
Posts: 7
Joined: Thu Jan 18, 2024 1:35 am
Engine size/power: 2.0 TDI (140bhp)

Re: 2016 Ex BG Caddy Camper

Post by Urq180 »

Hi mate

I have also just bought a 66 ex bg van and will be tackling the conversion soon.
The guy i bought from removed the roof vent and sealed it with a plate!i would like to refit the fan with same cut out/fixing holes but cant seem to find out where to source one.
Do you have a make/model for this so i can search online?
Thanks
Will47
Caddy2k Groupie
Posts: 13
Joined: Thu Sep 28, 2023 6:26 am
Engine size/power: 2.0 TDI (140bhp)

Re: 2016 Ex BG Caddy Camper

Post by Will47 »

Hi,

Hope you enjoy the van and good luck with the conversion. One thing i found out straightaway is the BG dont do cambelts so had to get it done as it was well overdue! Hopefully yours has been done.

The standard roof vent doesnt have a fan in it it just works with ram air whilst moving along with the vent in the side door. I am planning to retrofit a 12v fan into the stock one.

If you want a fan there are better roof vents out there with fans built in, either way I will try and see if there are any manufacturer markings on the vent and let you know. I will also measure the cut out when i can. Im away at the moment and will be back next week so will take a look then.

Cheers

Sent from my SM-S906B using Tapatalk

Urq180
Caddy2k Groupie
Posts: 7
Joined: Thu Jan 18, 2024 1:35 am
Engine size/power: 2.0 TDI (140bhp)

Re: 2016 Ex BG Caddy Camper

Post by Urq180 »

Hi

Thanks for reply.
Cambelt has been done but will be getting it changed in spring when getting serviced.
I have seen some good fans/vent online 12v/solar etc but the hole cut out is 150mm with 4 fixing holes.
Trying to find one with that size of cut out seems to be harder than i thought.
Let me know if you source a fan/vent that fits and will follow your build for extra tios as ive never done a conversion before.
Thanks again
Will47
Caddy2k Groupie
Posts: 13
Joined: Thu Sep 28, 2023 6:26 am
Engine size/power: 2.0 TDI (140bhp)

Re: 2016 Ex BG Caddy Camper

Post by Will47 »

After fully insulating the van I started templating the sides ready to cut out panels from 6mm birch ply, I am not a fan of the look of 4 way stretch carpet so tried to keep its use to a minimum.

I used large cardboard boxes to make templates for the side panels and then taped the boxes onto the ply ready to cut with a jigsaw, double checking the template and some measurements as I went in order to get as good a fit as possible, I am pretty happy with the end product, it has some minor imperfections but they are hardly noticeable.

Before fitting the side panels i used some 4 way stretch carpet to cover the pillars around the back door. Once this was done I worked out where the fixings would go and used drywall props to force the side panels into place to follow the curvature of the van, I then drilled through the panels and metal work and screwed them into place.

Image

Image

The ceiling panel was also cut from 6mm birch ply, I used the ex bg ceiling panel as a template but went slightly larger as I wanted it to go all the way to the edges. I cut the panel in two pieces and used a cover strip in the middle, much the same as the existing panels. I wanted to create a topo pattern in the ceiling, just for something nice to look at rather than plain ply. To do this my wife, who is much more artistic than me, drew a topo pattern onto the panels, i then followed the pattern with a 6mm router bit at a 2mm depth and am very pleased with the result. I placed 3 led dimmable spotlights in random locations to fit in with the pattern and also a led reading light. Once done i used the drywall props to position the panels and used the same method to screw into place. I ran all the wiring from lights down the left hand B pillar into the footwell where the electrics will be.

Image

Image

The drivers side sliding door was also covered with a birch ply panel following the same process, I fitted a hit and miss vent into this where the door vent is to allow for adjustable airflow. The passenger sliding door will be fitted with a ply panel upholstered with green tweed, just for something a little different.

For the barn doors, I covered them with 4 way stretch carpet and then cut more birch ply panels to fit in place of the existing panels, these were all cut oversize to cover as much of the carpet as possible and also allow for insulation behind the top panels.

All the panels were then treated with osmo polyx matt wax for durability.

The floor was covered with the 5mm thermal sd insulation and I cut panels from 5mm ply to go over this and provide a solid base for the laminate flooring, then it was just a case of laying down the laminate. Before installing the floor i ran some wires underneath to the left hand wheel arch where I plane to have some storage along with usb charging ports etc.

Image

Image


I did all of this over about a week and didnt stop to take many pictures of the process, attached are the pictures i have.

Sent from my SM-S906B using Tapatalk


stu_b
Hyper Poster
Posts: 796
Joined: Sat Mar 18, 2023 5:28 am
Engine size/power: 1.6 CR TDI (75bhp)

Re: 2016 Ex BG Caddy Camper

Post by stu_b »

this is coming along really nicely
your doing a smart job
looks like you got a full time supervisor
User avatar
Sean1066
Hyper Poster
Posts: 2341
Joined: Wed Oct 24, 2018 11:01 pm
Engine size/power: 1.6 CR TDI (102bhp)
Location: Newton abbot Devon

Re: 2016 Ex BG Caddy Camper

Post by Sean1066 »

It’s looking good so far buddy
Caddy maxi 3.2 VR6 EX BG

My build thread
https://www.caddy2k.com/forum/viewtopic ... 13&t=36851
Will47
Caddy2k Groupie
Posts: 13
Joined: Thu Sep 28, 2023 6:26 am
Engine size/power: 2.0 TDI (140bhp)

Re: 2016 Ex BG Caddy Camper

Post by Will47 »

Thanks Guys. Haha yes Harley is a great supervisor and doesn't get in the way at all!

Urq, in regards to the roof vent, I have had a good look and cant see any markings on it. My suggestion would be to get an aftermarket roof fan, something like the maxxfan dome, and enlarge the hole. I know cutting the roof is intimidating but with a jigsaw, a decent blade and lots of measuring it is straightforward enough, the main thing is making sure its well sealed!

Sent from my SM-S906B using Tapatalk

Will47
Caddy2k Groupie
Posts: 13
Joined: Thu Sep 28, 2023 6:26 am
Engine size/power: 2.0 TDI (140bhp)

Re: 2016 Ex BG Caddy Camper

Post by Will47 »

Before getting the furniture built I needed to install the electrics and diesel heater.

I used a 100ah eco worthy leisure batter with a victron 18amp dc to dc smart charger, I couldnt use a split charge relay as the van has a smart alternator, these are much better anyway as it will fully recharge the battery in around 5hours of driving which i do every week so the battery stays topped up. I may add a solar panel in the future but we shall see.

I also added a 12v fuse box to which I have attached some usb chargers, all the lighting, and the diesel heater. This was all done very quickly as I needed to use the van for a few nights so i got this done and threw a mattress on the floor and it was good to go! Of course this was a couple of months ago and I still havent tidied up the wiring. All of the electrics are in the passenger side rear footwell under the floor, a great use of the space but i am concerned about them being down low in case they get wet, I will make a lid to cover them at some point.

I have yet to add the mains hook up but using it off grid for 4 days at a time has been fine so far.
Image

I used a 5kw chinese diesel heater which fitted snugly in the drivers side rear footwell, 5kw is too much for a caddy but they are the cheapeast ones so I have just turned it down to 2kw in the settings. I dropped the main fuel tank, removed the fuel sender and fitted the heater fuel feed into that, with the pump attached to the passenger side sill and the exhaust running to the back of the van. I ended up fitting a 1.5m exhaust as otherwise it was exiting right next to the passenger side door vent on the van which wasnt ideal.

The only issue with having the diesel heater in the footwell is that it is very low down and the exhaust is close to the ground and has to run uphill slightly to attach to the bottom of the van, I know this isnt recommended but I have been running it like this for a while with no issues, I did make a small hole in the first bend for any condensate. The combustion air intake runs across the plastic cross member under the van.

At the moment I just have large 60mm duct that came with the diesel heater just pointing straight up out of the footwell, this works but doesnt spread the heat around evenly, I now have a 4 way splitter and 4 x 42mm ducts, i will install these soon and have them running to different places throughout the van to spread the heat more evenly.

The main issue with these cheap diesel heaters is the controller, they do not have a true thermostat that turns on/off to maintain temperature. Instead they reach the desired temperature and then turn to their loweat setting but keep pumping out heat, in a caddy this isnt ideal and it turns into a sauna pretty quickly. The easiest workaround for this is to have the windows open slightly but this seems like a waste of fuel to me and it still ends up getting too hot. I have looked at ordering an afterburner controller for it, only about 75 quid which isnt too bad but then you are putting a lot of start/stop cycles on the heater and drawing much more power from the battery as they use quite a bit of power for the first 2 minutes or so after start up. This wont be an issue when im on a mains hook up but wouldnt be ideal when using off grid.

Image

Image

Image


Sent from my SM-S906B using Tapatalk

Urq180
Caddy2k Groupie
Posts: 7
Joined: Thu Jan 18, 2024 1:35 am
Engine size/power: 2.0 TDI (140bhp)

Re: 2016 Ex BG Caddy Camper

Post by Urq180 »

Will47 wrote: Thu Jan 25, 2024 8:16 am Thanks Guys. Haha yes Harley is a great supervisor and doesn't get in the way at all! Image

Urq, in regards to the roof vent, I have had a good look and cant see any markings on it. My suggestion would be to get an aftermarket roof fan, something like the maxxfan dome, and enlarge the hole. I know cutting the roof is intimidating but with a jigsaw, a decent blade and lots of measuring it is straightforward enough, the main thing is making sure its well sealed!

Sent from my SM-S906B using Tapatalk
Hi will thanks for advice will have a look online and see what i can find.
Build looking great btw
Will47
Caddy2k Groupie
Posts: 13
Joined: Thu Sep 28, 2023 6:26 am
Engine size/power: 2.0 TDI (140bhp)

Re: 2016 Ex BG Caddy Camper

Post by Will47 »

Next up is the furniture.

I am going to have an L shape running across behind the seats and down the drivers side of the van. The part behind the seats will have a large 1.4m drawer that slides out the nearside sliding door and will serve as the kitchen, then the part down the drivers side will be the slide out bed, part of the kitchen will also be the bed to give a 2.1m long bed! The top of the bed will be cut from a single piece of ply so it can slide out across the van to around 1.1m wide.

The main thing for me is getting the height correct so that I can sit up inside the van without having my neck bent, not easy as im around 6ft tall but i figured out the right height to make it work.

I drew the designs in autocad initially to get all the dimensions correct and then went to b and q, found some half decent sheets of 12mm and 18mm soft ply and got them to cut the majority of it to size. The 12mm ply is for the kitchen section and 18mm for the bed.

The initial rough layout
Image

I built the drawer section first, I made the outer box and joined it together with pocket holes and wood glue and then did the same for the drawer, for the drawer i used some heavy duty locking runners that i got on ebay, they can supposedly hold 150kg but i dont plan on testing it! The centre part of the drawer will house a 2 burner stove with some storage underneath it and then eitherside of that will be a box for storage. I fixed the drawer into its cabinet and then made a 3 part hinged top so that the stove and storage can also be accessed from inside. I used a router to create ventilation holes in all of it mainly because it looks good and saves a bit of weight.

Here is the finished and installed drawer, you can also see the green tweed upholstered nearside sliding door. I will take some better pictures but you get the idea!

Image

Image

Image

Now time for the bed. This will be made up of two sides and the sliding top. The end at the rear doors will have a folding down door for access to storage underneath and there will also be two doors under the front of the bed for access. I made the sides first and used 105 degree inset kitchen cabinet hinges to hinge the 3 doors and found some smart black latches online to hold them closed. I did two large cut outs in the back panel to save weight and also provide access and cooling for where i plan to put the inverter.

The top of the bed was the hardest part of the whole build so far. I sketched it out onto a single sheet of wood and then cut the long straight lines using a track saw and did the ends with a jigsaw, the cuts have to be really straight or it wont slide, and at first it woukdnt slide, i had to make the gaps slightly larger and sand down all the edges smooth then wax with candle wax and it started to slide really nicely.

Here is the finished furniture set up, i do plan on adding a storage cabinet of some sort over the left hand wheel arch.

ImageImageImage

Apologies for the lack of photos during the build! I always forget to stop and take photos. In all the furniture took maybe two weeks of working on and off. Next up is to cut some foam cushions and upholster them.

Sent from my SM-S906B using Tapatalk

Urq180
Caddy2k Groupie
Posts: 7
Joined: Thu Jan 18, 2024 1:35 am
Engine size/power: 2.0 TDI (140bhp)

Re: 2016 Ex BG Caddy Camper

Post by Urq180 »

Urq180 wrote: Tue Jan 30, 2024 8:10 am Hi will thanks for advice will have a look online and see what i can find.
Build looking great btw
Hi will
Just a wee thanks for the advice on the maxxdome.
Fitted nicely after some light grinding.
Havent hooked up to power yet but seems like its well built
Was struggling to fund anything myself online.
Cheers
Post Reply